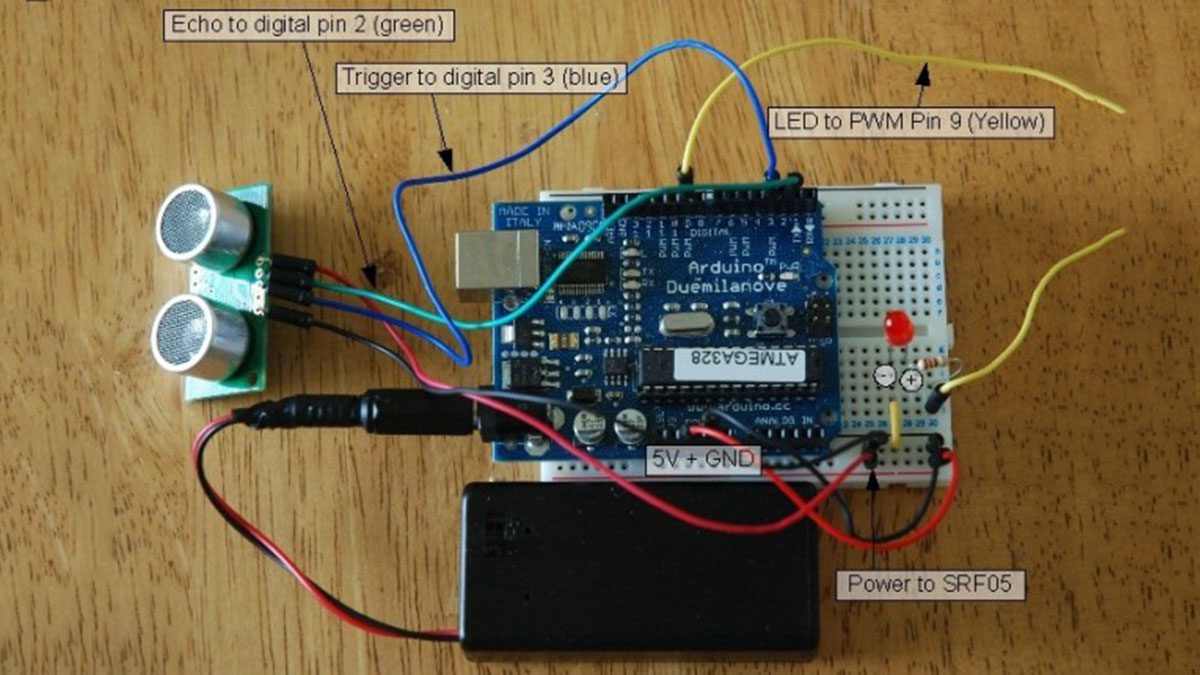
Arduino – Sonic range finder with SRF05
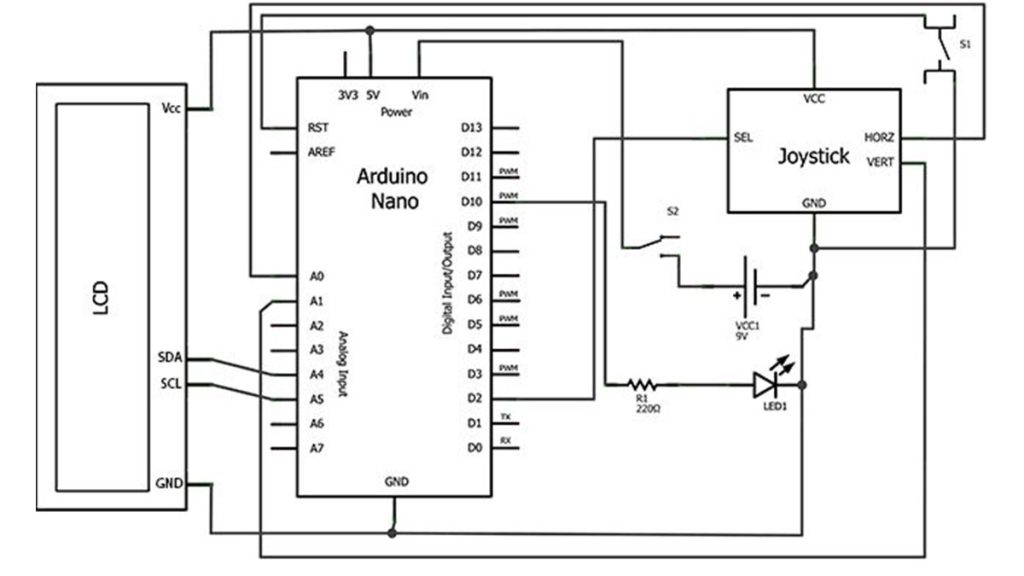
A guide to using the SRF05 Distance Sensor with Arduino in order to calculate distances from objects. In this case I’m also altering the output of an LED with PWM according to how close an object is to the sensor. So the nearer you are the brighter the LED. So if we start with the […]