Summary of Hardware and Arduino Code for DIY WMRP-Solder Station
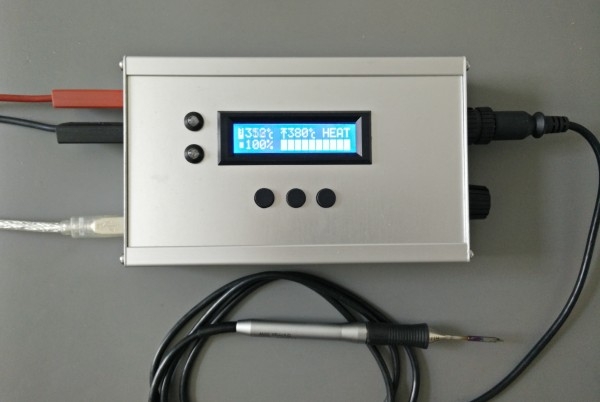
This article details a DIY WMRP soldering station featuring precise temperature control via a low-offset op amp and Type C thermocouple. Key functionalities include cold junction compensation, battery input monitoring, current measurement, and stand detection. The design incorporates user-friendly controls like three buttons for temperature presets, a rotary encoder for adjustments, and an illuminated LCD. It supports USB debugging, uses a compact aluminum enclosure, and includes safety sockets for power and ESD protection.
Parts used in the DIY WMRP-Solder Station:
- Low offset op amp
- Type C thermocouple
- KTY82-210 PTC sensor
- WMRP soldering pencil
- 3 cell lipo battery
- Soldering pencil current measurement circuit
- Three buttons for save and recall
- Rotary encoder
- Illuminated 16x2 character LCD module
- USB interface
- 4mm safety sockets (red, black, green/yellow)
- Blue I2C 1602 display from ebay
- Modified Amphenol T 3437 000 connector
- Rotary encoder knob
- Display frame EA027-2UKE
- Proma 131020 aluminium enclosure
Features:
- low offset op amp for soldering tip temperature measurement with type c thermocouple
- cold junction compensation using the PTC (KTY82-210) included in the WMRP soldering pencil
- input voltage measurement (for use with 3 cell lipo battery)
- soldering pencil current measurement
- recognizing if the soldering pencil rests in the stand (–> standby)
- 3 buttons for save and recall temperature values
- rotary encoder to set soldering temperature
- illuminated 16×2 character LCD module
- USB for debugging and firmware update
- clean and small enclosure
- 4mm safety socket for +12V power input and a protective earth socket for connection to ESD protection
The BOM in the layout folder includes only the parts on the PCB(s).
Parts (not on PCB):
- lcd display from ebay “Blue I2C 1602”
- modified connector “Amphenol T 3437 000” (http://www.mikrocontroller.net/topic/143288#1500819)
- 4mm safety sockets (red, black, green/yellow)
- rotary encoder knob
- display frame “EA027-2UKE”
- aluminium enclosure “Proma 131020”
For more detail: Hardware and Arduino Code for DIY WMRP-Solder Station
- How is cold junction compensation achieved?
It uses the KTY82-210 PTC sensor included in the WMRP soldering pencil. - Can this project run on a 3 cell lipo battery?
Yes, it includes input voltage measurement specifically for use with a 3 cell lipo battery. - What components are required for temperature setting?
A rotary encoder is used to set the soldering temperature along with three buttons to save and recall values. - Does the system detect if the pencil is resting?
Yes, it recognizes when the soldering pencil rests in the stand to enter standby mode. - What type of display is used?
An illuminated 16x2 character LCD module, specifically a Blue I2C 1602 from ebay, is used. - How is firmware updated or debugging performed?
The project utilizes a USB connection for both debugging and firmware updates. - What enclosure material is recommended?
An aluminium enclosure identified as Proma 131020 is specified for the clean and small design. - Are safety sockets included for power input?
Yes, 4mm safety sockets are provided for +12V power input and a protective earth socket for ESD protection.