This is how to push high resolution real-time data from Arduino-based temperature sensor to your web page without any server-side coding.
Arduino is a great device for collecting, storing and transferring data from various sensors but there are times you need to make your data accessible from any place over the internet, like I did for room temperature in my study.
That’s when this solution may come handy.
The solution utilises a cloud-based real time web publishing tool Partcl.com that allows you to publish any data with about 0.1 second latency.
First you will need:
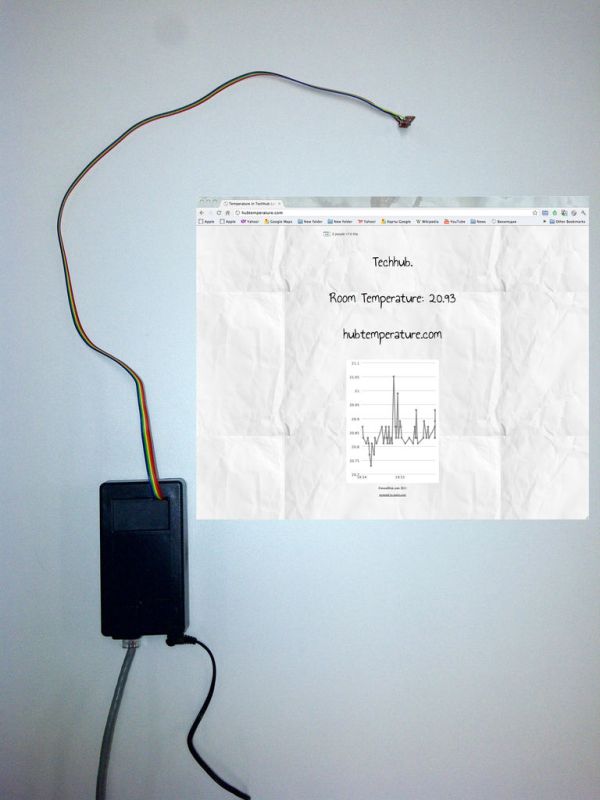
– Temperature sensor TMP102 on sparkfun breakout board
– Arduino Ethernet (which is in fact is Arduino + Ethernet Shield)
– wires
– ethernet cable
-power adaptor for Arduino
– Free account on Partcl.com (when registered you will get your publishing and web keys which you will put into Arduino code and in http code on your website)
Step 1: Connect the sensor as shown on the picture.
Connect the sensor as shown on the picture.
Image is taken from incredibly good blog http://bildr.org
I often use it as a reference
Step 2: Register on Partcl.com
Register on Partcl.com.
After registration you will get a publishing key and a web key. You will need them for the next steps.
Step 3: Upload the Arduino code
Upload the Arduino code
Substitute Bold fields with the following information:
-Mac address of your board
-IP of the board in your network. If you have DHCP and can not specify a fixed IP address, you will need another library and slightly different code. I will be more then happy to provide any additional instructions if needed.

#include <SPI.h>
#include <Ethernet.h>
#include <Wire.h>
// Enter a MAC address and IP address for your controller below.
// The IP address will be dependent on your local network:
byte mac[] = {0x??, 0x??, 0x??, 0x??, 0x??, 0x??}; //Mac Address of Arduino Ethernet Shield or Ethernet Board
byte ip[] = {???,???,???, ???}; // IP address of the Arduino
byte server[] = {67, 202, 35, 165}; // Partcl.com
int tmp102Address = 0x48;
// Initialize the Ethernet client library
// with the IP address and port of the server
// that you want to connect to (port 80 is default for HTTP):
Client client(server, 80);
void setup() {
// start the Ethernet connection:
Ethernet.begin(mac, ip);
// start the serial library:
Serial.begin(9600);
SPI.begin();
Wire.begin();
// give the Ethernet shield a second to initialize:
delay(1000);
}
For more detail: Real-time room temperature on your Website using Arduino