The project consists of a kit for drones that includes an electronic device that functions as a meteorological station.
Things used in this project
Hardware components |
||||||
 |
|
× | 1 | |||
 |
|
× | 1 | |||
 |
|
× | 1 | |||
 |
|
× | 3 | |||
 |
|
× | 1 | |||
|
× | 3 | ||||
 |
|
× | 1 | |||
 |
|
× | 1 | |||
|
× | 1 | ||||
|
× | 1 | ||||
|
× | 1 | ||||
 |
|
× | 1 | |||
|
× | 1 | ||||
Software apps and online services |
||||||
 |
|
|||||
Hand tools and fabrication machines |
||||||
 |
|
|||||
Story
The project consists of a kit for drones that includes an electronic device that functions as a meteorological station used for monitoring the values of environmental temperature, of atmospheric pressure and of humidity. The whole device’ll work thanks to Arduino/Genuino MKR1000.
The electronic device will have inside a GPS locator so as to know the exact position of the analog readings of the different sensors.
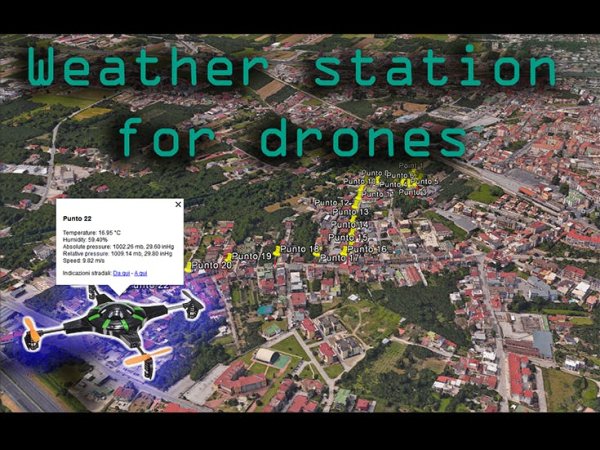
The values acquired will be preserved in a KML files on a microSD and you can view them with Google Earth or Google Maps by simply importing the KML file.
They can be monitored in real time via Wi-Fi hotspot using a Smatphone, Tablet or PC.
In addition to the meteorological data, the device can acquire altitude, geographical coordinates and the speed of the drone in m/s.
The device consumes little power and can be powered by a 3.7V LiPo thanks to the potential of mkr1000 board.
In summary, the device will have the following characteristics:
You will be able to acquire:
- Temperature
- Atmospheric pressure
- Humidity
- Speed
- Altitude drone
- Geographic coordinates
SHOPPING LIST
Before proceeding with the assembly of the project, make sure you have the following components:
- 1x Arduino MKR1000 (or Arduino Zero + Arduino WiFi Shield 101)
- 1x MicroSD breakout board
- 1x DHT22 or DHT21 or DHT11
- 1x BMP180
- 1x GPS UBLOX NEO-7M or NEO-6M
- 3x LEDs (red, yellow and green)
- 2x Resistor 4.7k
- 1x Resistor 10k
- 1x Button
- 1x Switch
- Wire
SCHEMATIC
Here the schematic to follow to assemble the entire project:

After you have made all the connections, I recommend downloading the entire software part of my repository on GitHub and copy the libraries in Documents/Arduino/libraries/…
On GitHub you will find the sketch (WeatherStation_v1.0.ino) to upload on Arduino/Genuine MKR1000.
The MKR1000 board can be powered via USB or through a Lipo battery 3.7V and 700mAh minimum.
After having powered the whole project must wait the GPS signal.
Once the GPS will have captured the satellite you will notice the ignition of Green LED.
After that, if all went well, you must press the button to create the KML files and start writing data to SD. During this phase the Yellow LED will remain lit until the button will come pressed again in order to stop the writing on SD. The Red LED indicates an error of communication of sensors and microSD with Arduino. In the event that you were to turn on the Red LED, I suggest you check the connections.
In any case, to identify the problem more quickly you can connect the MKR1000 board to the PC via USB, and open the Serial Monitor present to Arduino IDE.
The Serial Monitor is also useful for debugging purposes.
SWITCH
Switch serves to select whether to show Data from the sensors and GPS on a HTML page via a Smatphone, Tablet or PC with WiFi, or decide to write data to SD.
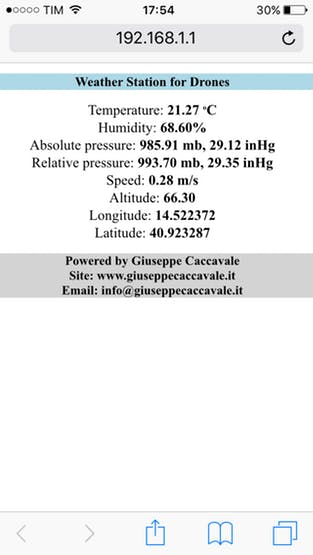
By setting the switch to HIGH you can see the sensor data and GPS via web page by following these steps:
1. Connect to the Wi-Fi hotspot “WeatherStation” through a device.
2. Open any browsers
3. Type, in the address bar, the following IP: 192.168.1.1
4. Enjoy 🙂
Result:
KML file present on the SD, can be opened directly from Google Earth or imported on Google Maps by following this guide.
This is an example with google Earth:

Initially, the project was also designed to support the app “Windows Virtual Shield for Arduino” but due to a problem with the app itself I decided not to implement this function at the moment.
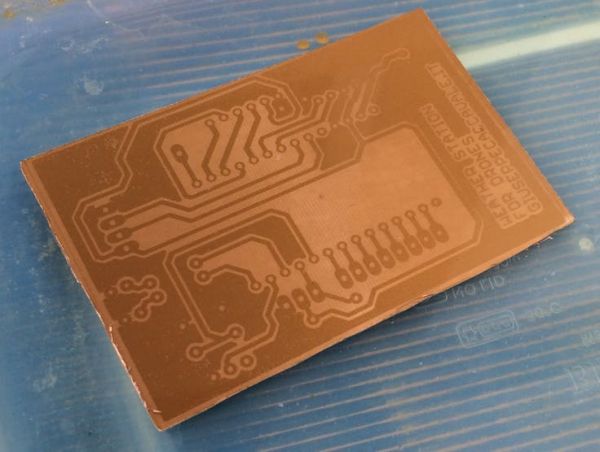
PS: I have also realize a PCB, you can find the whole project in the “eagle” folder on GitHub.
For any problems with the project, not hesitate to contact or leave a comment.
Bye bye 🙂 …
Code
Source : Weather Station for Drones