Introduction
While building microcontroller based projects, there are occasions where communication will be required between two devices, either in a duplex/transceiver based operation (where both devices can transmit and receive at the same time) or in a simplex-based operation where communication is one way (Receiving device cannot transmit and the transmitting device cannot receive).
Several options exist for implementing any of the two communication modes mentioned above and the selection of a particular option, usually depends on the specification of the project, especially the distance between the devices and cost. For short range, low-budget communication between two microcontrollers, one of the most preferred medium used is Radio Frequency (RF) communication using the 433MHz RF transmitter and receiver modules. For today’s tutorial, we will look at how to use these modules to establish communication between two Arduino boards.
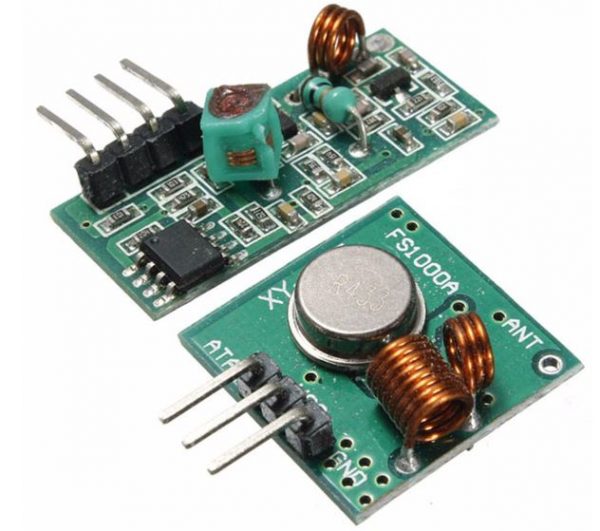
The 433 MHz Transmitter and Receiver Modules
These modules are very popular among makers and DIY enthusiasts due to their low cost and ease of use. They are used in all forms of short-range, simplex-based communication between two microcontrollers with one of the microcontroller serving as the transmitter while the other serves as the receiver. These modules are ASK (Amplitude Shift Keying) or OOK (Of Hook Keying) type RF modules, that means they usually draw no power when transmitting a Logic “zero” and as such consumes a significantly low amount of power. This low power consumption makes them very useful in battery-based implementations.
Some of the specifications of the transmitter and receiver modules are listed below.
Transmitter Specifications
- Working voltage: 3V – 12V
- Working current: max Less than 40mA max, and min 9mA
- Resonance mode: (SAW)
- Modulation mode: ASK
- Working frequency: 433.92MHz
- Transmission power: 25mW
- Frequency error: +150kHz (max)
- Velocity: less than 10Kbps
- Transmission range: 90m (in open space)
Receiver Specifications
- Working voltage: 5.0VDC +0.5V
- Working current:≤5.5mA max
- Modulation mode: OOK/ASK
- Working frequency: 433.92MHz
- Bandwidth: 2MHz
- Sensitivity: exceeds –100dBm (50Ω)
To demonstrate the ease with which wireless capabilities can be added to projects using these modules, we will build a weather station with remote data display. The weather station will comprise primarily of a temperature and humidity sensor and the 433 RF transmitter module. It will measure the temperature and humidity of the environment and send it via the RF transmitter to the display unit (received via the RF receiver module) on a ST7735 1.8″ Color TFT LCD display.
Read more: Using the 433MHz RF Transmitter and Receiver with Arduino