Summary of Ultrasonic sensor HC-SR04 arduino project with code
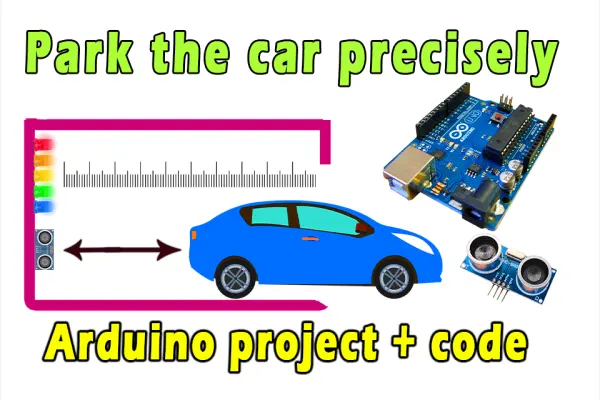
This project uses an Arduino and an HC-SR04 ultrasonic sensor to measure the distance between a car and a garage wall and indicate proximity with seven LEDs, helping prevent scrapes while parking. The Arduino reads distance from the sensor and lights LEDs progressively as the car gets closer.
Parts used in the Garage Parking Distance Indicator:
- HC-SR04 ultrasonic module
- Arduino UNO
- 7 LEDs
- 7 resistors (220 Ohm)
- Breadboard
- Electrical wires
Many times, when parking our cars in the garage, we accidentally scratch them against the walls or cause damage due to a lack of visibility regarding the remaining distance between the car and the wall. To address this issue, we can create a straightforward electronic project using Arduino and an ultrasonic sensor. This project aims to measure the distance between the car and the wall, providing assistance in parking the car precisely in the garage without causing any damage. The project involves utilizing the HC-SR04 ultrasonic sensor with Arduino and includes the necessary code for implementation.
Electronic components needed :
The components required for this project include:
– HC-SR04 ultrasonic module
– 7 LEDs
– 7 resistors (220 Ohm)
– Electrical wires
– Arduino UNO
– Breadboard
These components are necessary to build and implement the project successfully.
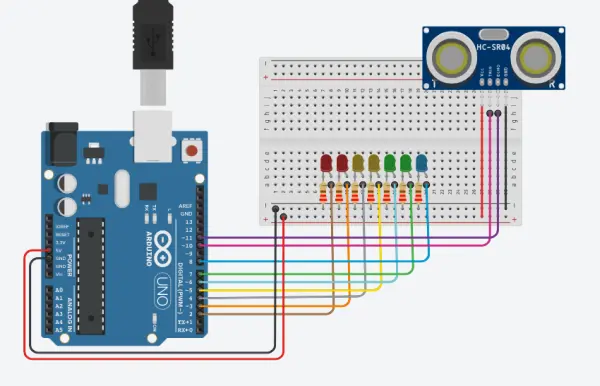
circuit diagram
Arduino programming code :
// ultrasonic sensor Pins
const int trig = 10;
const int echo = 11;

// led Pins variables
const int LED1 = 2;
const int LED2 = 3;
const int LED3 = 4;
const int LED4 = 5;
const int LED5 = 6;
const int LED6 = 7;
const int LED7 = 8;

int duration = 0;
int distance = 0;

// By www.andprof.com
void setup()
{
  // ultrasonic sensor
  pinMode(trig , OUTPUT);
  pinMode(echo , INPUT);
 // led
  pinMode(LED1 , OUTPUT);
  pinMode(LED2 , OUTPUT);
  pinMode(LED3 , OUTPUT);
  pinMode(LED4 , OUTPUT);
  pinMode(LED5 , OUTPUT);
  pinMode(LED6 , OUTPUT);
  pinMode(LED7 , OUTPUT);

  Serial.begin(9600);
}

void loop()
{
  digitalWrite(trig , HIGH);
  delayMicroseconds(1000);
  digitalWrite(trig , LOW);

  duration = pulseIn(echo , HIGH);
  distance = (duration/2) / 28.5 ;
  Serial.println(distance);

  if ( distance <= 5 )
  {
    digitalWrite(LED1, HIGH);
  }
  else
  {
    digitalWrite(LED1, LOW);
  }
  if ( distance <= 7 )
  {
    digitalWrite(LED2, HIGH);
  }
  else
  {
    digitalWrite(LED2, LOW);
  }
  if ( distance <= 10 )
  {
    digitalWrite(LED3, HIGH);
  }
  else
  {
    digitalWrite(LED3, LOW);
  }
  if ( distance <= 15 )
  {
    digitalWrite(LED4, HIGH);
  }
  else
  {
    digitalWrite(LED4, LOW);
  }
  if ( distance <= 17 )
  {
    digitalWrite(LED5, HIGH);
  }
  else
  {
    digitalWrite(LED5, LOW);
  }
  if ( distance <= 20 )
  {
    digitalWrite(LED6, HIGH);
  }
  else
  {
    digitalWrite(LED6, LOW);
  }
  if ( distance <= 25 )
  {
    digitalWrite(LED7, HIGH);
  }
  else
  {
    digitalWrite(LED7, LOW);
  }
}
Explainer video :
- What does this project do?
It measures the distance between a car and the wall using an HC-SR04 and Arduino and indicates proximity with seven LEDs. - Which ultrasonic sensor is used?
The HC-SR04 ultrasonic module is used. - How many LEDs are used and why?
Seven LEDs are used to indicate different distance thresholds as the car approaches the wall. - What Arduino pins are used for the ultrasonic sensor?
Trig is connected to pin 10 and Echo to pin 11 in the provided code. - Which Arduino pins are used for the LEDs?
The LEDs are assigned to pins 2 through 8 in the provided code. - What resistors are recommended for the LEDs?
220 Ohm resistors are specified for each LED. - How is distance calculated in the code?
The code measures pulse duration from the echo pin and computes distance as (duration/2) / 28.5. - At what distances do LEDs light up?
The code lights LEDs at distances less than or equal to 25, 20, 17, 15, 10, 7, and 5 (units implied as centimeters) for LEDs 7 down to 1 respectively. - Is serial output available for distance readings?
Yes, the code prints the measured distance via Serial at 9600 baud. - Is a breadboard required?
The parts list includes a breadboard for assembling the circuit.