
Summary of Simple Parking Sensor using Arduino
The author built a battery-powered garage parking sensor using an Arduino Fio board to solve the lack of proximity awareness near walls. The device uses an ultrasonic sensor and four LEDs to indicate distance, entering sleep mode after 5 seconds of inactivity to extend battery life up to two months. It is designed for low cost, easy assembly, and operates without nearby power sources.
Parts used in the Garage Parking Sensor:
- Arduino Fio based board
- 2,000 mAH LiPo battery
- 4x Bright LEDs (2 Green, 1 Yellow, 1 Red)
- 4x Resistors of 270 Ohm
- Small bread-board
- LV-MaxSonar EZ1 MB1010 distance sensor
- Cables
- 3.3V FTDI board
My car has only parking sensor for the Reverse, so when I enter the Garage there is no way to know if I am close enough to the wall to allow the door to close or too close that I can hit the wall with the car. So, decided to build a parking sensor that will be fixed on the garage wall. One of the limitations that I got is that there is no power nearby, so the parking sensor had to be battery powered.
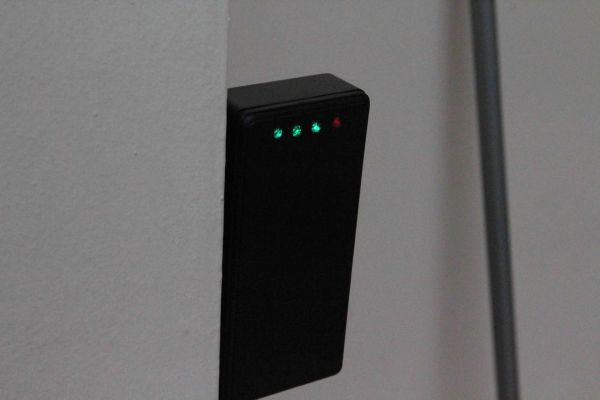
Started it as first project with Netduino, that was chewing power. Found out that the Netduino board does not support power saver mode of the ARM processor, moved to Fio based Arduino board, and optimized power consumption over time. Now, the device can remain about two months without recharging battery. Still, in the future I will move to a different, more power conservative processor (probably the MSP430 from TI or by its name LaunchPad).
Features:
- Battery powered
- Requires charging only once in 60 days or more
- Low cost
- Easy to assemble
- 4 LEDs indicating distance
- Support single or multiple LEDs lights together
Step 1: Components required
The following are the components you will need:
1. Arduino, better take the Fio based board or another one that does not have on-board FTDI
2. A 2,000 mAH LiPo battery that fits the Fio (the connector matches the Fio battery connector)
3. 4x Bright LEDs, 2xGreen, 1xYellow, 1xRed
4. 4x Resistors of 270 Ohm
5. small bread-board to solder the resistors and LEDs
6. LV-MaxSonar EZ1 MB1010 distance sensor
7, Some cables to connect LED board and the sensor
If you are using the Fio (recommended), you would also need a 3.3V FTDI board to program it.
If you do have power nearby the device, then you can buy any Arduino board instead of the battery and see some notes in next steps for power considerations.
Where to buy?
All goods can be purchased at your favorite electronics shop. None of those are very special components. One of the places is obviously Sparkfun (http://www,sparkfun.com)
Step 2: How it works
When you are far from hitting the wall, the first green LED will turn on, then when getting closer, the 2nd one, then the yellow LED and finally the red LED will light up. You should stop when the red LED is on.
When no change in distance for some time (5 seconds), the device will turn off all LEDs and go to sleep. This fits the scenario of car parking in the garage or no car at the garage (where did you go :-)?).
The program is fairly simple, read analog input from the sensor, test the value against some thresholds and based on the result, set the number of LEDs to light up. Testing amount of time with no change in status and if that is for 5 seconds, the processor is put to sleep to preserve power. The processor wakes up every second to see if anything changed. If not, back to sleep. When in sleep, the entire device will consume 0.4mA and when working (without LEDs) it consumes several mA. When only one LED is lightening at a time, consumption is about 15mA. I tried 2 seconds of sleep as well, but it gave an awkward feeling when driving in as sometimes it took 2 seconds really before you saw some light… obviously not a good thing for people on the rush.

If you operate the device in the mode of single LED lightening at a time, expect about 2 months between recharging. If all LEDs that fit the distance will light up simultaneously, expect about a month between recharging.
To shorten the time the processor is up, I used 115,200 baud rate for the serial (only used for debugging). This reduced the awake time substantially. Removing serial output can further reduce awake time, but not dramatically I think.
2. A 2,000 mAH LiPo battery that fits the Fio
3. 4x Bright LEDs, 2xGreen, 1xYellow, 1xRed
For more detail: Simple Parking Sensor using Arduino
- Why did the author switch from Netduino to Arduino?
The Netduino consumed too much power because it did not support the ARM processor's power saver mode. - How long does the battery last with one LED lit?
The battery lasts about two months between recharges when only one LED lights up at a time. - What happens if the distance does not change for five seconds?
The device turns off all LEDs and enters sleep mode to preserve power. - Can this project use a standard Arduino board?
Yes, but only if there is power nearby, as standard boards do not have the same battery optimization features. - What is the power consumption while the device is sleeping?
The entire device consumes 0.4mA when in sleep mode. - How many LEDs are used to indicate different distances?
Four LEDs are used: two green, one yellow, and one red. - What baud rate was used to reduce awake time?
The author used a 115,200 baud rate for serial communication to shorten the time the processor stays active. - Which processor does the author plan to move to in the future?
The author plans to potentially use the MSP430 from TI or its LaunchPad for better power conservation.
