
Summary of Planterbot – The Plant Monitoring Robot
The Planterbot is a plant-monitoring robot that uses capacitive moisture sensing (no probe wires into the plant), plus a 10k thermistor for temperature and a CdS photocell for light detection. It displays temperature and light graphs on a front-facing 16x2 LCD and is powered from a 9V battery pack. Laser-cut enclosure files are provided; glue, headers, and basic wiring complete the build.
Parts used in the Planterbot:
- Arduino Uno or Leonardo with USB cable
- Thermistor 10k ohm
- CdS photocell (light sensor)
- Wire
- Electrical tape
- Battery pack for Arduino with DC plug 9V
- Small amount of aluminum foil (for water sensor)
- Baltic birch or other laser-cuttable material
- Acrylic for water sensor
- Male headers
- 16x2 LCD preferably with backlight
Hello everyone !
Please vote for me in the tech contest!
In this instructable I am collaborating with Akin Yildiz an instructables author that creates instructables that help plants grow you should really go check out his account: http://www.instructables.com/member/Akin+Yildiz/
The planterbot is a plant monitoring robot. It uses capacitance for sensing moisture from the plant instead of using the usual soil probe, this means that wires don’t go into the plant. It also detects temperature and light using thermistors and Cds photocells and displays the temperature and light graphically on the front facing LCD.
This is kind of like the the final version of Akin’s : http://www.instructables.com/id/Computer-aided-pla…
Note: Currently you should power this from a 9 volt battery pack, if you don’t do this and power it off of an AC wall outlet the readings will be off.
Update: New youtube video of it! another one will be coming soon that shows off all of the features.
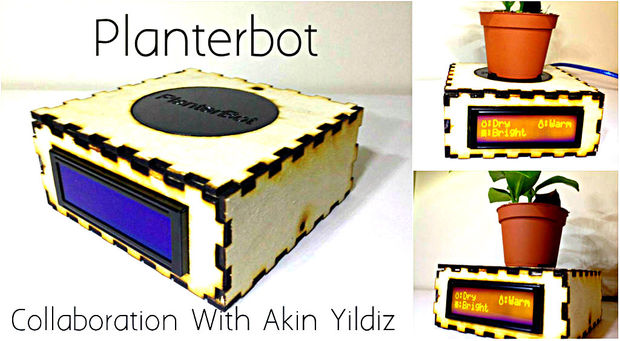
Here is how the idea of the collaboration started: http://www.instructables.com/id/Lighttemperature-S…
Step 1: Parts and Tools
These are the parts and tools that you will need to make this project:
Parts:
Arduino Uno or Leonardo with USB cable
Thermistor 10k ohm
Cds photocell (light sensor)
Wire
Electrical tape
Battery pack for arduino with DC plug 9v
Small amount of aluminum foil (for water sensor)
Baltic birch or anything that is laser cuttable
Acrylic for water sensor (you can use wood for the water sensor but it doesn’t look as good and the wood can warp if it gets wet.)
Male headers
16×2 LCD preferably with backlight
.
Tools:
Laser cutter
Computer with arduino IDE
Hot glue gun and hot glue
Step 2: Laser Cut Parts
Here are the files that you will need to cut for an enclosure for this instructable if you don’t have a laser cutter then you should see if your city or town has a local makerspace/ hackerspace that has one (or can use an online service).
File:http://www.thingiverse.com/thing:515346
For more detail: Planterbot – The Plant Monitoring Robot
- What sensors does the Planterbot use?
It uses a capacitive moisture sensor made with aluminum foil, a 10k ohm thermistor for temperature, and a CdS photocell for light. - Can I power the Planterbot from mains power?
No, the article specifies powering from a 9V battery pack; using an AC wall outlet will make the readings be off. - What microcontroller is required for the project?
An Arduino Uno or Leonardo is used. - How is moisture sensed without probes in the soil?
Moisture is detected using capacitance with aluminum foil rather than traditional soil probe wires. - What displays are used to show temperature and light?
A front-facing 16x2 LCD, preferably with backlight, displays temperature and light graphically. - What materials are recommended for the enclosure and water sensor?
Laser-cuttable Baltic birch (or similar) for the enclosure and acrylic for the water sensor are recommended. - Are laser cutter files provided?
Yes, the article provides Thingiverse files for laser cutting the enclosure. - What tools are needed to build the Planterbot?
A laser cutter, a computer with the Arduino IDE, and a hot glue gun with hot glue are listed.
