Summary of Motion Tracking Face
Chartreuse is an interactive motion-tracking face that follows viewers: eyes turn yellow and happy when someone approaches, then turn blue and sad as they walk away. Built from sliced 1/8" hardboard layers, it’s driven by an Arduino Uno, two servos, a stepper motor, and addressable LEDs, with laser-cut and glued assembly, diffusing acrylic eye pieces, and simple electronics mounted inside. The project uses modified 3D mask files, Fusion360/Slicer workflows, and finishing with wood glue and sanding.
Parts used in the Chartreuse:
- Arduino Uno
- Servo (x2)
- Stepper motor
- Addressable LEDs (a couple)
- Solid core wire
- ~20 square feet of 1/8 inch hardboard
- Wood glue
- 1.5 ft of 1.5 inch PVC
- 20 1/8 inch ball bearings
- Small piece of fiberglass mesh (8 inch x 2 inch)
- 2.25 inch diameter opaque acrylic discs for eyes
- Hot glue
- Soldering supplies
- Clamps
- 3D printed parts (from mask/fixtures)
Meet Chartreuse! Chartreuse’s face follows you when you walk by. When she sees you, her eyes turn yellow and she gets a happy expression in her eyes. As you walk away, her eyes change to blue and she sadly turns away.
Chartreuse is powered by an Arduino Uno, two servos, and a stepper motor and a couple of addressable LEDs and constructed from a few pieces of 1/8″ hardboard.
Supplies:
What you’ll need
Electronics:
- Arduino Uno
- Servo
- Stepper Motor
- Solid core wire
Materials:
- ~20 square feet of 1/8″ hardboard
- Wood Glue
- 1.5 ft 1.5 inch PVC
- 20 1/8″ Inch Ball Bearings
- Small piece of fiber glass mesh (8″x 2″)
Tools:
- 3D printer
- Laser cutter
- Clamps to hold things together while drying
- Soldering iron
- Hot glue gun
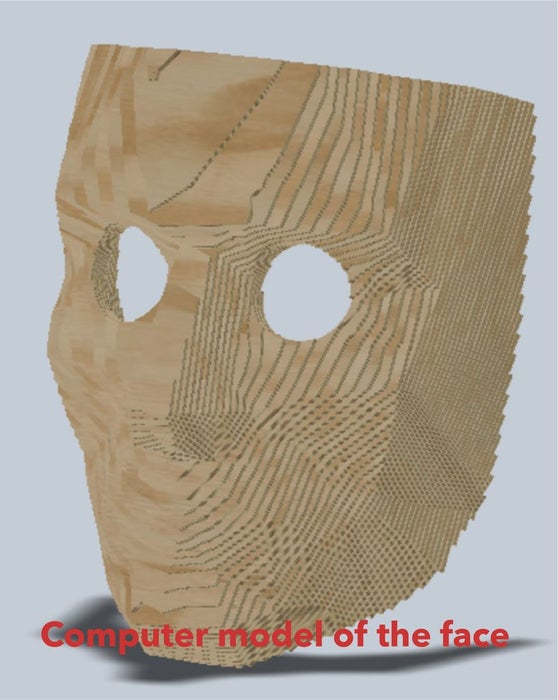
Step 1: Making the Model
We started the process with a mask modeled by kongorilla on Thingverse. This can be found here. This mask is intended to be cut from paper or another flat, flexible material. This meant that we had to do some modification but at least had a starting point.
Editing
In Meshmixer, we got rid of the mouth, eyes, and the back edges of the mask using the drag and draw brushes. Then, in Fusion360, we added eye holes by converting the mesh to a BRep. Then extruding circles through it. We then scaled the whole model to change it to our desired dimensions.
Slicer
In Slicer (an extension for Fusion360) we choose a slice angle starting at the nose and going back.
If you’d like, we’ve done all these steps for you and all the files are ready to go in the next step! However, if you have familiarity with Fusion360, Meshmixer, or another CAD software feel free to make your own face (or not?) for this project. The .stl file for the mask and the sliced .3dmk file are included.
Step 2: Building the Face
Laser cutting
First, you’ll need to laser cut the parts. The attached PDF has the plans for the 52 layers that make up the face. The red lines need to be raster (etched into the MDF) and the blue lines need to be vector (cut). We used a Epilog Legend 36 EXT (9000 Series) laser cutter for this project. This meant we cut our hardboard down to the bed size of 36″ by 24″. Cut your material down to whatever the bed size of the laser cutter you are using is. We found it cut best with the glossy side facing up.
You will also need to cut two 2.25″ diameter circles for the eyes. We used scrap 1/8″ opaque acrylic but anything that can diffuse the LEDs will work fine!
Glueing
Once cut, we split the pieces into 5 sections (layers 1-10, 11-20, 21-30, 31-40, 40-52). If you etched them, these number are marked on the top of the hardboard. There is also engraved guide lines to help you line up the piece with the layer below it. Starting with the lowest layer, add glue to the top of it and carefully place the next layer on top. Repeat until you have assembled the 5 sections. Then, place them on top of each other with glue between, clamp, and dry overnight. The included video shows a step-by-step animation of how the mask is assembled as well as our time lapse of assembly.
Finishing
Next, we coated the inside with a thin layer of wood glue using a craft brush. This will prevent the hardboard from bowing out and serve the dual purpose of smoothing the inside. After the glue has dried, we glued the eye pieces in using hot glue. From the inside, we added a small amount of glue around the eye holes and place them in. Be careful to not get any glue on parts of the eyes visible from the front, as this will be visible once you add the LEDs. Finally, sand off the etched numbers from the top layer. (Or, if you thought ahead, remove the etching numbers prior to cutting!)
Read more: Motion Tracking Face
- What microcontroller is used to power Chartreuse?
Chartreuse is powered by an Arduino Uno. - Which motors are used to create expression and movement?
The project uses two servos and a stepper motor. - What material is used to construct the layered face?
The face is made from ~20 square feet of 1/8 inch hardboard cut into 52 laser-cut layers. - How are the eye pieces made to diffuse LEDs?
2.25 inch diameter opaque acrylic discs are used to diffuse the addressable LEDs for the eyes. - Which software tools were used to edit and slice the mask model?
Meshmixer was used for mesh edits, Fusion360 for BRep edits and scaling, and the Slicer extension for slicing layers. - How are the laser-cut layers assembled?
Layers are grouped into five sections, glued together with alignment guides, then glued atop each other and clamped to dry overnight. - What finishes are applied to the inside of the mask?
A thin coat of wood glue is brushed on the inside to prevent bowing and smooth the surface. - Are the mask files provided or do you need to model from scratch?
The creator modified a Thingiverse mask and provided the .stl and sliced .3dmk files for use. - What laser cutter settings or tips are mentioned?
Red lines are raster etched, blue lines are vector cut; glossy side faced up; cut material to your laser bed size (example used Epilog Legend 36 EXT).