Summary of Iron Man’s Arc Reactor That Pulses With Your Heart Beat
This project creates a DIY Arc Reactor that visually pulses in sync with your heartbeat using LEDs and a pulse sensor. Made from cut Sunboard pieces and acrylic, the reactor houses an ESP8266 NodeMCU or Arduino Nano microcontroller connected to a pulse sensor. The sensor readings control the LED pulse to mimic the heartbeat rhythm. The construction involves painting, sanding acrylic for diffusion, soldering, and coding using the PulseSensor Playground library, providing a functional and visually appealing Iron Man-inspired gadget.
Parts used in the DIY Heartbeat-Pulsing Arc Reactor:
- Sunboard (PVC board)
- Acrylic sheet
- Black paint (poster or acrylic)
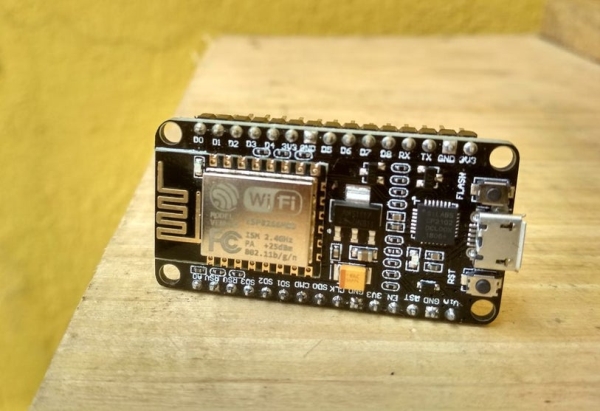
- NodeMCU (ESP8266 microcontroller) or Arduino Nano
- 3.7V Li-ion / Li-po rechargeable battery
- Li-ion battery charging module
- LEDs (LED strip recommended)
- Magnet wires
- Soldering iron and solder
- Sandpaper
- Board cutter or paper cutter

There are lot of DIY arc reactors out there that look pretty cool. Some look realistic too. But why build something that just looks like that thing and does not do anything. Well, this arc reactor is not going to protect your heart using electromagnets (of course not) but will surely look cool when it beats with your heart. I mean literally, the LEDs in it will pulse with your heart beat.
It might look (in the video) like the arc reactor is just blinking, but it’s actually responding to my heartbeat since the pulse sensor is attached to my finger.
Before I begin, please consider voting this project for the fandom contest. Thank you.
Supplies:
Sun
board (PVC board) https://www.amazon.com/Expanded-PVC-Sheet-Lightwei…
Acrylic
sheet
Black
paint (poster/acrylic)
Nodemcu
(esp8266 microcontroller) or an Arduino nano https://www.amazon.com/ESP8266-microcontroller-Nod…
3.7v
Li ion / Li-po secondary battery https://www.banggood.in/3_7V-650mAh-JST-Plug-Recha…
Li
ion battery charging module https://www.amazon.com/McIgIcM-Lithium-Charging-Pr…
LEDs
(LED strip is a better option)
Magnet
wires
Soldering
iron and solder
Sand
paper
Board
cutter (or any standard paper cutter)
Step 1: Design

The whole thing can be done in a jiffy if you have a 3D printer. But I didn’t have one, so sun board to the rescue!
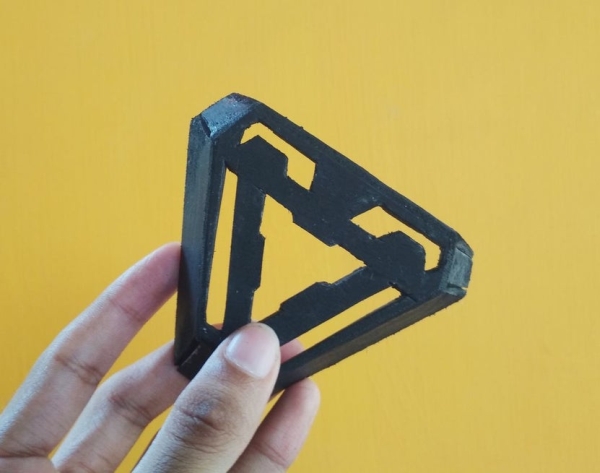
First, we need to design and cut out the arc reactor case from sun board.You can look at the images and cut it accordingly or get a print out of the arc reactor shape from the PDF and do the cutting. Cutting a sun board isn’t a hard task. All you need to do is run your cutter multiple times and the cut should be done. It’s not a hard task but is a time consuming one. So, make sure you stay patient till all the cuts are made. Don’t worry if the lines are visible after cutting the board, because we are going to paint it later.
Make the side walls according to your required height. To keep it simple, the total height can be the sum of height of the node mcu/Arduino nano + thickness of battery + a few millimetres extra for wires to run through. The back can be made by tracing the borders of the front. There you go, you have an arc reactor, well, almost.
Step 2: Code It

If you’re not much interested in coding, you’re in luck. The code to make it work just as we want already exists in the pulse sensor library. So hurray! We can save a lot of time here. First of all, we have to download the pulse sensor library in the Arduino IDE. Fire up the IDE (I mean open the Arduino IDE in your pc) and click on sketch -> include library -> manage libraries. Now in the text box type “PulseSensor playground” and you’ll find it with an option to install. Install the latest version.
Now for the code. Click on file -> examples and scroll to the bottom to find pulseSensor playground. Click on it to find various pulse sensor example codes. From the list click on “pulseSensor BPM” if you’re using Arduino or “pulseSensor BPM alternative” if you’re using node mcu. Now all you have to do I upload the code. Great!
One thing to note. Towards the beginning of the code you’ll find pulse_blink=13 and pulse_fade=5. This means an led connected to pin 13 will blink with heartbeat and an led connected to pin 5 will fade with heartbeat. We need to connect two LEDs to each in parallel. In case you’re using node mcu pin 13 and pin 5 are pins D7 and D1 respectively. That’s all for the coding part. Cool! Let’s move on.
Step 3: A Little Here-and-there

I cut out a small compartment in the back wall to make place for the battery. Then, for the front diffusion system, I cut a triangular shape from a piece of acrylic and used a sand paper to scratch on its surface several times to make it semi transparent. It is a time consuming and boring process though. You can also buy semi transparent acrylic directly, instead of manually making it semi transparent.
Before sticking it to the front, I painted it black with poster colours. The inside is not necessary to be painted because the white colour of the acrylic reflects light and will result in a brighter and more evenly lit interior. The acrylic can now be stuck to the front from behind.
Read more: Iron Man’s Arc Reactor That Pulses With Your Heart Beat
