
Making a IoT LED dimmer that you can control via your PC, phone, tablet or any other device connected to the network is super simple, and I’m going to show you how.
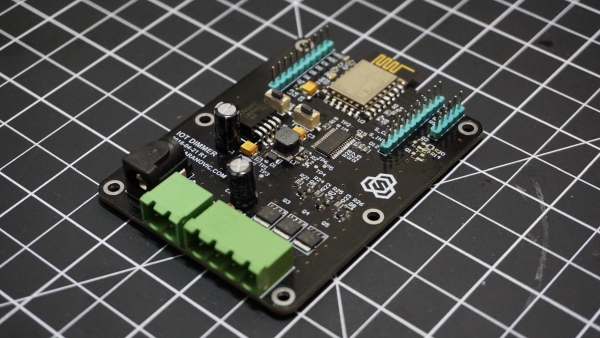
I’m sharing my three channel LED dimmer that you can use to dim single RGB LED strip or dim three separate LED channels. I want to be able to control lights above my desk and also mix warm white and cool white strip to give me more flexibility over lighting while I’m working, taking pictures or watching movies.
This is going to be a very short and very simple project that if you follow steps below, you can build it in an hour (excluding lead time for components).
For this project you will need:
- LED strip (RGB, or 1/2/3 single color LED strip)
- NodeMCU (ESP8266 dev board)
- Three N-Channel Power MOSFET
- Three N-Channel Signal MOSFET
- 12V Power adapter for LED strip
Firmware
When it comes to writing the firmware for ESP8266, there are tons of options. To keep things simple and in effort to save time, in this example we’ll use Arduino since it has plenty of libraries, example code and it’s easy to understand if you are just trying to get your feet wet with custom hardware.
Let’s take a look at the whole Arduino sketch, and then just go over some lines that might be of interest to you. The code provided should be pretty much self-explanatory and also comments should come in handy.
At minimum, you should modify following lines to get our IoT dimmer connected to our WiFi.
// WiFi Configuration (hard-coded at the moment)
static const char ssid[] = "__Your-WiFi-SSID__";
static const char password[] = "__Your-WiFi-Password-Here__";

// mDNS hostname for this device
// You should be able to call http://dimmer.iot
static const char dns_hostname[] = "dimmer";
I am not planning renaming my WiFi network or changing password on a daily basis so this is fine for me. (If you want, you can download Arduino libraries that allow you to set NodeMCU in station mode so you can connect to your device, configure which credentials you want it to use and then it will restart in client mode and try to connect to you WiFi access point.)
Also whatever you set as `dns_hostname` you should be able to connect to your IoT dimmer by typing in http://dns_hostname.iot, in my case that is http://dimmer.iot. It is more convenient than IP but this may or may not work for you, depending on your network config.
Arduino code is pretty “boring” and “nothing special” in code is happening, at least on the surface that is.
Read more: IOT LED DIMMER