Summary of Innovative Keyless Bike Technology: Arduino and Android App Integration
This article details a keyless bike project using an Arduino Nano and Bluetooth HC-05 to control ignition, self-start, and location features via an Android app. The system uses wireless communication where the phone sends commands that the Arduino processes to activate relays for various bike functions.
Parts used in the Keyless Bike Project:
- Arduino Nano
- Bluetooth HC-05
- LEDs
- 4-channel relay
- USB A-type cable
- Breadboard
- Hook-up wires
Interested in starting your bike without a traditional key? Absolutely! We’ve developed a project tailored for tech enthusiasts eager to incorporate advanced technology into their bikes. Through our keyless bike project, you gain full control over your bike, including engine start and ignition. Additionally, you can conveniently locate your bike with the click of a button. This project offers a captivating blend of functionalities. I’m personally planning to install this innovation on my bike soon, and I’ll be sharing a video of the process on my YouTube and Instagram channels. Stay tuned!
Introductions
The user-friendly keyless bike Arduino project offers seamless functionality. An Android mobile application serves as the control hub for your bike.
With this app, you gain the ability to:
– Activate and deactivate your bike
– Engage the bike’s self-start feature
– Locate your bike using horn and indicator controls
Our project enables you to manage these aspects through wireless communication linking your bike to the mobile phone.
For those eager to delve into this project, we’ll be sharing comprehensive details here. To successfully undertake this endeavor, familiarize yourself with the electronics basics provided on our website. Let’s embark on this journey without any delay!
Required components
The components required for this keyless bike project include:
– Arduino Nano
– Bluetooth HC-05
– LEDs
– 4-channel relay
– USB A-type cable
– Breadboard
– Hook-up wires
With these components, you have all you need to get started. Let’s understand the role of each component in this project.
The Arduino Nano serves as the central controller, playing a pivotal role in this task. It possesses the capability to store, process, and operate various sensors and modules. In this setup, the Arduino Nano takes charge of controlling the Bluetooth module and relays. It receives data from the Bluetooth module, compares it with programmed data, and subsequently activates or deactivates the relays.
Relays function as electronic switches, capable of controlling circuits with minimal current. Similar to pressing a button to operate a light or fan, relays manage bike components such as ignition, engine, and indicators by responding to low-voltage signals.
The Bluetooth module acts as the wireless communication bridge in this keyless bike project, establishing a connection between the bike and the mobile phone. We’ve developed an Android app specifically for this purpose, which facilitates the Bluetooth HC-05 module’s connection to the bike. The download link for the app is provided below for your convenience.
Circuit diagram

Code
void setup()
{
Serial.begin(9600); // buart rate
pinMode(12,OUTPUT); //
pinMode(9,OUTPUT);
pinMode(10,OUTPUT);
pinMode(11,OUTPUT); // LED
//digitalWrite(12,HIGH); // relay module high
}
void loop()
{
if(Serial.available()>0)
{
char data= Serial.read();
Serial.println(data);
if(data==’A’)
{
digitalWrite(10,HIGH);
delay(300);
digitalWrite(10,LOW);
delay(300);
digitalWrite(10,HIGH);
delay(300);
digitalWrite(10,LOW);
delay(300);
digitalWrite(10,HIGH);
delay(300);
digitalWrite(10,LOW);
delay(300);
digitalWrite(10,HIGH);
delay(300);
digitalWrite(10,LOW);
delay(300);
}
else if(data==’C’)
{
digitalWrite(11,LOW); // LED OFF
delay(500);
}
else if(data==’D’)
{
digitalWrite(11, HIGH); // LED OFF
delay(500);
}
else if(data==’B’)
{
digitalWrite(12,LOW); // LED OFF
delay(1000);
digitalWrite(12,HIGH); // LED OFF
delay(1000);
}
else
{ }
}
}
To transfer the provided code to your Arduino, connect it using the cable provided. If you encounter any difficulties during the sketch upload process, feel free to seek assistance from our website for guidance.
How to operate the application.
Step 1: Power up the system and initiate Bluetooth pairing.
Begin by supplying power to the system. Then, proceed to your phone’s settings.
Access the Bluetooth settings and locate the “Pair new device” option.
From the list displayed, choose the HC-05 device.
Next, launch the provided application on your phone.
Within the application interface, tap on the “Connect” tab.
Select the HC-05 device from the available list to establish the connection.
Additionally, I’ve constructed the entire circuit on a breadboard, which, as you may be aware, is not the most efficient setup for this kind of project. Therefore, I’d like to introduce PCBWay, a service that provides rapid PCB prototyping for your research endeavors. Personally, I highly recommend PCBWay as they ensure the delivery of your initial prototype boards within just 24 hours!
The prototyping phase stands as a crucial juncture for engineers, students, and enthusiasts alike. PCBWay doesn’t just expedite the creation of your boards; it ensures precision and cost-effectiveness. This significantly reduces expenses and accelerates the electronic development process.
PCBWay offers a spectrum of PCBs, ranging from 2 Layer boards to highly advanced HDI and flex boards. Despite the varying functionalities and intended applications of the PCBs they produce, I’m genuinely impressed by the consistent quality of the boards, their timely delivery, and their cost-efficiency.
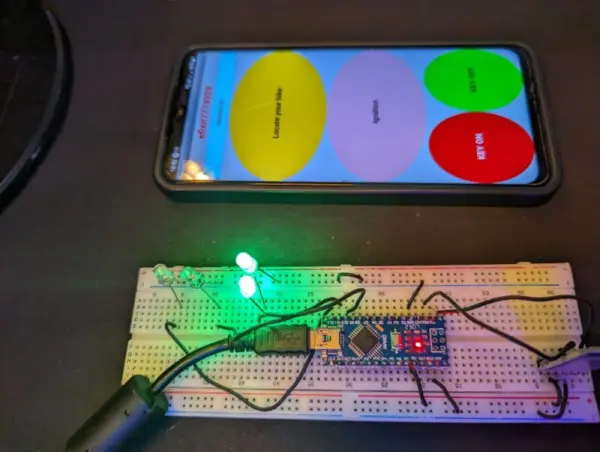
Keyless bike project Working
Once the application establishes a connection with the device, the ‘Connect’ tab within the app interface transitions to ‘Connected’. Whenever a key is pressed in the app, the phone transmits a character to the Bluetooth module linked to the Arduino system.
For instance, pressing the ‘Turn On Bike’ tab in the application triggers the phone to transmit the character ‘A’ to the Arduino system. Subsequently, the Arduino system compares this received data with the programmed instructions we’ve written. If a match is found within the programmed data, it triggers a corresponding action.
For instance:
“`cpp
if (received_data == ‘A’) {
// Bike start sequence
// Perform specific actions
// …
} else {
// Bike remains inactive
// No action taken
}
“`
In this manner, the entire system operates. Your feedback and queries are welcomed in the comment section. Thank you for your attention!
Source:
- What functions can be controlled through the Android app?
The app allows users to activate and deactivate the bike, engage the self-start feature, and locate the bike using horn and indicator controls. - How does the Arduino Nano function in this setup?
The Arduino Nano acts as the central controller that stores data, processes sensor inputs, and manages the Bluetooth module and relays. - Can I locate my bike using this project?
Yes, you can conveniently locate your bike by triggering the horn and indicator controls through the mobile application. - What is the role of the Bluetooth HC-05 module?
The Bluetooth module serves as the wireless communication bridge connecting the bike to the mobile phone. - Does the project require a traditional key?
No, the project is designed for tech enthusiasts who want to start their bike without a traditional key. - How are bike components like ignition controlled?
Relays function as electronic switches that manage bike components such as ignition and engine by responding to low-voltage signals. - What happens when the Connect tab is pressed in the app?
Pressing the Connect tab initiates the pairing process with the HC-05 device to establish a connection between the phone and the system. - Which character triggers the bike start sequence?
Pressing the Turn On Bike tab transmits the character 'A' to the Arduino system to trigger the bike start sequence.