Summary of Drain Clog Detector
This project proposes an intelligent drain clog detection system using sound analysis to prevent water damage and reduce maintenance costs. The team simulated clogs in a bathtub environment, collecting audio data from open and blocked pipes. Using Arduino for analog sensing and Raspberry Pi for processing, the system streams data via Google Cloud IoT Core to BigQuery for analysis. Machine learning rules derived from this data trigger alerts when specific sound patterns indicate a blockage, enabling proactive maintenance for homes and enterprises.
Parts used in the Drain Clog Detector:
- Small water pipe
- Grove Sound sensor
- Grove Arduino shield
- Arduino UNO 3
- Raspberry Pi 3
- USB cable
- Water hose with water source
- Bathtub (for simulation)
Don’t let a clogged drain slow you down!
Coming back from our vacation, me and my wife were surprised by the water covering the floor of our apartment, and we found out it’s not even clean water, it’s drain everywhere. After clearing the drain and cleaning the floor, I had this question: why don’t we have an alarm system for potential drain clogs? Clogged drains not only can bring your home to a halt, but will consume additional costs from your pockets, $206 on average is cost of clearing a clogged drain according to HomeAdvisor, in addition to hidden costs of damaged carpets, wooden furniture, … etc. Our idea is to let home owners as well as enterprises like city/compounds maintenance departments and specialized service providers to have an efficient and intelligent system that alerts whoever in charge as early as possible to take action, which contributes in enriching smart cities with an important feature.

The Idea
Although detection of clogs can be done through a number of techniques, like using gas sensors or internal mechanisms, our team was focused on using sound as our input, as we know that knocking on a tube where it’s opened is different sound from that happened when being closed. According to this simple concept, if we can train a model the sound patterns occurring on tube surface during clogs as well as those patterns occurs in opened pipes, we can then apply the model to detect proactively when a clog starts to compose, and we then ring some bills.
Credits for
Project in detail
3 phases are implemented in this project : Gathering data, Learning & prediction.
Before applying this system in real life, we needed to create an
enforced simulation environment, where we have the pipe, flowing water, and somehow to simulate the clog. So, we got a tube, a water hose with a water source doing this in the bath tub, and using the tub surface to close the tube which represents the clog. In this video, we explain how we built the environment and how we collected data for the model training.
And in this next video, showing how we did the testing for the system and the model, in open mode, then in clog mode and back to open mode, however
So, lets explore our implementation step by step:
Step 1: The Experiment
In this scenario we use a small water pipe connected to our hardware and sound sensor. Hardware reads the sensor value and send it back to Cloud. This has been done for 10 min for blocked tube then another 10 min for tube that isn’t blocked.
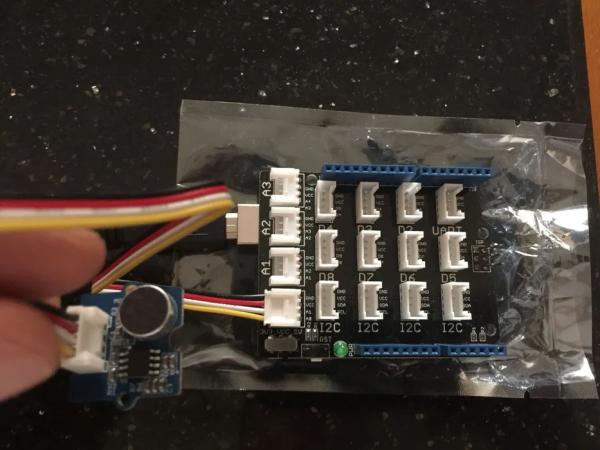
Step 2: Hardware
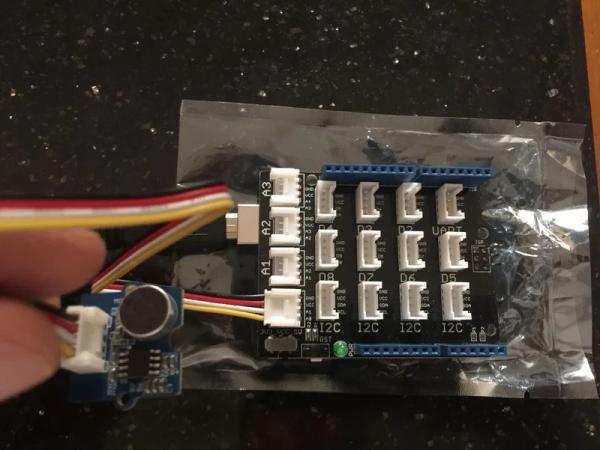
I- Arduino
To detect the water sound inside the pipe we need a sound sensor. However Raspberry Pi 3 doesn’t have Analog GPIO. To handle this issue we use Arduino as Arduino has analog GPIO. So we connect Grove Sound sensor to Grove Arduino shield and connect Shield to Arduino UNO 3. Then we connect Arduino & Raspberry using USB cable. To get more information about Grove Sound sensor, you can check its data sheet. You can find in data sheet a sample code how to read sensor values. Sample Code is almost use will small changes. In below code we connect sensor to A0 in shield. To write on serial, we use Serial.begin() function. To communicate with Raspberry baud rate set to 115200Data will be sent to Raspberry if it is bigger than certain threshold to cut the noise Many trials has been done to choose the desired threshold & delay values. Threshold found to be 400 & Delay value to be 10 millisecond. Threshold has been chosen to filter normal noise & ensure that only meaningful data will be sent to the cloud.Delay has been chosen in away to ensure that sensor has detect any changes in flow sound inside the tube immediately.
II- Raspberry Pi 3
To download android things on Raspberry, you can download the latest version from Android Things Console. In this project we use version : OIR1.170720.017. follow steps in Raspberry site to install operating system on raspberry, for windows you can use these steps After installation you can connect the Raspberry to your computer using USB. Then in your computer console use below command to get Raspberry IP
nmap -sn 192.168.1.*
After getting the IP, connect to your Raspberry using below command
adb connect
To connect your Raspberry to Wifi (add your SSID & password)
adb am startservice \
-n com.google.wifisetup/.WifiSetupService \
-a WifiSetupService.Connect \
-e ssid ***** \
-e passphrase ****
Step 3: Google Cloud – Registeration

Google offer a free tier for all users for one year with ceiling of 300$, Thanks to Google :).
Follow screens to create new project in Google Cloud
Step 4: Google Cloud – Pub/Sub

Google Cloud Pub/Sub is a fully-managed real-time messaging service that allows you to send and receive messages between independent applications.
Step 5: Google Cloud – IOT Core
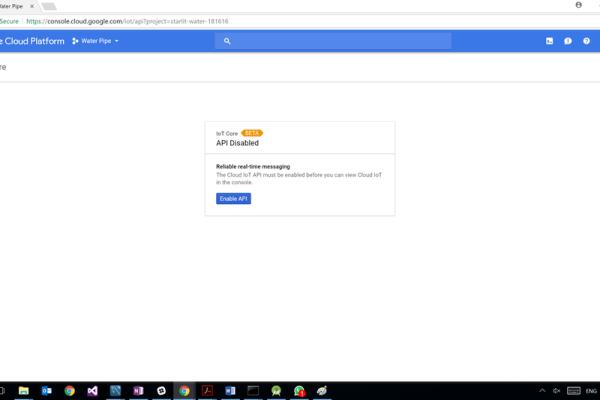
II- IOT Core
A fully managed service to easily and securely connect, manage, and ingest data from globally dispersed devices. IOT Core still Beta, to have access on it you need to make a request with Justification to Google. We made the request, our justification was this contest. Google approved, Thanks to Google again :). Raspberry will send sensor data to IOT Core which will forward readings to PubSub topic created in previous step
Step 6: Google Cloud – Cloud Functions
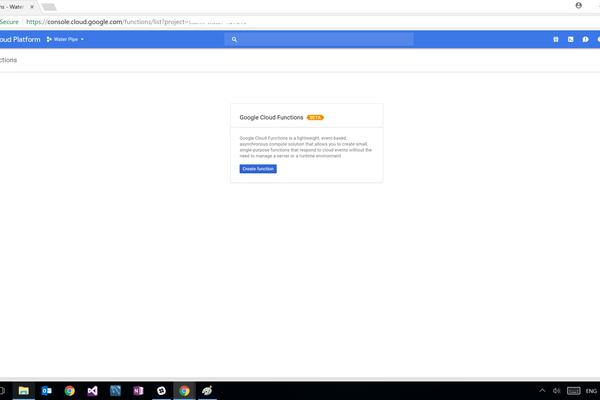
Cloud Functions is a serverless environment to build and connect cloud services. Trigger for this function is the PubSup topic that created in step 1. ;; This function will be triggered when new value written in PubSup and write it in Cloud DataStore with Kind “SoundValue”
Step 7: Google Cloud – Cloud DataStore
Google Cloud Datastore is a NoSQL document database built for automatic scaling, high performance, and ease of application development. While the Cloud Datastore interface has many of the same features as traditional databases, as a NoSQL database it differs from them in the way it describes relationships between data objects. No need for any setup as once the Cloud Functions write sensor values to DataStore, data will be added to DataStore
Step 8: Google Cloud – BigQuery
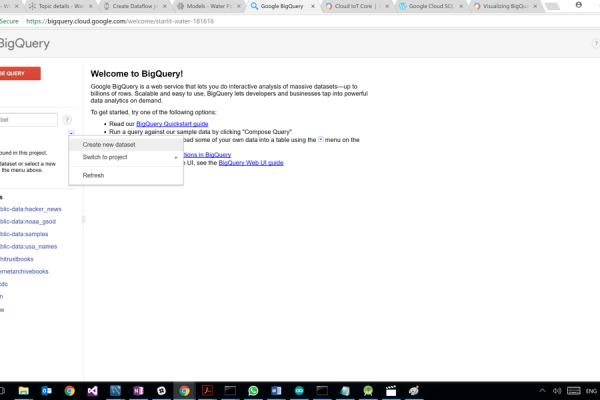
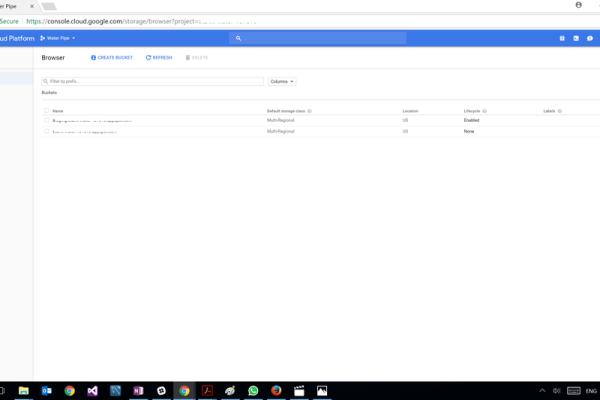
We gather a sample 10 min from normal pipe & 10 min from blocked pipe with difference exactly 1 hour between the 2 iterations. After downloading data DataStore and make some manipulation to add classification for each row. Now we have 2 csv files one for each category. As best practice upload data CSV files first to Cloud Storage. In below screen we create a new bucket & upload the 2 CSVs files As this bucket will be used for analysis only, no need to choose Multi-regional bucket Then create new Dataset & new table in BigQuery and upload the 2 CSVs file from bucket to the new table
Step 9: Google Cloud – Data Studio
Then we use Data Studio to draw some insights. Data Studio will read data from BigQuery table. From graphs we can see the difference between 2 categories in number of telemetries and sum of values per minute. Based on these insights we can design a simple model, pipe is considered blocked if in 3 successive minutes, count of telemetries values that are higher than noise threshold (400) is more than 350 telemetries. and in 3 successive minutes, count of telemetries value that is higher than spark threshold (720) is more than 10 telemetries.
Step 10: Prediction Phase
We refer to a reading, when it exceeds a certain value (THRESHOLD_VALUE) which was set to 350 that filters noise and lower water flow rates in the tube, from being considered as a reading
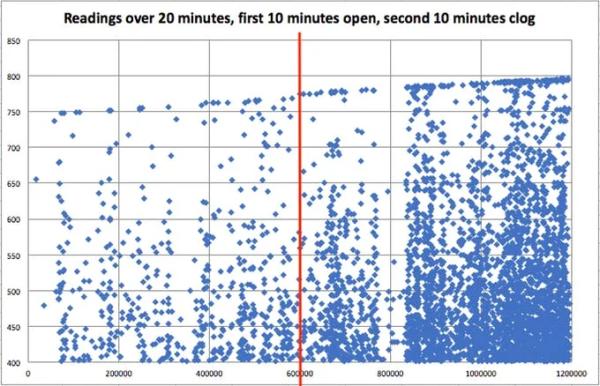
Data analysis shown that in open mode the number of readings is less
than 100, but in clog mode, values are far higher (reached 900 per minute), but in rare cases were also less than 100. However, these cases are not repeated consequently, and for three consequent minutes, total number of readings always exceeded 350. Having open mode in same three minutes will sum up less than a 300, we could confidently put this rule: Rule # 1 –> For three minutes in a raw, if total readings > 350 , then a clog is detected. We found maximum value reached in open mode doesn’t exceed a certain value (SPARK_VALUE ) which is found to be 770, so we added this rule: Rule # 2 –> If reading value > 350 , then a clog is mostly detected.
Combining both rules, gave us an easy way to implement the detection
logic, as shown. Notice that below code was deployed on Arduino which then evaluates the received telemetries based on our model and send to raspberry if pipe is clogged or open.
Step 11: Code
All Code for Arduino, Raspberry & Cloud Function can be found on Github.
For more information you can check this link
Source: Drain Clog Detector
- How does the system detect a drain clog?
The system uses a sound sensor to analyze audio patterns on the tube surface, distinguishing between the sounds of open and blocked pipes. - Why was an Arduino chosen over the Raspberry Pi alone?
Arduino was used because it has analog GPIO pins required for the Grove Sound sensor, which the Raspberry Pi 3 lacks. - What threshold value filters out normal noise in the system?
A threshold of 400 was chosen to filter normal noise and ensure only meaningful data is sent to the cloud. - How long was data collected for each simulation mode?
Data was gathered for 10 minutes while the tube was blocked and another 10 minutes while it was open. - What rule determines if a clog is detected based on reading counts?
If the total readings exceed 350 for three consecutive minutes, the system identifies a clog. - Does the system use gas sensors or internal mechanisms for detection?
No, the team focused specifically on using sound as the input method rather than gas sensors or internal mechanisms. - Which Google Cloud service forwards sensor readings to the Pub/Sub topic?
Google Cloud IoT Core forwards the readings from the Raspberry Pi to the Pub/Sub topic created in the project. - What software is installed on the Raspberry Pi to manage the device?
The project uses Android Things version OIR1.170720.017 installed on the Raspberry Pi.