
Summary of DIY Six Channel Arduino RC Transmitter
This article details a DIY Arduino-powered RC transmitter project by [Electronoobs], designed to look professional while remaining accessible to hobbyists. The build utilizes an Arduino Nano and NRF24 module for communication, paired with custom firmware capabilities. It features user input via switches, buttons, potentiometers, and two JH-D202X-R2 joysticks. Power management includes batteries, a charging module, and a voltage regulator stepping down to 3.3V. An OLED display provides visual feedback. The author notes that a matching receiver can be built using similar components, though it is not compatible with existing commercial vehicles without adaptation.
Parts used in the DIY Six Channel Arduino RC Transmitter:
- Batteries
- Charging module
- Voltage regulator
- Arduino Nano
- NRF24 module
- OLED display
- Switches
- Buttons
- Potentiometers
- JH-D202X-R2 joysticks (x2)
It’s wasn’t so long ago that RC transmitters, at least ones worth owning, were expensive pieces of gear. Even more recently than that, the idea of an RC transmitter running an open source firmware would have been considered a pipe dream. Yet today buying cheap imported transmitters and flashing a community developed firmware (if it didn’t come with it pre-installed to begin with) is common place. It’s not much of a stretch to say we’re currently in the “Golden Age” of hobby RC transmitters.
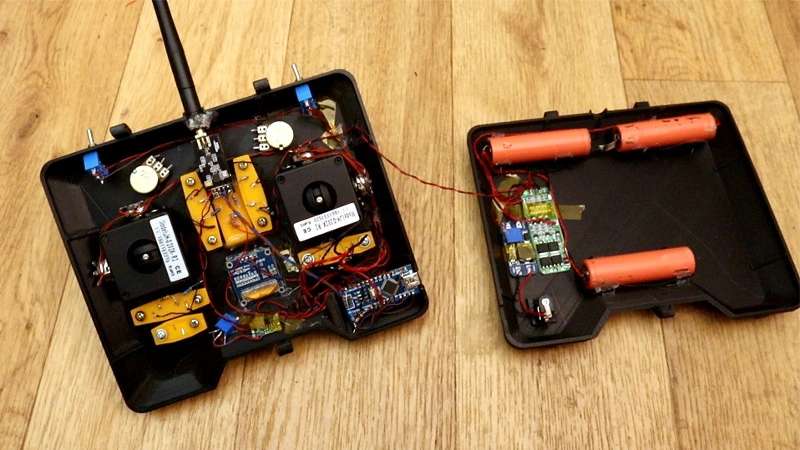
But what if even cheap hardware running customizable software isn’t enough? What if you want to take it to the next level? In that case, [Electronoobs] has an Arduino powered RC transmitter with your name on it. But this is no scrap of protoboard with a couple of cheap joysticks on it, though he has made one of those too. The goal of this build was for it to look and perform as professional as possible while remaining within the hobbyist’s capabilities. The final product probably won’t be winning any design awards, but it’s still an impressive demonstration of what the individual hacker and maker can pull off today with the incredible technology we have access to.
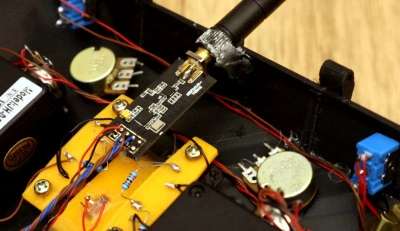
So what goes into this homebrew radio control system? Inside the back panel [Electronoobs] mounted the batteries, charging module, and the voltage regulator which steps the battery voltage down to the 3.3 V required to drive the rest of the transmitter’s electronics. On the flip side there’s an Arduino Nano, an NRF24 module, and an OLED display. Finally we have an assortment of switches, buttons, potentiometers, and two very nice looking JH-D202X-R2 joysticks for user input.
As you might have guessed, building your own transmitter means building your own receiver as well. Unfortunately you won’t be able to bind your existing RC vehicles to this radio, but since the receiver side is no more complicated than another Arduino Nano and NRF24 module, it shouldn’t be hard to adapt them if you were so inclined.
Low-cost consumer RC transmitters can be something of a mixed bag. There are some surprisingly decent options out there, but it’s not a huge surprise that hackers are interested in just spinning up their own versions either.
Source: DIY Six Channel Arduino RC Transmitter
- How does the voltage regulator function in this build?
The voltage regulator steps the battery voltage down to the 3.3 V required to drive the rest of the transmitter electronics. - What components are mounted on the back panel?
The batteries, charging module, and voltage regulator are mounted inside the back panel. - Can this radio bind with existing RC vehicles?
No, you will not be able to bind your existing RC vehicles to this radio because it uses a custom-built receiver. - What is the primary goal of this specific build?
The goal was for the system to look and perform as professionally as possible while remaining within the hobbyist's capabilities. - Which modules handle wireless communication in the design?
An Arduino Nano and an NRF24 module are used on the flip side of the case for communication. - What type of user input devices are included?
The system uses an assortment of switches, buttons, potentiometers, and two JH-D202X-R2 joysticks. - Is it difficult to create the matching receiver?
No, the receiver side is described as no more complicated than another Arduino Nano and NRF24 module. - Does the final product win any design awards?
The final product probably won't win any design awards but remains an impressive demonstration of maker technology.
