There are a lot of Twitter feed readers around the Web that use Arduino AND a PC to display twits on LCD displays or whatsoever. Then, I decide it was the time to design a solution for performing the same job WITHOUT A PC, and here’s the project.
In a simple equation:
Arduino + Ethernet Shield + LCD Display + Twitter = automatic Twitter feed reader with LCD!
The items you need are the following:
– Arduino (I used Duemilanove)
– Ethernet Shield
– an LCD display (mine was 4 lines, but you can easily adapt the software to other dimensions)
– wires
– a box capable of holding the system together
– a simple Arduino sketch
Step 1: Step 1 – Connect the Arduino to the Ethernet Shield
Mount the Ethernet Shield on top of the Arduino board. You can find detailed instructions here.
Step 2: Step 2 – Connect the LCD Display
This is a little harder, but again you can find detailed informations here. The link contains also some sample code you can use to check that the connection work. Please perform this action WITHOUT the Ethernet Shield.
Before proceeding to the next steps, you need to change a bit the schematics you find here. In fact, such schematics do not foresee the concurrent usage of the Ethernet Shield, which occupies pins no. 10-11-12-13 to communicate with Arduino. For this reasons, you should move the related connections (12 and 11) down to 9 (LCD RS pin) and 8 (LCD Enable pin).
Step 3: Step 3 – Preliminary testing
At this point, you are almost finished. However, before packaging I suggest that you make a preliminary test on your system.
First, connect the Arduino to the PC and upload my sketch, that you can download from here. You’ll probably need to upload the following libraries from the Arduino website:
– Ethernet (for the Ethernet Shield)
– EthernetDHCP (for self-configuring the IP address is you use DHCP at home)
– LiquidDisplay (for the LCD)
– TextFinder (for parsing the RSS feed)
Second, after disconnecting the PC, connect the Ethernet Shield to the home router via Ethernet cable and then power Arduino.
Third, you may need to wait some time to see the tweet (the sketch is programmed to read my own last tweet, if you didn’t modify it). If it gives a connection error, try pushing the reset button on the Ethernet Shield to refresh the network configuration.
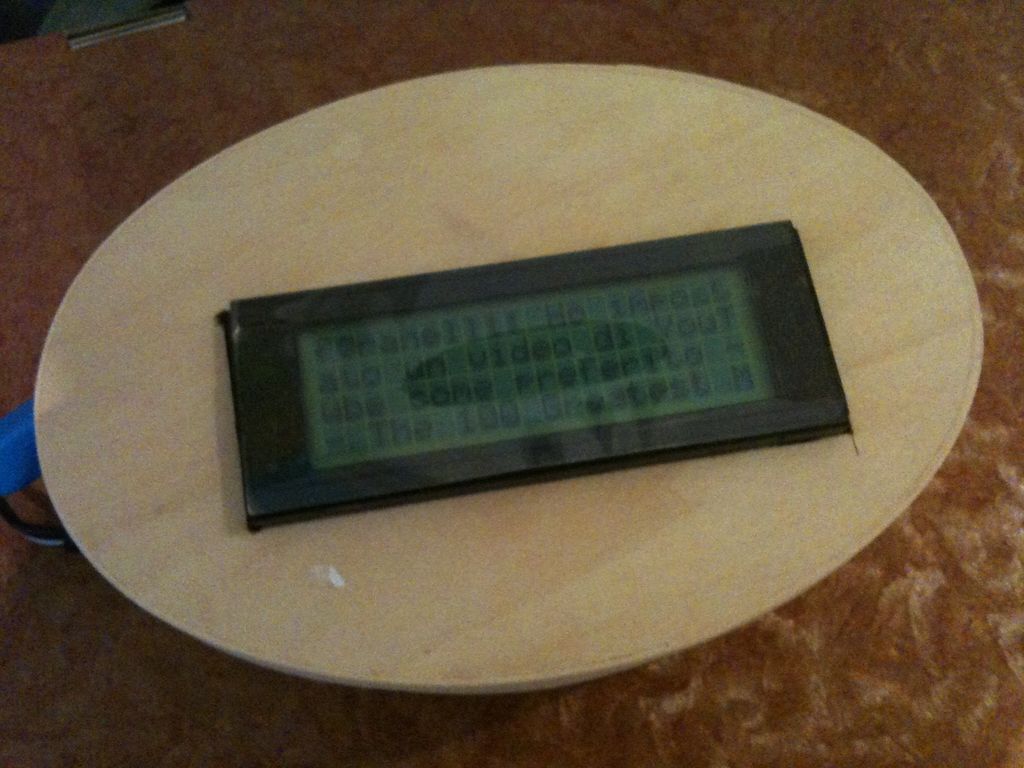
On the LCD, you should get the title “Twitter2LCD” and then after some time (around 1 minute) the tweet divided into two pages. It’ll continue updating every minute or so if you leave it on.
If everything worked correctly, you can proceeding to the final setup and packaging steps. Otherwise, get back to step 1 and test connections and correct behaviour using samples on the Arduino website.
Feel free to contact me if you need help.
Step 4: Step 4 – Configuration
Now you can freely adapt and configure the sketch to your needs.
Basically, the sketch is very simple: (1) it sets you IP and other network parameters, (2) it reads the Twitter feed RSS, (3) it parses it, (4) it displays it on the LCD. This last steps requires some lines on code, since I couldn’t get the lines on the screen sorted in other ways… 🙁
Here are some indications:
– lines 29-32 contain configuration (LCD connections, Twitter server’s IP, Ethernet Shield MAC on the network): feel free to modify those as you prefer (I didn’t bother adding domain name resolution to automatically change “twitter.com” to the IP every time – to keep it simple)
– line 42 sets the LCD size, change it according to your display
– line 54 selects the RSS feed related to my account, you can easily change it by browsing to your preferred Twitter account (you don’t need to be the owner, but it must be public) and copy the link to the feed, indicated by the RSS logo
– the main part of the sketch performs an extremely easily parsing of the xml feed, by looking for the tags and
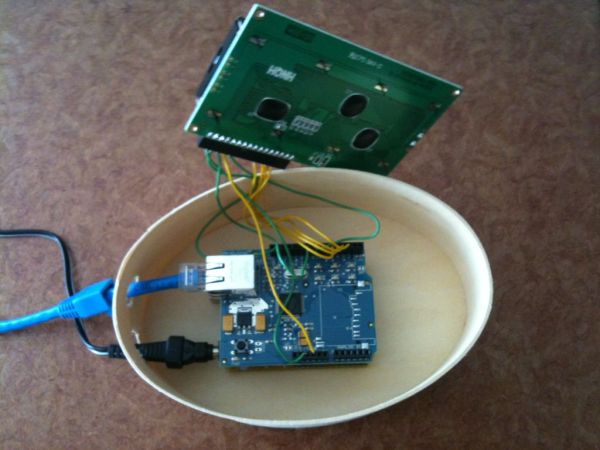
Step 5: Step 5 – Packaging
Packaging is relatively easy: if you select a box which can be opened, then fix the display on the top by cutting a suitable area and dig two holes for Ethernet and power supply. In the pictures, you can find my solution.
Step 6: Step 6 – Have fun!
That’s it. Feel free to send me your versions and suggestions, this doesn’t pretend to be a complete solution, but a framework to work on and play with!!!
Duemilanove
Ethernet Shield
dimensions
Arduino sketch
For more detail: Displaying Twitter feed without a PC! using Arduino