
Controlling Arduino with Raspberry Pi using pyFirmata
Although Raspberry Pi and Arduino are two different hardware in terms of their applications and structure, but they both are considered as two competing open source hardware platforms. They both have very strong community and support. Today we will slightly change things, and show you how we can take advantage of both of them. If you have both Arduino and Raspberry pi boards, this article will show you how to use Raspberry pi and Python to control the Arduino.
We will use PyFirmata firmware to give commands to Arduino using Raspberry Pi python script. PyFirmata is basically a prebuilt library package of python program which can be installed in Arduino to allow serial communication between a python script on any computer and an Arduino. This python package can give access to read and write any pin on the Arduino. So here we will run python program on Arduino using Raspberry pi.
So in this tutorial we will take advantage of this library and will use this in our Arduino board to control Arduino using Raspberry Pi.
Requirements
- Raspberry Pi with Raspbian OS installed in it
- Arduino Uno or any other Arduino board
- Arduino USB cable
- LED
In this tutorial I am using External Monitor using HDMI cable to connect with Raspberry Pi. If you don’t have monitor, you can use SSH client (Putty) or VNC server to connect to Raspberry pi using Laptop or computer. If you find any difficulty then follow our Getting stared with Raspberry Pi Guide.
Installing PyFirmata in Arduino using Raspberry Pi
To upload PyFirmata firmware in Arduino, we have to install Arduino IDE in Raspberry Pi. Follow these steps to install:
Step 1:- Connect the Raspberry Pi to the internet. Open command terminal and type the following command and hit enter
sudo apt–get –y install arduino python–serial mercurial
Wait for few minutes, it will take time. This command will install the Arduino IDE in your Raspberry Pi.
Step 2:- Now, we will install pyFirmata files using the given github:
git clone https://github.com/tino/pyFirmata
Then run the following command:
cd pyFirmata
sudo python setup.py install
Step 3:- We have installed all the required files and setups.
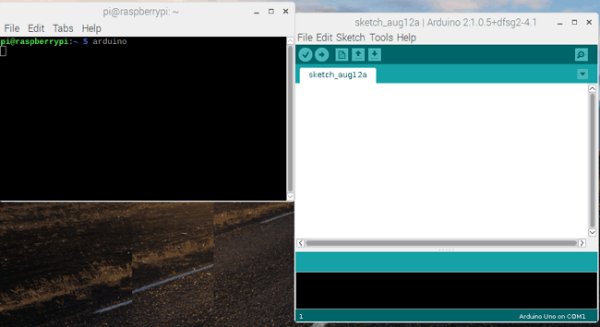
Now, connect your Arduino board with Raspberry Pi using USB cable and launch Arduino IDE by typing arduino in terminal window.
Step 4:- Then type lsusb command to check whether Arduino is connected with your raspberry pi.
In Arduino IDE, Go to tools and choose your board and Serial Port.
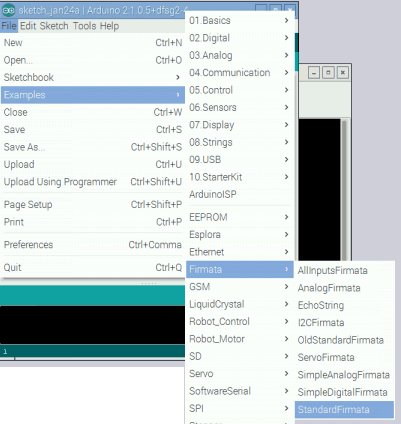
Step 5:- Upload the PyFirmata firmware on the Arduino by clicking File -> Examples -> Firmata -> Standard Firmataand then click upload button . As shown below.
We have successfully installed the pyFirmata firmware in the Arduino board. Now, we can control our Arduino using Raspberry Pi.
For demonstration we will blink and fade an LED on the Arduino by writing python codes in Raspberry Pi.
Code Explanation
For coding part, you should read documentation of pyFirmata for better understanding. We will use pyFirmata functions to write our code. You can find pyFirmata documentation by following the link.
So let’s start writing the code
Open your favorite text editor on the Raspberry Pi and import pyFirmata library.
import pyfirmata
Define pin on the Arduino to connect the LED
led_pin = 9
Now, we have to write serial port name on which Arduino board is connected using pyfirmata.Arduino() function and then make an instance by assigning port in board variable.
board = pyfirmata.Arduino(“/dev/ttyACM0”)
print “Code is running”
In while loop, make led pin HIGH and low using board.digital[].write() function and give delay using board.pass_time()function.
while True:
board.digital[led_pin].write(0)
board.pass_time(1)
board.digital[led_pin].write(1)
board.pass_time(1)
Our code is ready, save this code by putting .py extension to the file name.
Open command terminal and type python blink.py to run the code on the Arduino board. Make sure your Arduino board is connected with your Raspberry Pi board using USB cable.
Now, you can see Blinking LED on the Arduino board.
Complete code for blinking LED using pyFirmata is given at the end.
Fading LED on Arduino using pyFirmata
Now, we will write code for fading the LED to make you more familiar with the pyFirmata functions. This code is easy as previous one. You have to use two for loops, one for increase brightness and other for decrease brightness.
In this code, we have defined the pins in different way like led = board.get_pin(‘d:9:p’) where d means digital pin. This is function of pyFirmata library. Read the documentation for more details.
Complete code for Fading LED using pyFirmata is given at the end.
Now, you can add more sensors to your system and make it more cool, check our other Arduino projects and try building them using Raspberry pi and python script.
Read More Information….
Controlling Arduino with Raspberry Pi using pyFirmata