Summary of Complete Digital Clock including Alarm and Motion Sensor
This article describes a specialized Arduino digital clock featuring an alarm, PIR motion sensor for automatic display activation and alarm silencing, and environmental monitoring. It utilizes an Arduino UNO or NANO with a TM1637 4-digit display, DS1307 RTC, DHT11 sensor, KY-040 encoder, and a buzzer to track time, temperature, humidity, and dew point while saving data permanently.
Parts used in the Digital Clock with Alarm and Motion Sensor:
- Arduino UNO
- Arduino NANO (optional)
- CATALEX 4 digits x 7 segments Display (TM1637)
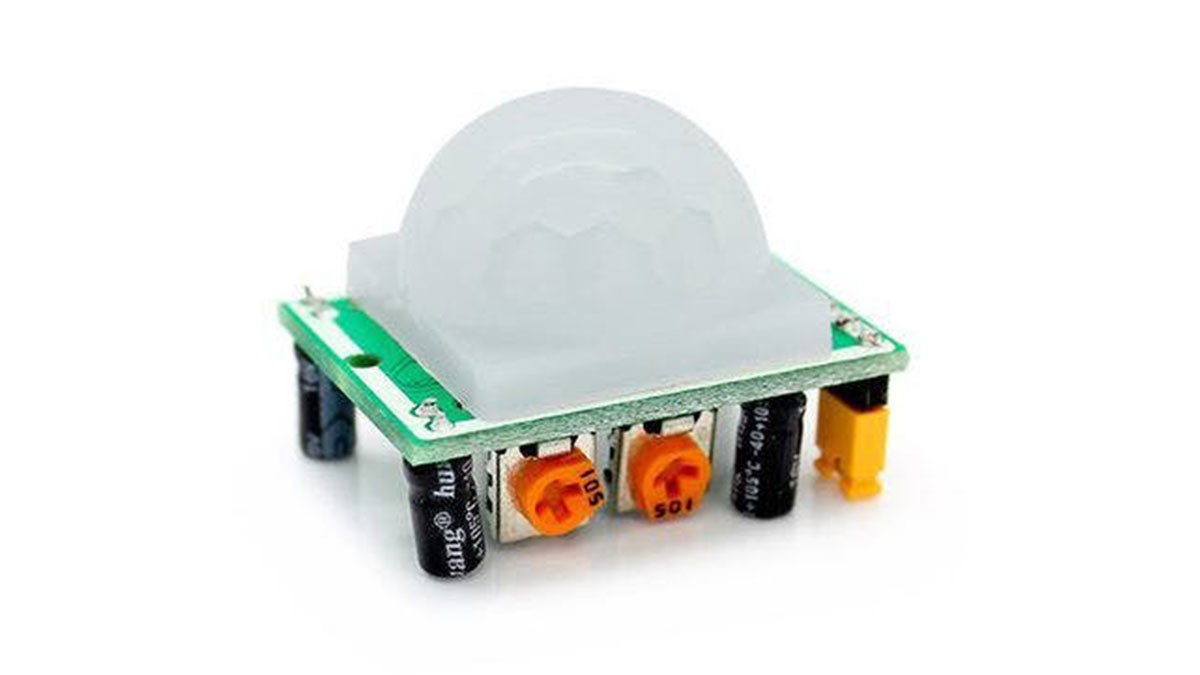
- PIR sensor module
- RTC module (DS1307)
- Temperature & Humidity sensor module (DHT11)
- Rotary Encoder Decoder module (KY-040)
- Buzzer 5V
- Sensor Shield for Arduino UNO (optional)
- Sensor Shield for Arduino Nano (optional)
- Wires
- Protoboard (optional)
I have done several designs of digital clocks for Arduino using LEDs and LCD displays, but this one is more special because I added other features like alarm and motion sensor (PIR).
Main features
- PIR (Presence Infrared Sensor)
- RTC (real-time clock)
- Alarm
- Temperature
- Humidity
- Water dew point
- Encoder to set the time and alarm
- Permanent memory for time and alarm data even when the power supply is off
Main functions of the PIR
- Activates the display only when movement is detected around the clock.
- Turns off the alarm if any movement is detected.
If you or your children have a deep sleep and it is difficult to wake up in the morning, this last function is perfect for you because the alarm remains activated with a noisy buzzing until the sensor detects the movement of your body.
You should definitely get out of bed and keep moving!
Shake your body !!
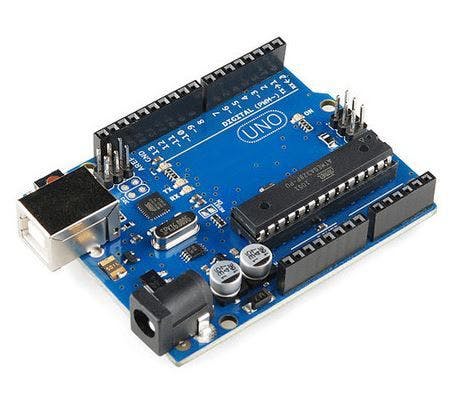
- Arduino UNO
- Arduino NANO (optional)
- Display CATALEX 4 digits x 7 segments (TM1637)
- PIR sensor module
- RTC module (DS1307)
- Temperature & Humidity sensor module (DHT11)
- Rotary Encoder Decoder module (KY-040)
- Buzzer 5V
- Sensor Shield for Arduino UNO (optional)
- Sensor Shield for Arduino Nano (optional)
- Wires
- Protoboard (optional)
2) Assembly
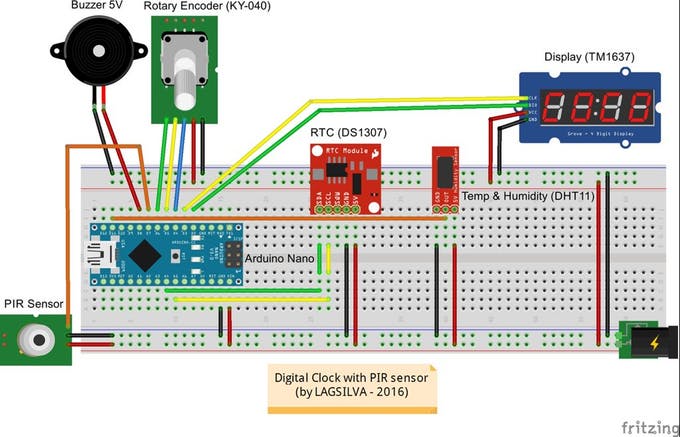
The assembly of these components is very easy.
Just follow the assembly diagram and pay attention to the connections between the components.
Here is the summary of the main signal pins of the sensors and modules to be connected in the Arduino:
Components X Arduino Pin
- Display DIO X Digital Pin #2
- Display CLK X Digital Pin #3
- Encoder SW X Digital Pin #4
- Encoder DT X Digital Pin #5
- Encoder CLK X Digital Pin #6
- PIR X Digital Pin #7
- Buzzer X Digital Pin #8
- DHT11 X Digital Pin #10
- RTC SDA X Analog Pin #A4
- RTC SCL X Analog Pin #A5
Note: In the diagram is shown the Arduino Nano for an application in a more compact size, but in the photos you can see my prototype using an Arduino Uno and a Sensor Shield to facilitate the whole assembly, but of course you can use protoboards to connect All Components.
Read More: Complete Digital Clock including Alarm and Motion Sensor
- What features does this digital clock include?
The clock includes an alarm, PIR motion sensor, RTC, temperature, humidity, water dew point measurement, and an encoder for setting time. - How does the PIR sensor activate the display?
The PIR sensor activates the display only when movement is detected around the clock. - Can the alarm be turned off automatically?
Yes, the alarm turns off if any movement is detected by the sensor. - Which microcontrollers can be used for this project?
You can use an Arduino UNO or an optional Arduino NANO. - Does the clock save data without power?
Yes, it has permanent memory for time and alarm data even when the power supply is off. - What happens if you have deep sleep?
The alarm remains activated with a noisy buzzing until the sensor detects your body movement. - Which pins are used for the display connections?
The display DIO connects to Digital Pin #2 and the display CLK connects to Digital Pin #3. - Can I use a protoboard for assembly?
Yes, you can use a protoboard to connect all components, although sensor shields are also optional.