Summary of Build A Wake Up Alarm Clock Using Arduino
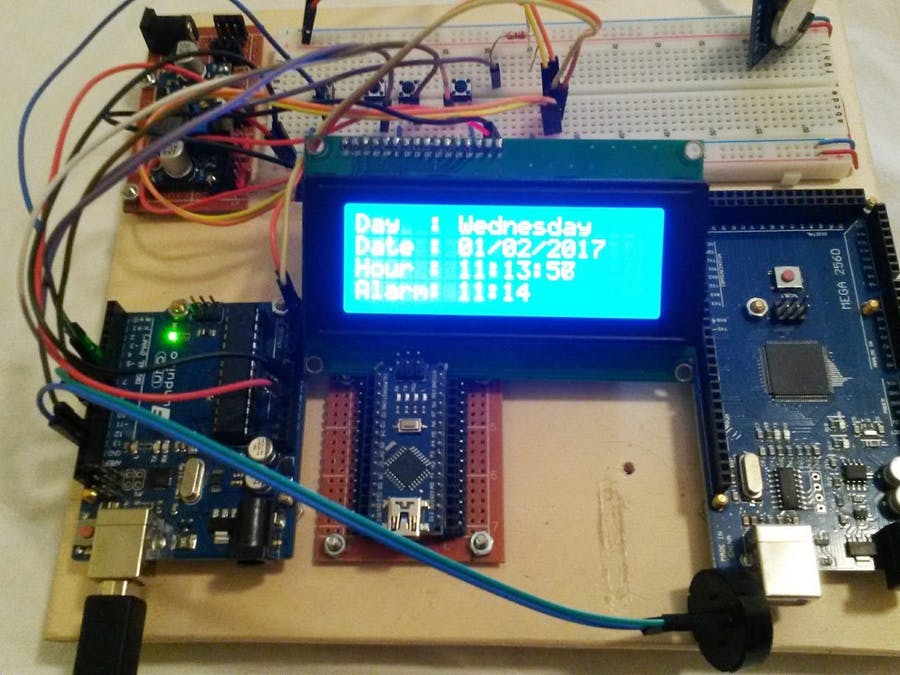
This article describes enhancing an Arduino clock project by adding a wake-up alarm feature. The author implemented a buzzer, LED, resistor, and buttons, replacing external pull-down resistors with the Arduino's internal pull-up resistors. The alarm is activated via button P4, configured using P2 and P3 simultaneously, and triggers with flashing display, lighting LED, and dual tones at the set time before auto-deactivating or requiring manual reset.
Parts used in the Alarm Clock:
- Buzzer Piezzo
- Diode LED
- Resistor of 220 ohms
- Button
Story
After designing the “Clock Set Date Time” and hearing the suggestion of ArduPic , I thought it would be a good idea and also useful, add a “wake-up alarm.”
A small change to the code and adding a few components: Here’s “the Alarm Clock“.
Compared to the previous project, I added a buzzer Piezzo, a diode LED, a resistor of 220 ohms, a button and as said before, I listened to the suggestion of “ArduPic” and I removed the resistance to “pull down.”
Arduino Code
To remove the “pull down” resistances I had to make a change to the code.
Use the pullup resistors of Arduino, and reverse the code logic conditions.
pinMode(P1,INPUT_PULLUP);
pinMode(P2,INPUT_PULLUP);
pinMode(P3,INPUT_PULLUP);
pinMode(P4,INPUT_PULLUP);
if(digitalRead(P1)==LOW)
{
menu=menu+1;
Alarm Code
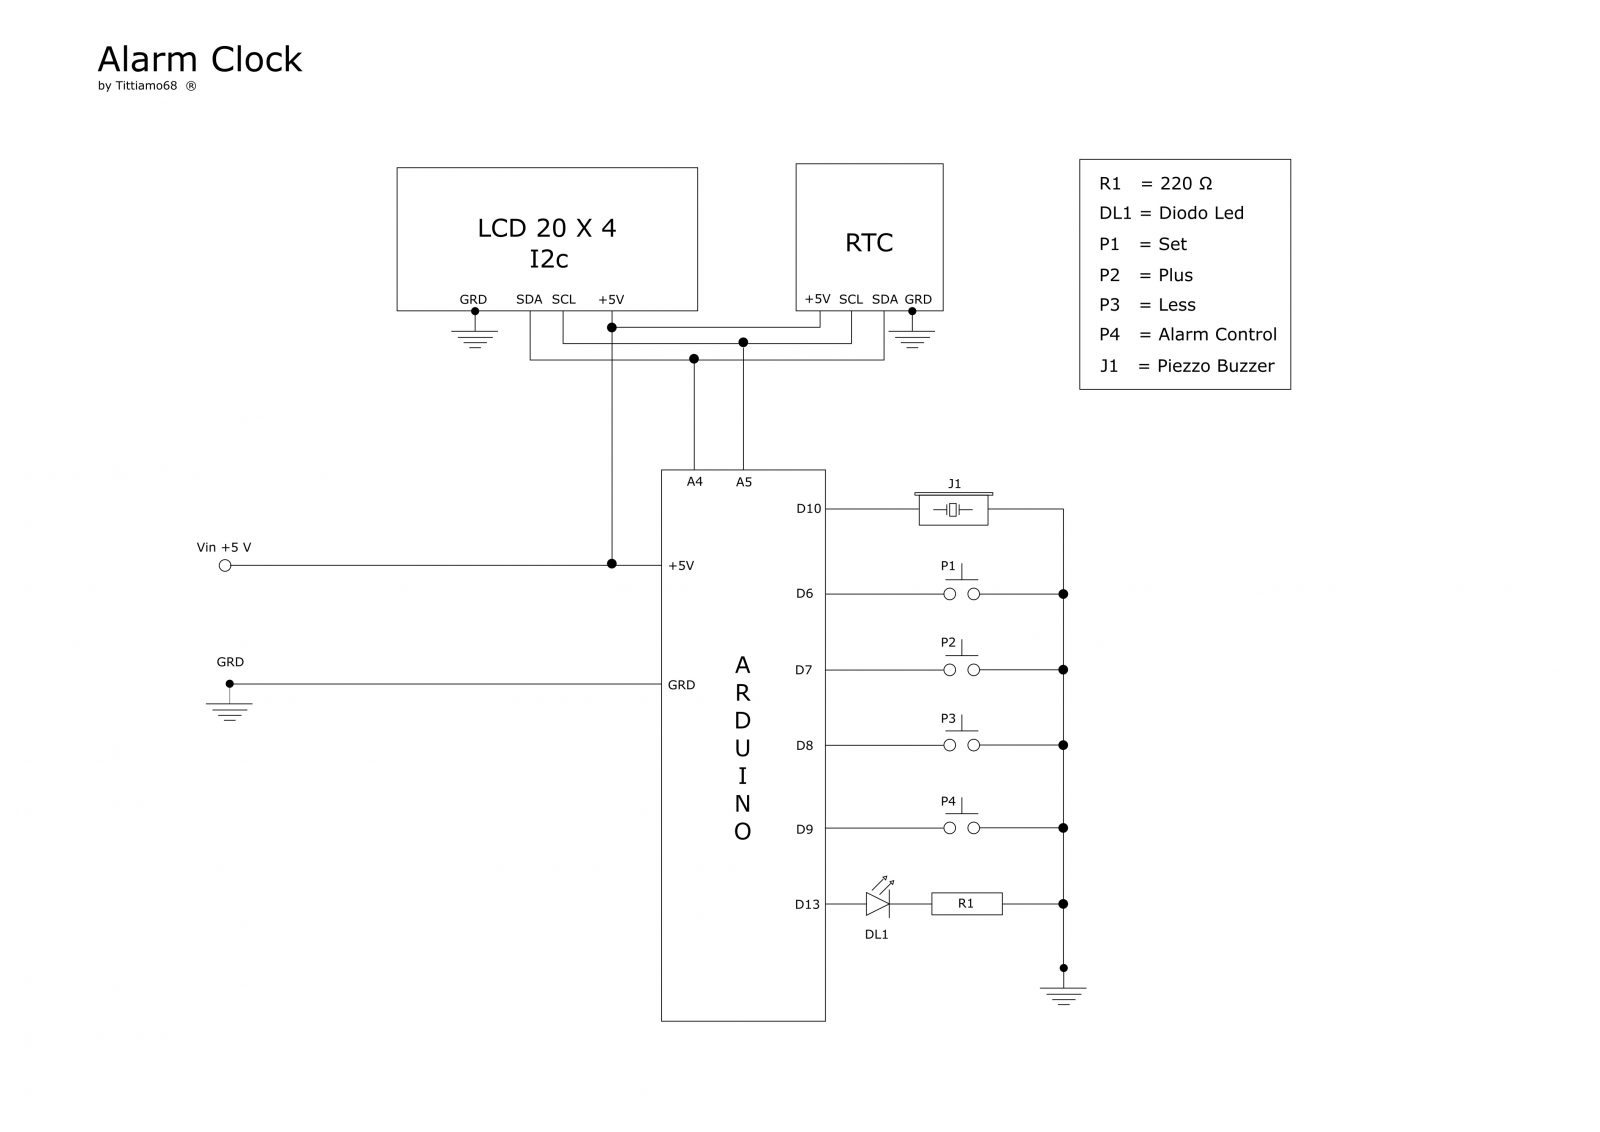
The activation and deactivation of the alarm clock is controlled by the “P4” button, line 444 “void Alarm()”.
To enter the alarm settings, you must use the “P3” “P2” buttons together, line 81 “if((digitalRead(P2)== LOW)&&(digital Read(P3)== LOW))”.
When the alarm is not set, the bottom of the display will show “Alarm Off” when the alarm is active, it shows the time that has been set.
At the scheduled time, the display flashes, the LED lights up, and the buzzer sounds two tones.
To turn off the alarm, you have to act on the P4 button, or, after a minute, it turns off alone
I am attaching the electric schematic and the layout Fritzing
Schematics
Read More: Build A Wake Up Alarm Clock Using Arduino
- How do I activate the alarm?
The activation and deactivation of the alarm clock is controlled by the P4 button. - What combination of buttons sets the alarm?
To enter the alarm settings, you must use the P3 and P2 buttons together. - Does the alarm require external pull-down resistors?
No, the author removed the resistance to pull down and uses the pullup resistors of Arduino instead. - What happens when the scheduled alarm time arrives?
At the scheduled time, the display flashes, the LED lights up, and the buzzer sounds two tones. - How can I turn off the alarm manually?
To turn off the alarm, you have to act on the P4 button. - Will the alarm stop automatically?
Yes, after a minute, it turns off alone. - What does the display show when the alarm is not set?
When the alarm is not set, the bottom of the display will show Alarm Off. - What code change was made to support the new components?
The code logic conditions were reversed to use pinMode with INPUT_PULLUP for the buttons.