Those of us who have small garages know the frustration of parking a little bit too far in or a little too far out and not being able to walk around the vehicle. We recently bought a larger vehicle, and it has to be parked perfectly in the garage to walk around the front and back.
To appease my frustration I decided to design a device that would allow me to park in the exact spot every time. I love working with Arduinos, leds, sensors, and nearly anything else electronic, so I knew from the start that it would probably end up as a contraption with an Arduino inside and a bunch of LEDs on the front!
I tried my best to document every step of this project well, but please note that it has some complicated, tight soldering; it probably shouldn’t be your first project.
Step 1: You Will Need…
All of these materials are cheap and easily available. I’m not affiliated with any of these suppliers, they’re simply where I bought the supplies.
Materials:
- 1x 2×4 – at least 8″ long
- 8x Philips Screws – Preferably 1″ Long
- 1x Power Supply – 5 volt, 850mA Here
- 1x Arduino Pro Mini – 5 volt, 16MHz Here
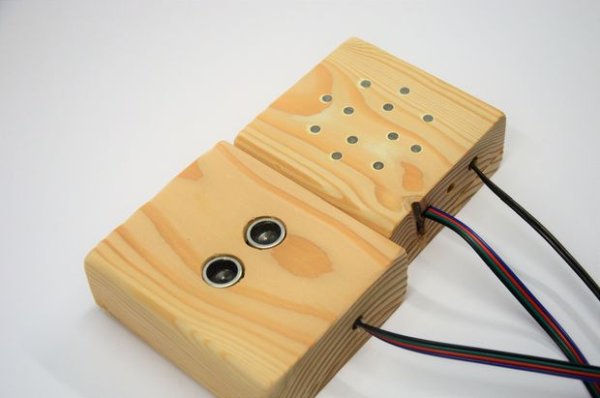
- 1x HC-SR04 Ultrasonic Distance Sensor Here
- 12x Through-Hole Resistors – 220 ohm, 1/4 watt Here
- 8x Green LEDs – 5mm Here
- 4x Red LEDs – 5mm Here
- 1x Tactile Pushbutton – 6mm Here
- 3x Four Conductor Wire Sold by the Foot – 22 gauge Here
- 1x Stranded Wire – 28 gauge Here
Tools:
- Wire Stripper
- Bandsaw
- Soldering Iron
- Solder – I use 60/40 Rosin Core
- Hot Glue Gun
- Speed Square
- Stick Glue
- Philips Screwdriver
- Pencil
- Drill
- 7/64″ Drill Bit – this depends on the size of your screws
- 3/16″ Drill Bit
- 1/4″ Drill Bit
- 1″ Forstner Bit
- Computer with the Arduino IDE Download Here.
- FTDI Programmer Here
Read more: Arduino Parking Assistant