SOS is the commonly used description for the international Morse code distress signal (· · · — — — · · ·). [read more on wiki]
Requirements:
1) Arduino
2*) 8 Ω speaker
3*) 150 Ω or similar resistor
4) 5mm RED LED
5) Hook-up wires
6) Any breadboard
* Ω = Ohms
Step 1: Schematic
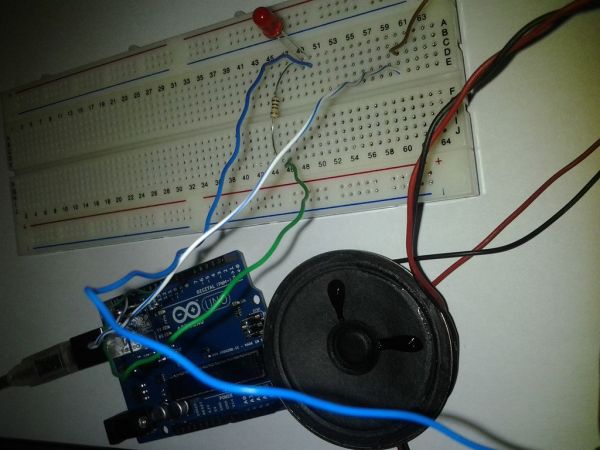
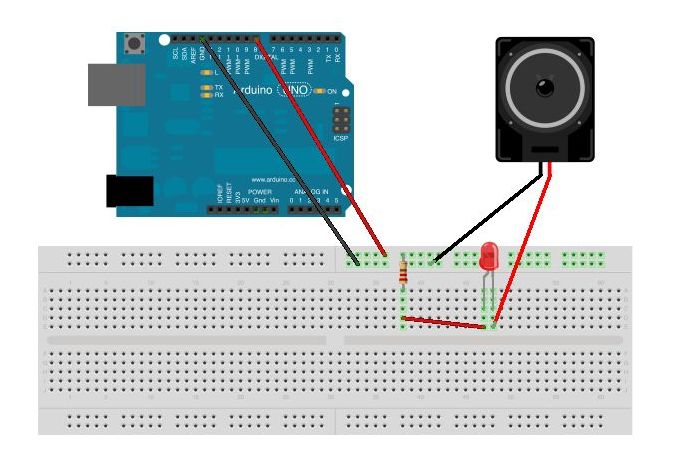
Hook-up wires as shown (original pic here). Make sure that LED’s anode and cathode correctly connected. [read more on wiki]
Step 2: Code
/*
  SOS signal

  Created by Vaidotas on 4/16/2012.
  Copyright (c) 2012 http://www.instructables.com/id/Arduino-SOS-signal-with-8ohms-speaker-LED-blinki/
*/

int pin = 8;
int pause = 100;
int note = 440; // music note A4

void setup()
{
  // no need
}

// SOS signal
void loop()
{
  threeDots();
  threeDashes();
  threeDots();
  delay(3000);
}

// three short signals
void threeDots()
{
  for (int i=0; i<3; i++){
    tone(pin, note, 100);
    delay(200);
    noTone(pin);
  }
  delay(200);
}

// three long signals8
void threeDashes()
{
  for (int i=0; i<3; i++){
    tone(pin, note, 300);
    delay(400);
    noTone(pin);
  }
  delay(200);
}2*) 8 Ω speaker
3*) 150 Ω or similar resistore


