
Summary of Arduino Servo Basic Code
This tutorial explains how to connect and control a servo motor using an Arduino. It provides wiring instructions, connecting the signal wire to digital pin 9, and includes C++ code to sweep the servo between 0, 90, and 180 degrees with one-second delays. The project demonstrates basic library usage for servo movement.
Parts used in the Arduino Servo Basic Project:
- Arduino
- Servo Motor
- Jumper wire
In arduino projects, you might add servo to your projects. This short tutorial, show you the basic how arduino and servo works together.
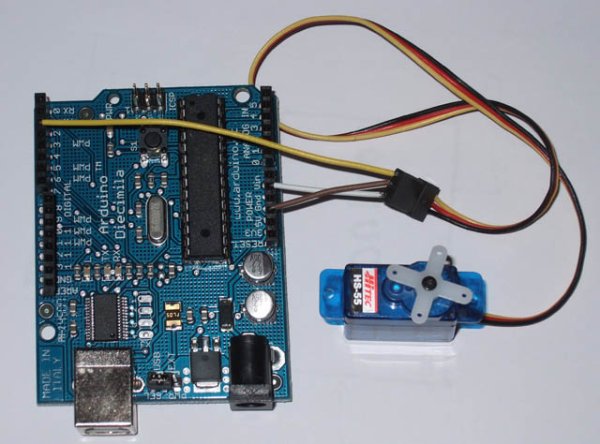
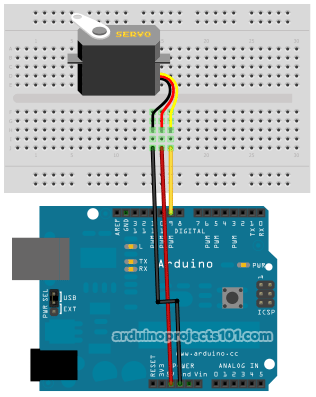
Instruction;
1) Connect all jumper wire as shown in diagram.
2) Connect the signal wire from servo to digital pin 9.
Upload this code to your arduino
/*
  Servo Basic
  Understanding the basic of servo in arduino projects. Sweep servo to 0, 90, 180, 90 and 0.

  Coded by: arduinoprojects101.com
*/

// include the library code:
#include <Servo.h>

Servo myservo;  // create servo object to control a servo

void setup(){
  myservo.attach(9);  // attaches the servo on pin 9 to the servo object
}

void loop(){
  myservo.write(0);     // sets the servo at 0 degree position
  delay(1000);          // waits for the servo to get there
  myservo.write(90);    // sets the servo at 90 degree position
  delay(1000);          // waits for the servo to get there
  myservo.write(180);   // sets the servo at 180 degree position
  delay(1000);          // waits for the servo to get there
  myservo.write(90);    // sets the servo at 90 degree position
  delay(1000);          // waits for the servo to get there
}
Servo cable have 3 wire, make sure you connect it properly;
Major Components in Project
Parts List;
1) 1x Arduino
2) 1x Servo Motor
3) Jumper wire
1) 1x Arduino
2) 1x Servo Motor
3) Jumper wire
For more detail: Arduino Servo Basic Code
-
How do you connect the servo signal wire?
Connect the signal wire from the servo to digital pin 9. -
What is the first step in the instruction list?
Connect all jumper wires as shown in the diagram. -
Which library must be included in the code?
You must include the Servo.h library. -
Does the code make the servo move back and forth?
Yes, it sweeps the servo to 0, 90, 180, 90, and 0 degrees. -
How long does the code wait between movements?
The code waits for 1000 milliseconds (one second) between positions. -
How many wires are in a servo cable?
A servo cable has 3 wires. -
What happens if the servo cables are not connected properly?
The tutorial warns to ensure they are connected properly but does not specify the exact failure outcome.
