This is a relatively simple controller for controlling equipment in your home.
At the moment I control my central heating, security and lighting.
By sending commands from my home computer.
My homeeasy central heating controller hack.
http://www.instructables.com/id/BampQ_homeeasy_home_automation_central_heating_c/
I am also able to login remotely from the internet to control the equipment at home connected to this controller.
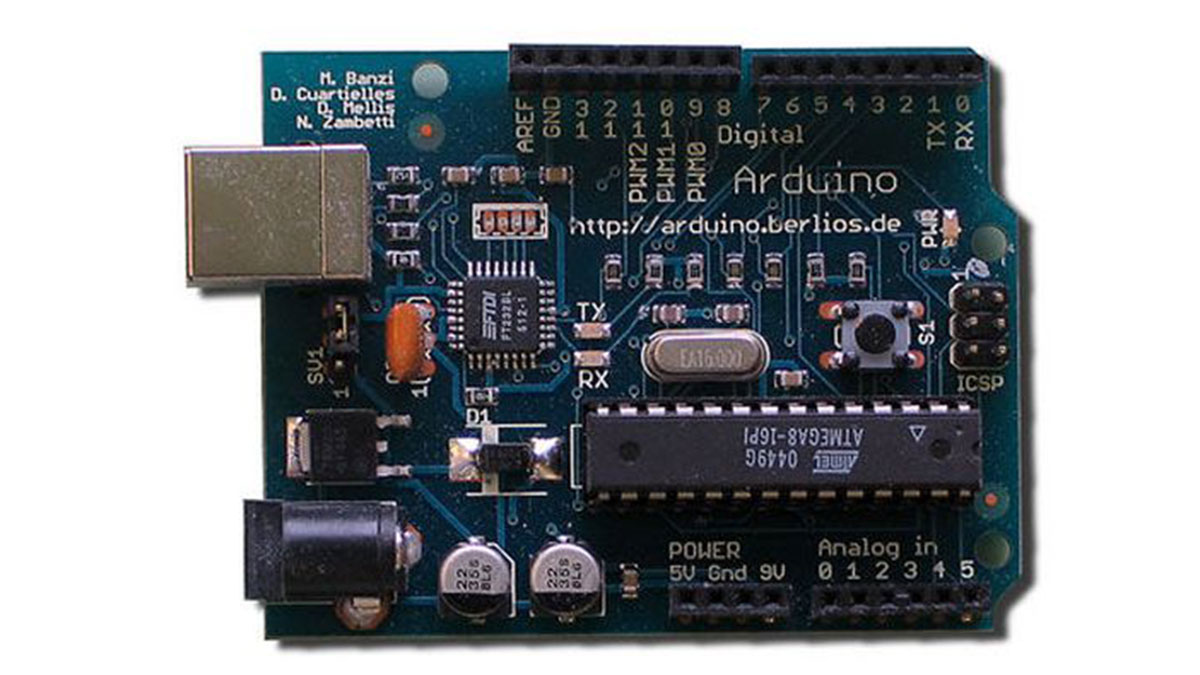
This project is built around an Arduino board.
The arduino board is a hardware interface allowing you to control and monitor hardware devices with your computer.
And the homeeasy home automation controllers available from B&Q.
These are basically plug-in module which allows you to switch devices on and off using a remote control.
The idea behind this project was. I wanted to be able to login to my home computer and send commands that would allow me to turn lights on remotely.
Or have the computer do it automatically at a set time or when it gets dark.
Step 1: Parts needed
1 arduino board.
1 homeeasy controller – part number HE300
1 prototype board – Vero board
10 resistors – 47 ohm
10 led’s
4 opto isolators – RS part 308-613
Some ribbon cable.
a strip of pins to connect to the headers on the arduino board.
1 box – to put it all in.
some HE302S – remote control socket
Tools
Soldering iron
Solder
Cutters
Step 2: Basic principle
Hardware
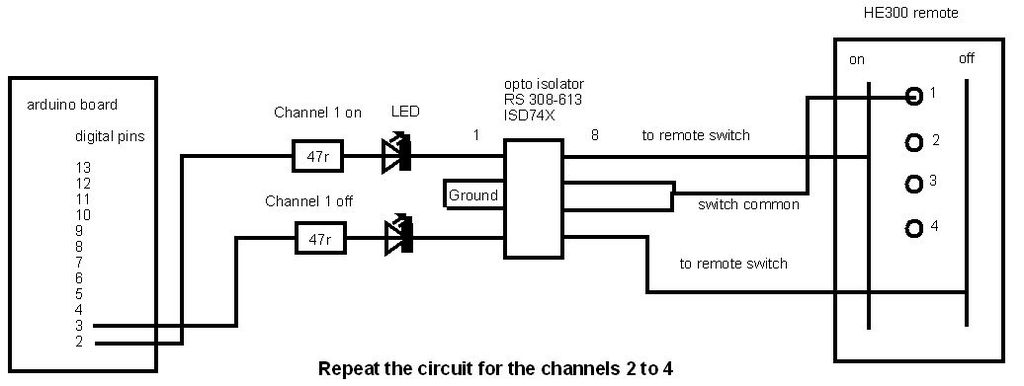
Basically the arduino board when programmed will switch the digital outputs high.
Which will send 5 volts through the resistor and light the led’s.
Which will activate the opto isolator which will connect the contacts on the remote control.
which will send the comand to the remote control sockets
And turn on or off the lights, heating or anything you want.
this circuit shown is for the first on and off switches.
just repeat the circuit for the following channels
software
I programed the software so when I pressed (H) in the terminal the arduino board will send a 1 second pulse to my remote control and switch my heating on.
when I press(h) the board will send a 1 second pulse my heating switches off.
(S) for security on
(s) for security off
(G) garden lights on
(g) garden lights off
and so on this can be changed to any button you want
Step 3: Building the board
The board I built on some prototype project board available from most electronic stores.
It was just a matter of soldering on the components as show in the circuit diagram.
And making sure there were no short circuits.
the first led connects to pin 1 on the opto isolator, led 2 connects to pin 4 on the opto isolator.
pins 2 and 3 are then connected to ground. which is next to digital pin 13 on the arduino board.
opto isolator pins 6 and 7 are connected together and go to the center contact on the remote control for the first on off buttons.
opto isolator pin 8 goes to the left track on the remote.
pin 5 goes to the right track on the remote.
and then it’s just a matter of repeating the circuit for the other channels.
1 homeeasy controller – part number HE300
1 prototype board – Vero board
10 resistors – 47 ohm
10 led’s
For more detail: Arduino Home automation