
Summary of Proximity Sensing Origami Flower using Arduino
This project transforms traditional origami into interactive art by integrating an Arduino and Bare Conductive paint. The resulting "ProxFlower" uses proximity sensing to trigger a vibrating motor when a hand approaches, causing the flower to wiggle. This guide details the process of folding the paper, applying conductive paint, and wiring the electronic components to create a responsive, animated craft.
Parts used in the Proximity Sensing Origami Flower:
- Origami Paper (or printer paper cut into a square)
- Wire Stripper
- Pliers
- Scissors
- Paper clip
- Copper wire
- Electronics prototyping breadboard
- Arduino board
- Arduino sketch software
- Capacitive Sensing Arduino library
- Small vibrating motor (from a cell phone battery)
- Several 10M Ohm resistors
- Bare Conductive paint
- Paint brush
- Computer for loading code onto Arduino
- Optional LED
Origami is the traditional Japanese art of paper folding. In this project, with a little help from an Arduino, you can bring your origami into the 21st century and make it an interactive art!
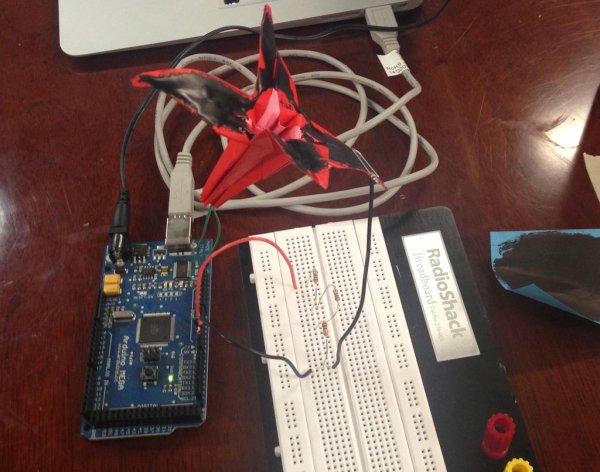
The result shown here uses Bare Conductive paint to give an origami flower proximity sensing powers. When you put your hand close by, it triggers a small vibrating motor, and the flower wiggles around to say “hello!”.
Submitted by Ace Monster Toys Hackerspace in Oakland, CA for the Instructables Sponsorship Program
Code:
 ProxFlower.ino.txt
Step 2: Make and Prepare An Origami Flower
The first step is to make an origami flower or other origami/paper object to which you want to add proximity sensing powers.
The flower below was created by following the instructions presented at this link. It is the traditional way to fold a Lily.
Once the flower is completed, cut off the bottom of the flower to make a place to thread the vibrating motor leads through.
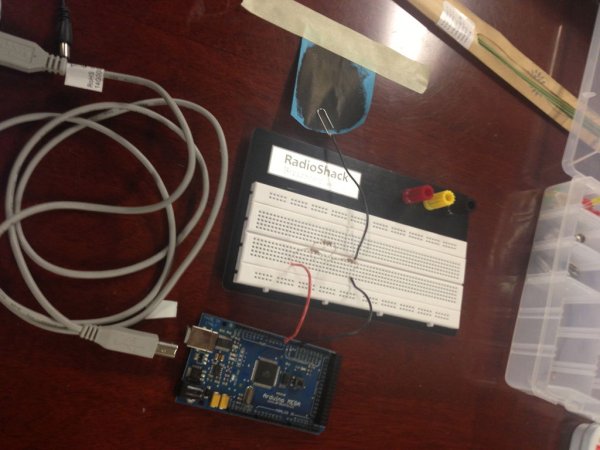
Finally, paint the petals with conductive paint, making sure that the entire painted surface is continuous across the petals. As I did this project, I painted the flower fairly late in the process and used a painted post-it note to test out the circuit first, so you will see the flower as unpainted through most of the Instructable.
Tools & Materials
- Origami Paper (or printer paper cut into a square)
- Wire Stripper
- Pliers
- Scissors
- Paper clip
- copper wire
- electronics prototyping breadboard
- arduino board and arduino sketch software
- Capacitive Sensing arduino library (from here)
- small vibrating motor as from a cell phone battery
- Several 10M Ohm resistors
- Bare Conductive paint
- paint brush
- computer for loading code onto Arduino (not shown)
- Attached Arduino sketch (rename from ProxFlower.ino.txt to ProxFlower.ino)
- OPTIONAL: for more flower flair, add connect an LED in addition or instead of the motor
For more detail: Proximity Sensing Origami Flower using Arduino
-
How does the origami flower interact with users?
It uses Bare Conductive paint to sense proximity; when a hand is close, it triggers a vibrating motor to make the flower wiggle. -
What is the first step in making the project?
The first step is to fold an origami flower or other paper object using traditional methods, such as the instructions for a Lily. -
How should the bottom of the origami flower be prepared?
You must cut off the bottom of the completed flower to create a place to thread the vibrating motor leads through. -
What specific type of paint is required for the circuit?
The project requires Bare Conductive paint to coat the petals, ensuring the entire painted surface is continuous across them. -
Which Arduino library is necessary for this project?
You need the Capacitive Sensing Arduino library to enable the proximity detection functionality. -
Can the flower be modified to include a light source?
Yes, you can optionally connect an LED in addition to or instead of the vibrating motor for more flair. -
What kind of motor is used to make the flower wiggle?
A small vibrating motor, typically sourced from a cell phone battery, is used for the movement.
