– Arduino Uno ($25)
– 32 x 16 LED Matrix ($20)
– Breadboard ($5)
– Jumper Cables ($5)
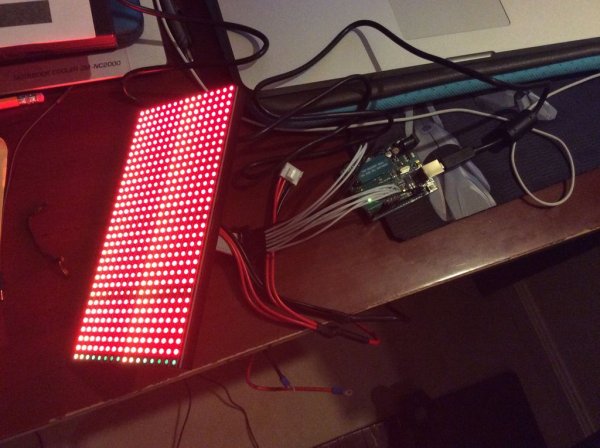
– USB A to B Cable ($3)
– Computer
– 5V 2Amp Power Supply ($10)
– A basic understanding of coding in C
In order to create this project, many physical materials are necessary, a lot of which will not be found lying around at home. In order to do this project, you should go out to computer stores or look online for these products. Keep in mind that you can upgrade to larger LED boards or faster arduinos, but that would require some modification of this tutorial as the coding, wiring, etc, changes with the addition of different products. Overall, this project is a fun way for you to practice your engineering, circuitry, and computer science skills while making a device that shows off your music taste in a new light.
– Arduino IDE (arduino.cc)
– Processing Software (processing.org)
– Soundflower (https://rogueamoeba.com/freebies/soundflower/)
– Arduino Libraries
As project is very heavy in coding, it will be necessary to download certain pieces of software to control the Arduino, rout the audio, and perform manipulations on the input tee sound waves. If unfamiliar with these programs, especially the Arduino IDE and the Processing Software, feel free to look ate the documentation beforehand, for help with the syntax and functions of the language. In both of these applications, the language is very similar to c and the logic behind the coding is relatively simple, so the task should not be too hard for someone with a basic understanding of computer science.
Step 3: Getting the Libraries
– download the two necessary libraries:
https://github.com/adafruit/RGB-matrix-Panel
https://github.com/adafruit/Adafruit-GFX-Library
This is an important step because the libraries are what is necessary to control the lighting on the board. Libraries are large masses of code written by others that are meant to help make your coding more efficient, so that you do not have to create your own functions. In this case, these libraries were written to be able to control the LED panel. This saves us a great deal of time, because now we can draw something on the board with a few lines of code instead of the countless lines of code that layout the definition of drawLine in the library. In order to make these libraries work, you must place these libraries under documents/Arduino/libraries in your computer and restart your programs to allow it to load. Remember to use #include and replace libraryname.name with the correct name of the library, in order to allow the code to be compatible with the library. What #include essentially does is it copies and pastes the code found in the library to the very front of the document, giving you access to the numerous functions, variables, and other features that the library provides.
Read more: LED Wave Display