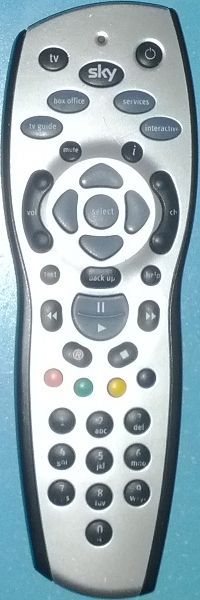
We have kids. I love them to bits but they keep hiding the remote control for the satellite and TV when they put the children’s channels on.
After this happening on a daily basis for several years, and after my darling wife allowing me to have an Arduino for Christmas I decided that it was time to make something useful (in her eyes!) with the Arduino.
So here we have the culmination of that: a web-based interface to the Arduino that replaces my remotes and is accessible from my internal network.
When I figure out why my ethernet shield won’t allow my arduino to keep a sketch I will write a new sketch that uses the ethernet shield as the web server, meaning I don’t need apache installed on my computer. Stay tuned, I will get there!
Step 1: Prerequisites
Hardware:
Arduino side:
Arduino – I am using an Arduino Uno R2
Breadboard – your local electronics shop, or the kitchen if you want an authentic breadboard
Mounting enclosure – I used an old plastic case with a transparent lid
Components:
Infrared LED – I desoldered one from a broken remote control (thanks kids!)
Infrared Receiver – I got mine from a magic eye remote extender
Transistor – I used a BC547
Resistor – I used a 1.5k ohm variable resistor set to 1k ohm
Breadboard jumper wires – I got mine from a solid core RJ45 cable reel
Computer side:
Computer to use as server
USB lead to Arduino
Software:
Arduino software – from arduino.cc
irremote library – from http://www.arcfn.com/2009/08/multi-protocol-infrared-remote-library.html (thanks Ken, great work!)
Apache web server with PHP installed – apache.org
Internal IP address – mine is 192.168.0.9
Picture of your remote control – google or a picture taken on your camera. I saved mine at 200×600 resolution
Step 2: Building the board
Arduino pins used for this project:
5v, ground
Digital pins 3, 11 (pin 3 controls the IR LED, pin 11 connects to the IR receiver)
Step 3: Schematic
This schematic is very simple, 4 components and 6 wires.
IR LED connections:
Connect one of the legs of the resistor to Arduino digital pin 3
Connect the other leg of the resistor to the base pin of the transistor (the middle leg in my case)
Connect the emitter of the transistor to ground
Connect the collector of the transistor to the negative leg of the LED (short leg, flat side of the LED)
Connect the positive leg (long leg, curved side) of the LED to the 5v pin
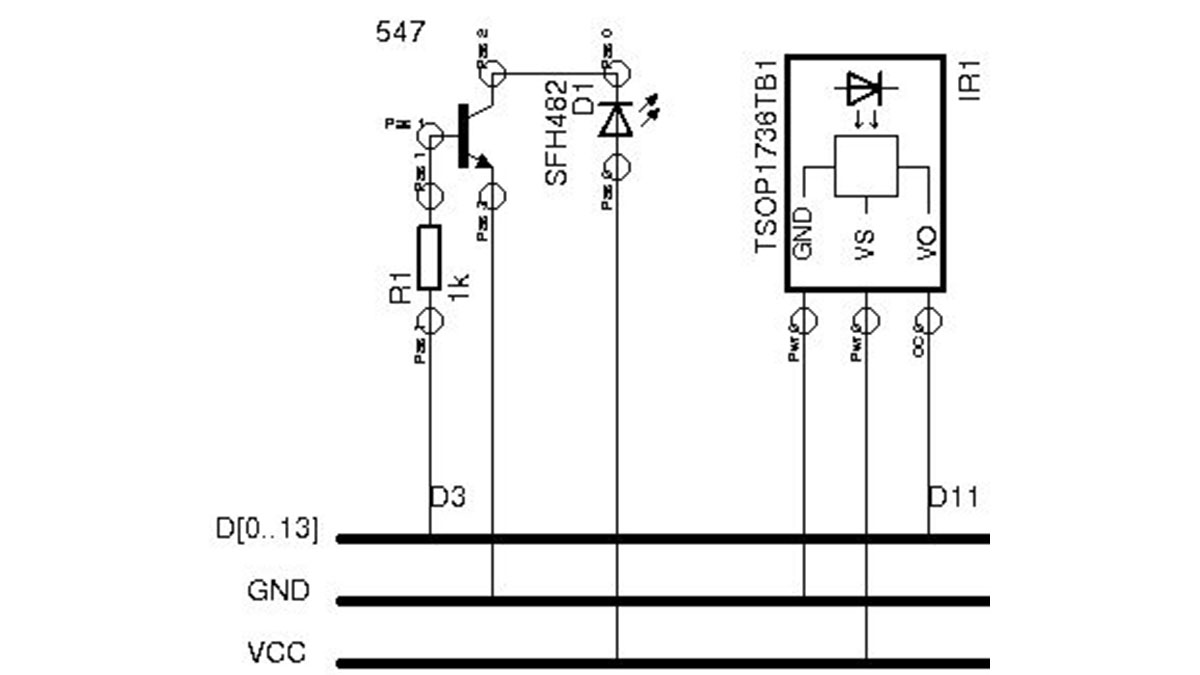
IR receiver connections (you would need to find the pinout for your particular IR receiver):
GND pin to ground
VS pin to 5v
VO pin to Arduino digital pin 11
Step 4: Add irremote library to the Arduino software
irremote is a great library written by Ken Shirriff and is available from his blog at http://www.arcfn.com/2009/08/multi-protocol-infrared-remote-library.html
Download the library from http://arcfn.com/files/IRremote.zip and install it as you would any other library for the arduino.
His blog has a lot of helpful information about the library and how to install it.
Step 5: Record the codes from your remote controls
Pressing every button on the remote control, saving the output string and mapping it to the virtual remote control.
You only need to do it once, expect to take approximately 20 minutes or so.
Start a text editor to save your output.
Create a new document and type out every button on your remote control, one per line:
Power
Up
Down
Left
Right
.. et cetera
Start the Arduino IDE and click on “Files->Examples->IRremote->IRrecvDump” and upload it to your Arduino.
This example will dump the remote codes to the serial port.
Arduino
Breadboard
Mounting enclosure