We can say that an Interrupt is an automatic transfer of software execution in response to a hardware event that is asynchronous with the current software execution. As it’s name says, interrupts, “interrupt” the normal program flow to perform an action (run another code block, function, etc.) and return back to the normal program flow when the action is completed. Interrupts can be established for events such as a counter’s number change, a pin changing state (from low to high or high to low), serial communication receiving information, or the Analog to Digital having established a conversion, etc., depending on what is supported by the microcontroller you are working with. For today’s tutorial, we will focus on interrupts as a result of pins changing state and how these can be used on the Arduino.
To monitor their digital pins for changes, microcontrollers by default use a technique generally referred to as “polling“, which means they constantly check the digital pins to know if any change has occurred. This usually takes a lot of the microcontroller’s resources and reduces its response time which may not be a problem in most applications but could be important in time-critical ones. One of the solutions usually adopted in scenarios where all the negatives of polling need to be eradicated is the use of external Interrupts. Interrupts provide the microcontrollers with a way of multitasking such that a particular digital pin does not need to be continually polled, as the pin would by itself signal the microcontroller and immediately pause the operations when a change occurs. Asides in time-critical applications, where the microcontroller needs increased response rate, Interrupts are widely used in power saving applications for all kind of device, from smartphones and their power button to your PC and the spacebar and the application goes on.
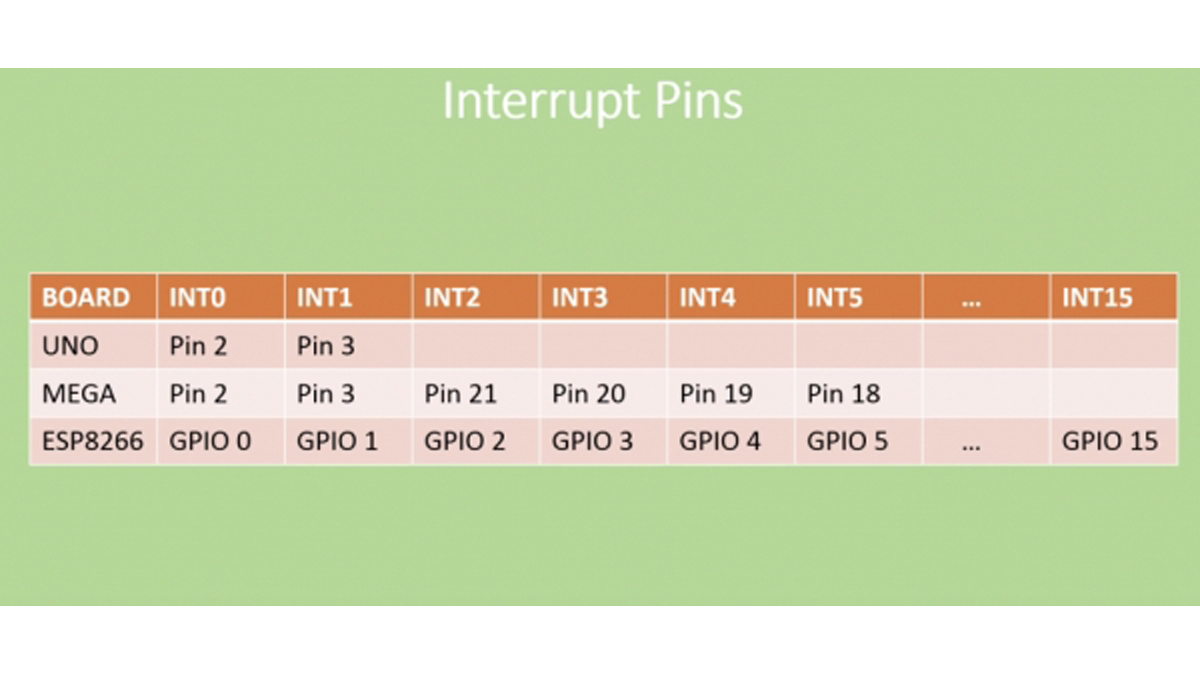
The number of external interrupts possessed by microcontrollers differs from one microcontroller to the other. For example, the Arduino boards, from UNO to Duemilanove, have only two interrupts which are located on digital pins 2 and 3. Other boards like the Arduino Mega has 6 while the esp8266 (ESP 12e) has about 16 interrupt pins.
For today’s tutorial, We will look at how the interrupt can be used in an Arduino project and as an example, we will connect a switch to one of the interrupt pins on the Arduino and use it to control a LED which is turned on/off when the interrupt is triggered.
Read more: USING INTERRUPTS WITH ARDUINO