Summary of Turn your Arduino into the best gift of all
This project describes making a six-point snowflake LED PCB gift (ArduFlake) combining PCB design, etching, and soldering an Arduino-controlled LED array. It covers software used, parts and supplies, PCB artwork preparation via Eagle and Paint.Net, etching with ferric chloride, cutting and drilling the board, and assembly for a personalized, glowing snowflake.
Parts used in the ArduFlake:
- Arduino or Arduino clone
- LEDs (Microtivity LEDs recommended)
- Resistors
- 0.1 male headers
Please vote for me in the Holiday Gift contest and the Make it Glow contest!
First, this started out as a gift, and not an instructable. So please excuse some hand waving here and there as I do not have any pictures of the etching and drilling portions.
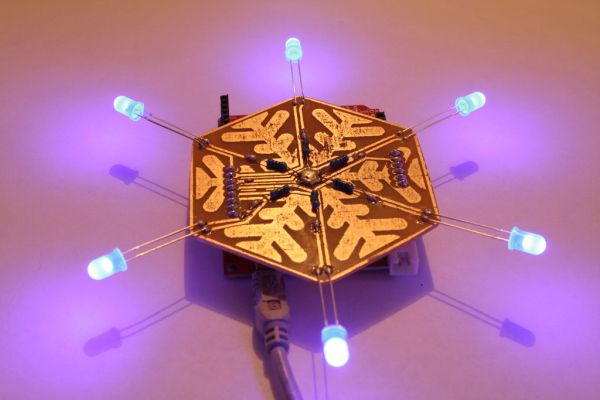
Second, this is for my dear dear wife. Yep, I got lucky enough to have a wife who likes to solder. We found out this summer when out of the blue she asked me if she could solder my RockSat PC board. We also are huge fans of snow flakes. We even had a snow flake themed wedding! Finally, this our 6th year of marriage, so what could be better than a 6 pointed snow flake!
Ok, so get ready, get set, Lets make one together!
Step 1: Get ready!
Software:
- Eagle CAD (if you design your own)
- Paint.Net (Photoshop or Gimp will work)
- Arduino IDE
- Windows Paint
Parts
- Arduino or Arduino clone
- LED’s. I was quite pleased with Microtivity LED’s.
- Resistors
- 0.1 male headers
Supplies
- Used Avery label paper
- Copper clad board
- Water
- Etchant (I used Ferric Chloride)
Tools
- Soldering iron
- Clothes iron
- Something to cut the PCB (I used a bandsaw)
- Something to drill the PCB (I used a drill press)
- Scissors
Step 2: Design snowflake
NOTE!!
If you like my original design you can skip this step and go straight to etching. I would like to guilt trip you a tad and remind you that every snow flake is unique. Copying violates that, but if you can live with it, so can I 🙂
Ok, so this process is more something that a graphics artist would be familiar with. For simplicity sake I spliced together a video that shows the process.
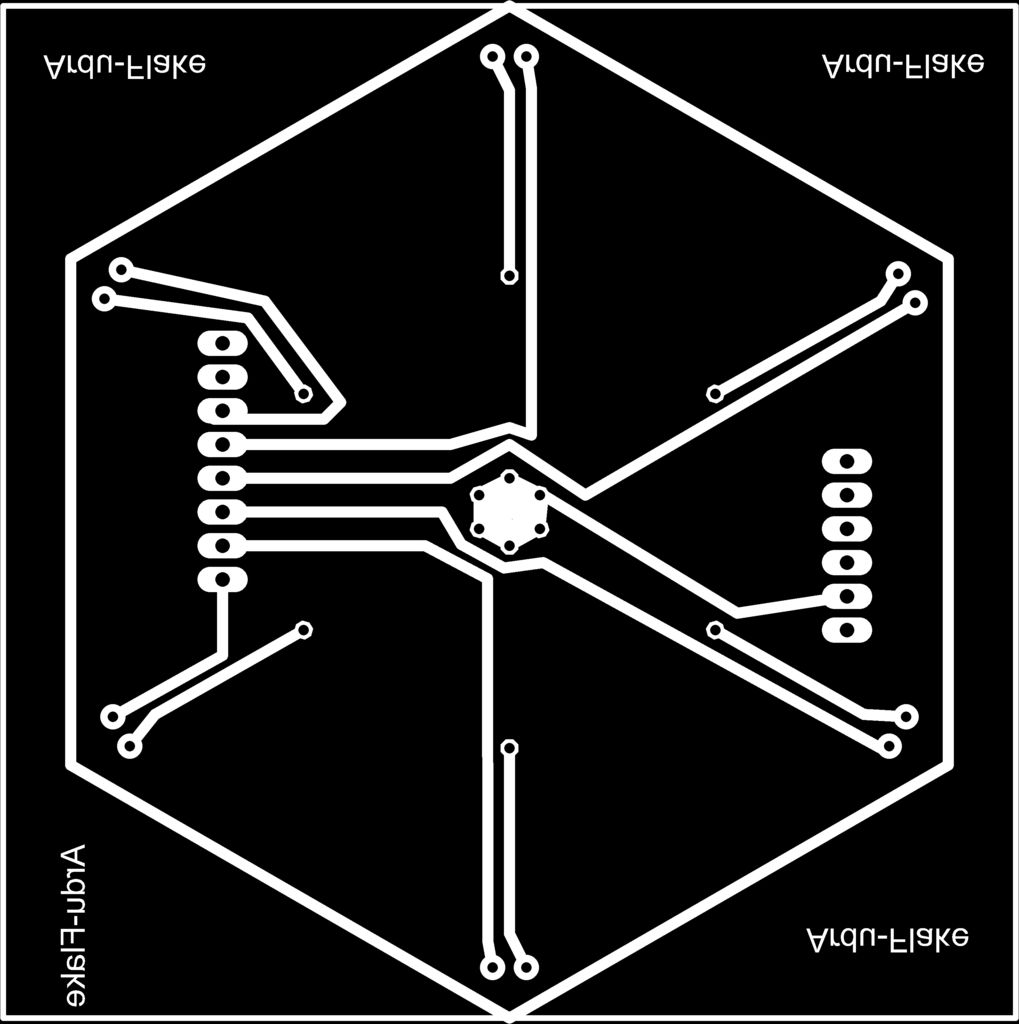
In short…
- Export PCB in eagle to clipboard
- Open paint.net and insert
- Find and open snowflake in Paint.Net
- Resize snow flake appropriately
- Create a new image with 3 layers, the black flake, traces in black, traces in white.
- Layers should go flake, white traces, black traces.
- Use a blur function to widen the white layer.
- Use magic wand to select widened traces.
- Use paint bucket to thicken up those traces.
- Save as bitmap!
 multi.pdf212 KB
FlattenedPDF.pdf163 KB ArduFlake.sch74 KBArduFlake.brd739 KB
- Arduino
- LED’s
- Resistors
- 0.1 male headers
- What software is used to design the ArduFlake PCB?
Eagle CAD is used to design the PCB; Paint.Net, Arduino IDE, and Windows Paint are also used in the workflow. - What LEDs does the article recommend?
The article says the author was quite pleased with Microtivity LEDs. - Can I skip designing and use the original snowflake design?
Yes, the article states you can skip the design step and go straight to etching if you like the original design. - What etchant is used to etch the copper clad board?
The author used ferric chloride as the etchant. - What supplies are needed for transferring artwork to PCB?
Used Avery label paper, copper clad board, water, and etchant are listed for the transfer and etching process. - What tools are required to cut and drill the PCB?
The article lists a bandsaw for cutting the PCB and a drill press for drilling. - How are traces prepared graphically before etching?
The workflow exports PCB from Eagle to clipboard, imports into Paint.Net, layers the snowflake and traces, blurs and widens the white trace layer, selects and thickens traces, then saves as bitmap. - Is soldering required for this project?
Yes, soldering is required to assemble the LEDs, resistors, and headers onto the PCB; a soldering iron is listed in the tools.