Summary of Totally Lit – Programmable RGB LED Acrylic Sign
This article details a DIY project creating a programmable RGB LED acrylic sign. The creator uses a laser cutter to engrave and cut clear acrylic, then installs an Arduino Nano with addressable LEDs at the edge. A push button toggles between various light patterns, including scrolling effects and solid colors like Canadian flag themes. The assembly involves mounting the acrylic on a scrap wood base with hot glue and powering the system via a 5V AC adapter.
Parts used in Totally Lit - Programmable RGB LED Acrylic Sign:
- Laser cutter/engraver (Trotec 300)
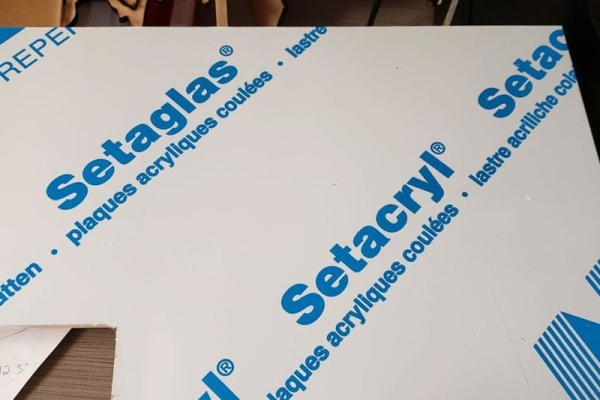
- Clear acrylic sheet (.25" or 3/8" thickness)
- Adobe Illustrator software
- Programmable RGB LEDs
- Arduino Nano
- Push button
- Wiring
- Scrap wood
- Screws or glue
- AC/DC power adapter (5V)
- Spray paint (optional)
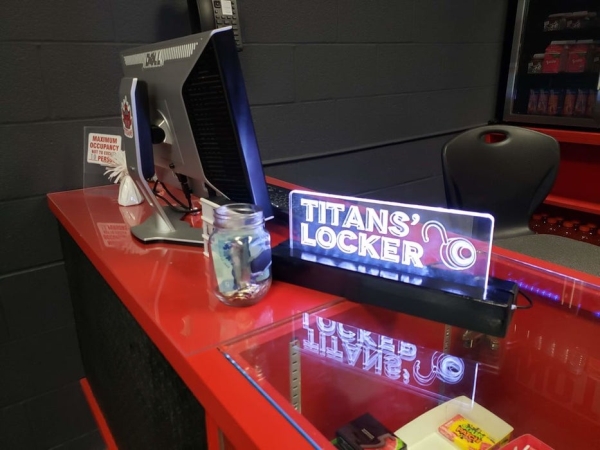
Been playing around with the laser cutter/engraver, and really fell in love with engraving in to clear acrylic and shining a light source from the edge. The thickness of the acrylic being used is a .25″ sheet, which cuts really cleanly by the laser cutter/engraver (the one that I had access to is the Trotec 300). Started off with a simple OPEN sign with a single light colour source, and have moved on to using programmable RGB LEDs
Things needed for this Instructable:
- access to a laser cutter/engraver (however you could get the same effect with clear acrylic and fine use of sand paper – though it’s a lot more work this way)
- Software to design the vector image (I used Adobe Illustrator)
- RGB LEDs
- Arduino Nano
- Push button
- Wiring
- Wood (scraps were used in this case)
- screws/glue
- AC/DC power adapter (5V was used here – I repurposed old AC adapters from other devices that have been long past their use, such as old mobile phones and their charging adapters that were included with them)
- spray paint (optional)
Step 1: Design and Laser Cut
Designed the sign using various techniques in a vector based program (such as Illustrator), and then made sure to set the proper line widths and colours (in Illustrator, with the Trotec laser cutter, you have to set the document to RGB colours, and then set the cut line widths to .001″). Using various colours to define cut versus engrave (red for full cut, blue for half cut, and black for engrave), set the laser cutting software to the specs as shown in the screen capture of the laser cutter materials setup page. The Adobe Illustrator file is included here.
The acrylic being used here is 3/8″ thick (very sturdy), which gives it a lot of room for the LEDs to shine and bounce within when placed at the edge of the acrylic.
Step 2: Prepare LEDs and Program
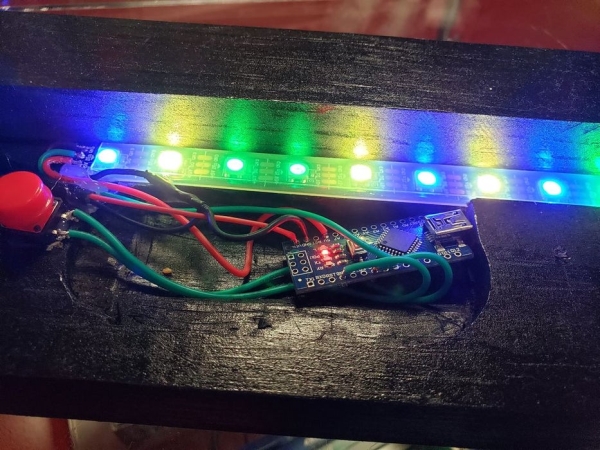
Using an Arduino Nano, a 5V AC Adapter, a push button, and strip of programmable/addressable RGB lights, set up the system so that output from a digital connection controls each individual LED and it’s brightness. The push button had to be programmed so that it acted as a toggle to increase a counter, which then led to a certain light pattern to be displayed.
The light patterns included in the Arduino source code are the following which are toggled through each button press:
- all red
- scrolling red to the right
- red, white and red (Canadian colours, eh?)
- scrolling red to the left
- randomized rainbow colours
- all green
- all blue
- all yellow
- all white
Step 3: Putting It All Together

Using some scrap wood, made a base where the LED strip lay flush and had mounts that held on to the acrylic. Used some hot glue to hold it all down. With the AC adapter just needing to be plugged in, Arduino boots up immediately and now you have a totally lit sign!
Please feel free to ask questions here, and I’ll be more than glad to help troubleshoot any issues you might have making your totally lit sign.
Source: Totally Lit – Programmable RGB LED Acrylic Sign
- What software is recommended for designing the vector image?
Adobe Illustrator was used to design the vector image. - How thick should the acrylic sheet be for this project?
The article mentions using a .25" sheet initially and later describes using 3/8" thick acrylic which is very sturdy. - Can I achieve the same effect without a laser cutter?
Yes, you can use clear acrylic and fine sandpaper, though it requires significantly more work. - How do I set line widths in Illustrator for a Trotec laser cutter?
You must set the document to RGB colors and set the cut line widths to .001". - What specific light patterns are included in the Arduino source code?
Patterns include all red, scrolling red, Canadian colors, scrolling red left, randomized rainbow, all green, all blue, all yellow, and all white. - How does the push button function in the circuit?
The push button is programmed as a toggle to increase a counter that changes the displayed light pattern. - What voltage power adapter is required for the Arduino Nano?
A 5V AC/DC power adapter is used, such as repurposed mobile phone chargers. - How is the acrylic mounted to the base?
Mounts hold the acrylic while hot glue is used to secure the LED strip and components to the scrap wood base.