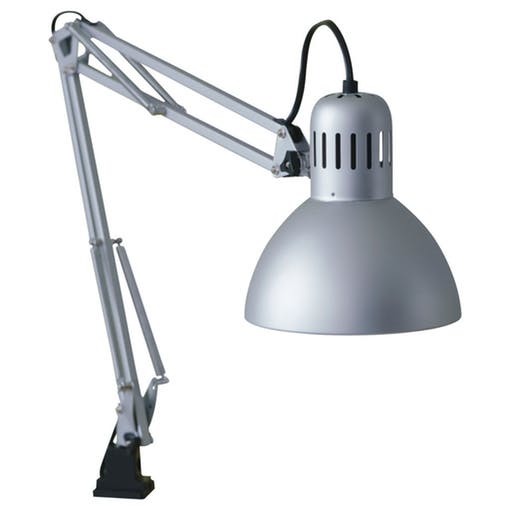
This is first version of my low cost 3d printed robot arm. It is based on Ikea Tertial lamp. I choose it because it has very good kinematic with using springs to unload servos. So you can use different number of springs to achive diffrent lifting power.
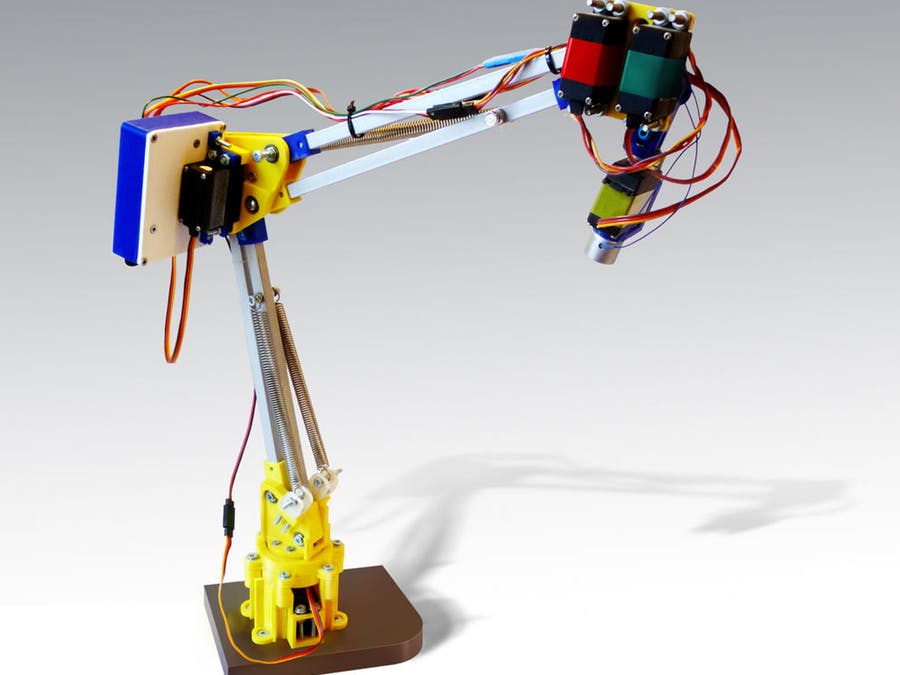
Techinacal specification:
- 5 DOF.
- Full lenght: 690mm
- Lifting power with 4 standart spring: 0.5kg (distance between base and attaching point: 500mm)
You can find some information and download STL files for free at:
Step 1: Let’s get it started!
First of all you should take a look at BOM file and picture to get information about all components.
Your can find all information about infill and quantity of 3d printed parts there. Because Tertiarm use lamp as base you won’t need to print big parts, so I hope it can be printed almost at all 3d printers. When you will be ready to start assembly Tertiarm, you should begin from disassembling lamp. You will need only 4 beam and 4 sping, if you be able to find same beams and springs you can do without buing ikea lamp. After making first prototypes, I have decided to cut all beam to 260mm, but you can choose other lenghth depends on your servo and goals.
- Cut all beam to one lenght.
- You should mount Tip and ServoTip 3d printed parts, as it shown on picture. Be careful about it you should check position of all elements. You will need to use mallet to fit it in place, it should be very tight, but you can also add screw to fix it.
- Fix servo horn on ServoTip.STL with M3 screws (20mm)
Now you are ready to assemble 1 axis.
Step 2: 1 Axis

- You will need to insert servo in MainPart.STL. And fix it with 2 scews.
- Fix MainPart.STL to some peice of wood with 7 screws.
- Insert 6 M3 nuts in BearingTop.STL. If it will be too tight you can heat up nuts.
- Assemble axis as shown on picture using 2 M3 screws (30mm).
- Insert 6 m3 screw (10mm).
- Mount it at MainPart.STL using 6 M4 screws. Make sure you have mount serrvo horn to servo and fix it with m3 screw (30mm) in center hole to servo.
- You have assemled 1 axis!
Read More: Tertiarm – 3d Printed Robot Arm