Use an Arduino MKR1000 to maintain a constant temperature in a charcoal smoker and allow monitoring over Wifi,
Things used in this project
Story
The Backstory
Most serious BBQ smokers know that the best flavor comes from using charcoal to heat their smokers. Propane and electric smokers have better temperature control, but lose that charcoal flavor. As a heat source, charcoal can be a pain. You need to constantly monitor the temperature, adjust the vents to try to get the right temperature, and have to play with it a few times to get it just right. Then, you’ve got to keep doing that every half hour as the charcoal level changes in the smoker. Wouldn’t it be great to just sit back on your couch, enjoying your favorite cold beverage and sporting event on the TV while letting the smoker do its thing?
The Project
Create a controller that monitors the temperature in the smoker and adjusts the airflow to the charcoal to maintain the correct temperature. Also, provide a way to monitor the temperatures of both the smoker and meat probes remotely. This is based on the soon to be released Arduino MKR1000 with built in Wi-Fi and support for charging a LiPo battery.
The Hardware
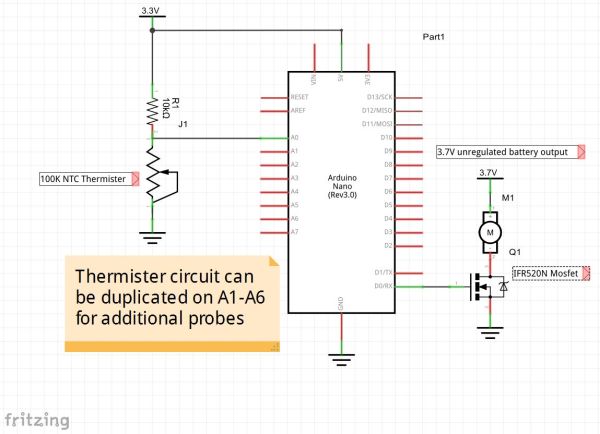
The temperature in the smoke is monitored using a 100K NTC Thermistor in a voltage divider connected to one of the analog inputs of the MKR. This thermistor was chosen as it is used for Prusa RepRab hot ends in 3D printers, so they are widely available and inexpensive. The can be bought already soldered to high temperature silicon insulated wire to make the ideal temperature probe. The thermistor is inserted in a length thin (1/4 inch or smaller) stainless steel tube for physical protection with one end crimped off to close it and the wires secured at the other end using heat shrink.
The voltage divider uses a 10K resister as the other half of the voltage divider. This value was chosen as it is close to the resistance of the 100K NTC thermistor at typical smoker temperatures (225 F). This gives a good range for temperature measurement, providing readings from about 50 F to over 300 F with reasonable granularity.
A0 is used to monitor the temperature. It uses a shorter probe that is placed on the grate inside the smoker. The other analog pins can be used to create more thermistor probes and voltage dividers to be inserted into the meat being smoked to monitor the internal temperature of the meat to know when it is cooked.
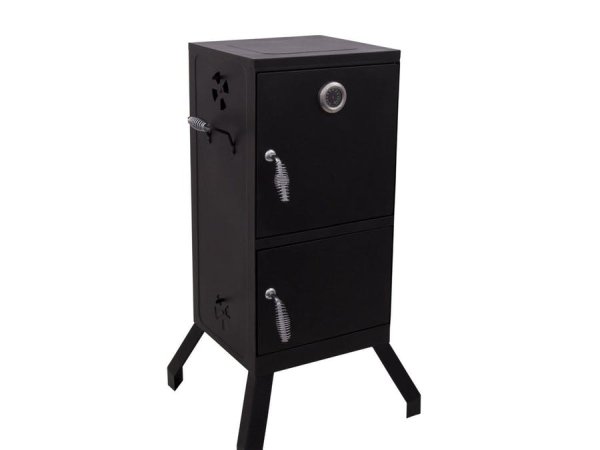
On the other side, a small blower is attached to the vent on the smoker. A small stainless steel dog food dish is attached over the vent on the smoker and the blower is attached to hole in the bottom of the dish. This serves two functions, first to completely cover the air vent, and secondly to provide some thermal isolation between the body of the smoker and the blower. The blower is controlled using a N channel MOSFET. This could be directly wired, but for ease of construction, a MOSFET model was used. The gate on the MOSFET is connected to the Arduino’s digital pin
The Build
For the first implementation, everything is done on a breadboard to keep things simple. The thermistor bridge(s) are easy to wire, the 10K resistor from Vcc (3.3V for the MKR) to one side of the thermistor and the other side goes to ground. Connect a jumper between the center of the bridge and an analog pin on the MKR. Cut a length of tubing to use for the probe, Crimp one end in a vice to seal it. Pliers are then used to fold the corners of the crimped tubing to make a sharper point. slide the thermistor in the tubing till it reaches the end. Slip a piece of shrink wrap over the other end and wires. Apply heat to shrink it down and secure the wires.
The blower side is almost as simple. Secure the leads to the blower to the output terminal block on the MOSFET module observing polarity. Attach your LiPo battery pack and the wires from a JST plug to the power terminal block on the MOSFET module, again observing polarity. Plug the JST plug into JST jack for the battery charger on the MKR. Run three jumpers for Vcc, ground, and the control wire from the pins on the MOSFET board to the MKR. A 10,000 mAh battery was used to provide plenty of battery life with the blower.
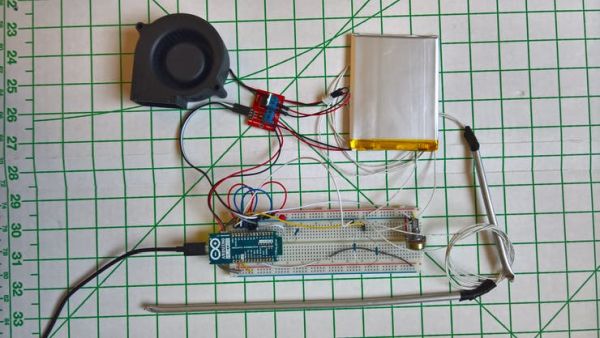
On the breadboard, a couple of items were added that are not in the schematic. There’s a 10K variable resistor which can be used to generate voltages to test the sketch by switching one of the jumpers from a thermistor to the slider on the variable resistor (the ends of the resister are connected to Vcc and ground). There’s also an LED with a 330 Ohm current limiting resister connected to output pin 0 to indicate when the sketch switches the fan on and off.
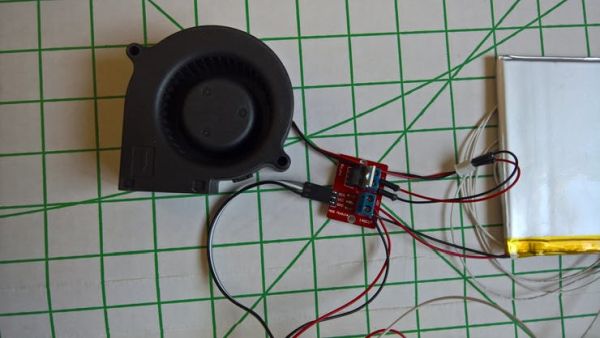 Detail on wiring the Mosfet module, blower and battery
The Software
There are two pieces of software involved. One is the sketch to control the Arduino and the other is a Universal Windows App, so the smoker can be monitored remotely on any Windows 10 device.
The sketch is largely based on a Wi-Fi server sketch in Simon Monks’ book “Programming Arduino Next Steps: Going Further with Sketches” (http://www.amazon.com/Programming-Arduino-Next-Steps-Sketches/dp/0071830251/ref=sr_1_6?ie=UTF8&qid=1459448622&sr=8-6).
It basically creates a simple Web server that serves up one page showing the measured temperatures and allows the target temperature for the smoker to be set. Initialization consists of setting up the Wi-Fi adapter and assigning a fixed IP address in order to know what to connect to when not connected to a computer to see a DHCP assigned address. Pin 0 is set to output. In the loop, it checks if there is a client trying to connect, and if so then serves up the web page. If there is a request, it also checks if it includes the parameter in the url to set the target temperature. It then checks the temperature of the smoker and turns the blower on if it is below target temperature and off if it is above.
Measuring temperature using a thermistor in the voltage divider is relatively simple. First from the analog input reading, we can determine the voltage drop over the fixed resistor (The reading if the fixed resistor is connected to ground, Vcc – the reading if it is connected to Vcc) We then use Ohms Law (V=IR) to compute the current (I) through the resistor (I =V/R) Since the same current flows through the thermistor, we use ohms law again to compute the resistance of the thermistor. R = V/I where V is the voltage drop of the thermistor (the analog input reading or Vcc – the reading depending on which side of the divider it’s on) and I is the current we just computed. Using R we can plug it into the Thermistor Beta equation:
1/T = 1/T0 + 1/Beta * ln(R/R0)
Where R0 is the Resistance of the thermistor at T0
(Note, all temperatures are in Kelvin so make sure to take that into account)
Serving up the simple HTML web page basically involves Sending out the html header blocks and html formatting codes around the measured temperatures. It also includes an input for the target temperature and a button to include it in a request back to the server.
The Windows Universal App
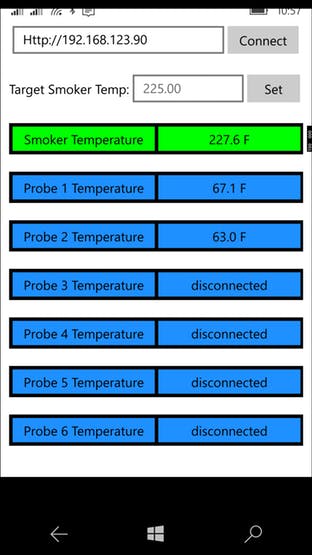
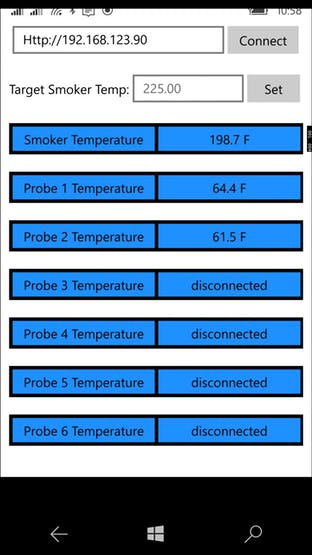
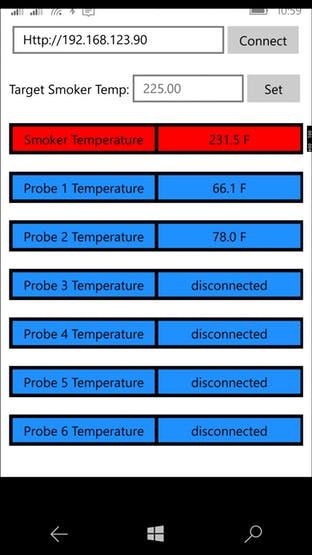
This is the piece that allows you to sit back and relax knowing your smoker is churning out some of the best smoked beef brisket west of the Pecos (or whatever river of your choice). It periodically loads the web page from the smoker, parses out the temperatures and displays them. It also allows you to set the target temperature for the smoker.
Code for both the sketch and Universal app are available in the GitHub repository listed below.

