Summary of Smartphone LED Controller Using Bluetooth With Own Application
This article details a project to control an LED via a smartphone using an Arduino Nano and an HC-05 Bluetooth module. The creator developed a custom Android application on the Kodular platform to send commands for turning the LED on or off. The system connects the phone to the Arduino wirelessly, allowing users to operate the circuit through a simple interface with green and red buttons after pairing the devices.
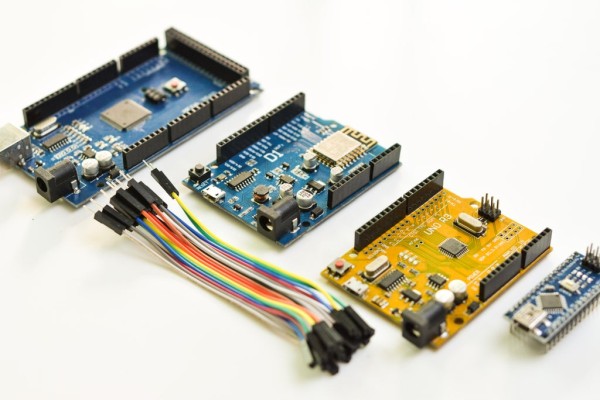
Parts used in the Smartphone controlled LED Using Arduino & Bluetooth with Own developed Application:
- Arduino Nano
- HC-05 Bluetooth Module
- LED
- Resistor (470E)
- Jumper Wires
- Breadboard
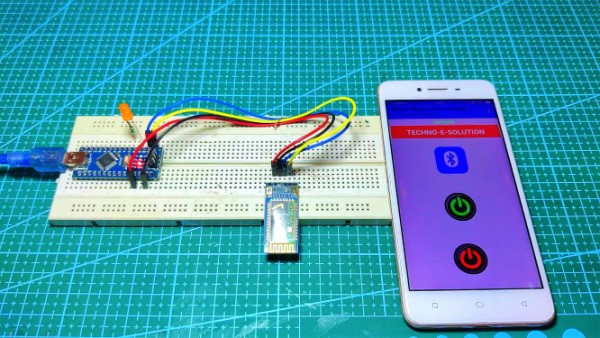
Hello friends welcome back to “Techno-E-Solution” In this video I’ll be going to show you an interesting project “Smartphone controlled LED Using Arduino & Bluetooth with Own developed Application”, I developed this application on kodular app making platform. In this project, we control the LED using a smartphone, for the smartphone to Arduino communication I used HC- 05 Bluetooth module. We send commands to the Arduino through the Bluetooth module to control the LED. So let’s make this project without wasting any time…
Follow me on:-
| YOUTUBE | INSTAGRAM | FACEBOOK | INSTRUCTABLES | DAILYMOTION | HACKSTER |
If you like this project subscribe to us on Youtube, So without wasting time Let’s get started…………..
Step 1: MATERIAL REQUIRED
To make this project we need some components (Best Buy Links are Provided):-
[ Above link are affiliated if you buy from the above link, We got some bonus from it. ]
Step 2: CIRCUIT DIAGRAM
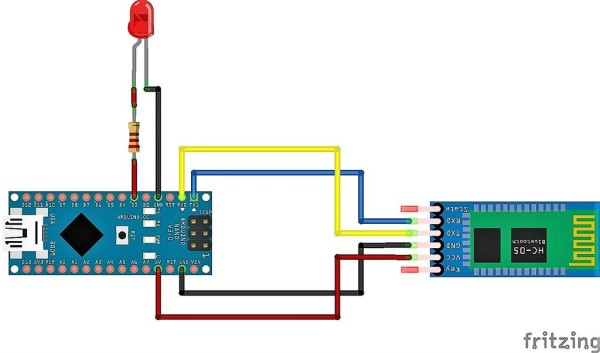
Follow the Above circuit diagram to make connection :-
Arduino — Bluetooth Module
5V >> VCC
GND >> GND
TX >> RX
RX >> TX
Arduino — LED
D3 >> Registor >> Anode
GND >> Cathode
Step 3: ARDUINO CODE

/*
 * Hello friends Here is the Arduio Code for Smartphone LED Controller
 * Upload the following code to your Arduino
 */

String readString;
#define LED 3

void setup()
{
  Serial.begin(9600);
  pinMode(LED, OUTPUT);

}
void loop()
{
  while(Serial.available())
  {
    delay(10);
    char c = Serial.read();
    if (c == '#'){
      break;
    }
    readString += c;
  }
    if (readString.length() >0)
    {
      Serial.println(readString);

      if(readString == "0"){
        digitalWrite(LED, LOW);
      }
      else if(readString == "1")
      {
        digitalWrite(LED, HIGH);
      }
      }

      readString="";
    }<br>
Step 4: NEXT PCB
NextPCB is a high-quality PCB Manufacturer. With professional PCB manufacturing capabilities, our PCB engineers with more than 10 years of experience will double-check your engineering files.
NextPCB is certified by IATF16949, ISO9001, ISO14001, UL, CQC, RoHS and REACH; more importantly, we handle the whole process including the PCB prototype, PCB manufacturing, PCB assembly, testing, and final shipment. We are capable of assembling BGA, Micro-BGA, QFN, and other leadless package parts. We also have an online parts shop, you can choose any parts you need.
If you want a Printed circuit board go through the NEXTPCBAdd Tip
Step 5: APPLICATION
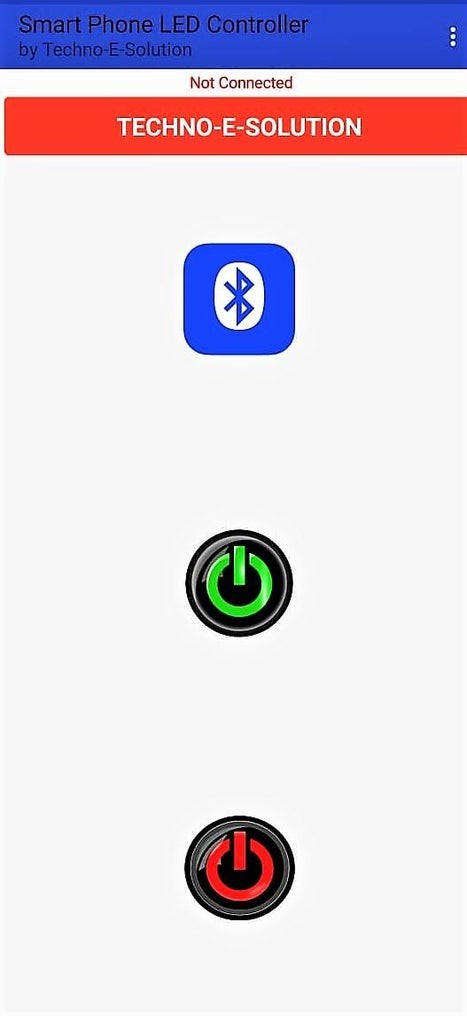
I built this application on a kodular app-making platform. In this app, we simply add two buttons to control the LED using Bluetooth. I provide the app link, you just install the following app.
How to operate the application:-
- First power-up the circuit using a 5V DC supply
- Turn on mobile Bluetooth.
- Search for HC-05.
- Pair them with mobile, use password (1234) or (0000).
- Now open the application.
- Click on the Bluetooth button.
- Select HC-05, the Bluetooth will get connect to the mobile.
- At the top of the application, you can see the status of the connection, it may be Connected or Not Connected.
- Now using two buttons on-screen which are the Green & Red buttons to control the LED.
Application Download Link:- Click here
Step 6: DEMO & TESTING
Here is the detailed video on a project, We hope this video will be helpful to you. If you got this video helpful subscribe to our youtube channel.
Source: Smartphone LED Controller Using Bluetooth With Own Application
- How do I pair the mobile device with the HC-05 module?
You can pair them using the password 1234 or 0000. - What platform was used to develop the application?
The application was built on the Kodular app-making platform. - Which pins connect between the Arduino and the Bluetooth module?
Alex connects 5V to VCC, GND to GND, TX to RX, and RX to TX. - What code values turn the LED on and off?
Sending the string 0 turns the LED LOW, while sending 1 turns it HIGH. - How do I supply power to the circuit?
You must power up the circuit using a 5V DC supply. - What colors are the buttons used to control the LED?
The application features Green and Red buttons for control. - Where can I download the application?
The app link is provided in the article under Step 5.