You can download our e-book ‘Learn Arduino from Scratch’ from this link
Few weeks ago I heard my nephew (aged 7) complaining of the dark at night. Basically he was afraid ? So I decided to put knowledge into practice and build a night lamp for kids. Since the project was intended for kids, I thought of making the lamp change color every now and then. It should also be sensitive to light so that if the room is well lit, the lamp would remain off.
For this project Arduino Uno was used.You can use any other Arduino instead, and all should work fine.
Hardware:
- 1x Arduino (ebay)
- Some Jumper wires (ebay)
- 1x Half Size Breadboard (ebay)
- 1x Bright RGB Cathode LED (ebay)
- 1x Photo Resistor (ebay)
- 2x 220 Ohm Resistors (ebay)
- 1x 330 Ohm Resistor (ebay)
- 1x 10K Ohm Resistor (ebay)
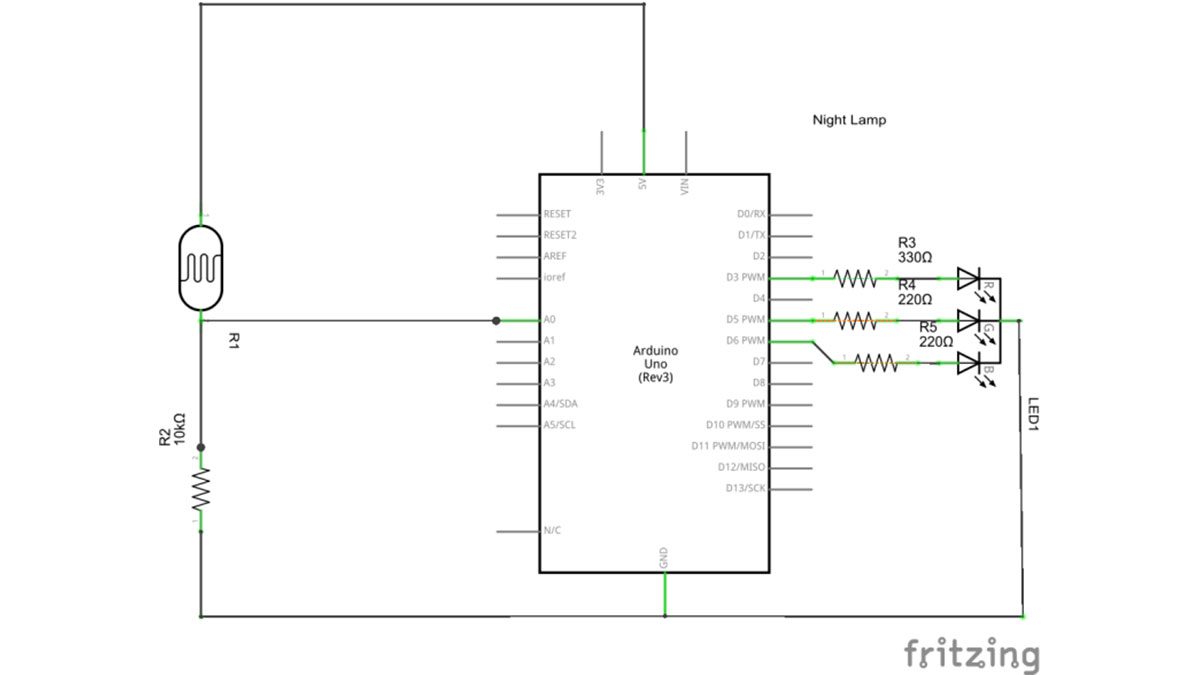
Schematic
So basically the idea was that as a first, the lamp should be switched on only when the photo-resistor reading goes below a certain threshold, meaning that the ambient light went down considerably; secondly the lamp should change color at certain intervals. That is why an RGB LED was used.

The Photo Resistor or Light Dependent Resistor (LDR) is a resistor which decreases its resistance when exposed to light. This means that the more light the LDR receives the more current passes through it and through the Arduino pin which is then read by the Arduino. The Resistor connected in series with the LDR serves to limit or increase the range of the LDR sensitivity to light. A 10kOhm resistor is a good choice to read ambient light but not if the LDR is exposed to direct sunlight, and also not good for low light conditions because the values saturate rapidly in these extremes.
Read more: A Smart Night Lamp for Kids
