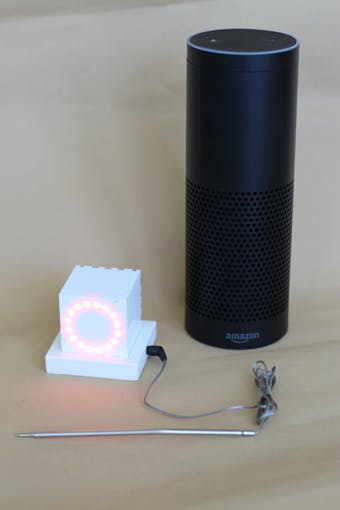
Alexa controlled timers at a glimpse. A really fancy egg-timer with added temperature control.
Story
Idea
Both of us like to tinker with electronics and the latest hard- and software. While most projects never get out of “early-Alpha”, we wanted to create something with a prototype look&feel for quite a while now. Participating in The Alexa and Arduino Smart Home Challenge finally made us consider creating something worthy of publishing here.

Having used Alexa on a daily basis for controlling lights and music throughout our home, something that really bothered me was the timers we would regularly set for things like cooking and making tea. The initial request for setting up a timer was usually followed by a couple of “Alexa, how much time left on the tea-timer?” so we rather quickly had the idea of creating an additional device, that let you glimpse at your timers without having to interact with Alexa again. We basically wanted to create an egg-timer with a really fancy hard- and software stack. For additional fanciness, we added a temperature controlled cooking mode.
Concept
While there are other options, having Alexa communicate with an Amazon Lambda function is the quickest and easiest way to get started with development. You can either set up your own skill and lambda or activate our Smart Kitchen Cube skill from your Alexa App.
You can view and activate the skill here, or search for “Smart Kitchen Cube” in the Alexa App. For a quick start, we recommend trying our skill first and then switch to your own skill and lambda in case you want to tinker with the software-side of this project. For detailed instructions on how to duplicate our setup, refer to the last two chapters of this project to get started, then modify things to your need. But first off, the necessary steps to build your own cube and link it to our skill!
Particle Cloud
You will need an account with particle.io to link the skill to. So head over there and either register as a new user or sign in to your existing account. Then go to build.particle.io, click on settings (the gearwheel in the lower left) and take note of your access token. You will need the token in your Arduino sketch so the Arduino can communicate with the particle cloud. While you are at it, flash the particle you will use for the cube with the software provided in the code section. If you haven’t set up your particle yet, do so now via the particle app, it has great step-by-step instructions on how to do this.
Account Linking
With your Particle account you can already set up our skill, so head over to alexa.amazon.com, log in with the account you have your Echo connected to, click on the Skills tab and search for “smart kitchen cube”.

Click on the skill and then on “Enable”. A window will open where you have to login with your Particle account. Press “Ok” when it asks you for permission to link the account. As of now, the device discovery will not yield any results unless you have flashed our code to the particle, but once you did that and add a device, it will show up in the “Smart Home” section of the alexa.amazon.com website. Lets build a device and hook it up now!
Hardware – The Cube
As we wanted to build more than just a breadboard prototype, creating our cube was as much about constructing the case as it was about building the circuit.
Read more: Smart Kitchen Cube
