Here I will show you an overview on how to make a robotic talking turret, loosely based off of the turrets from the popular game, Portal. This instructable should help anyone wanting to do an animatronics project.
For more detailed pictures, go to:
http://razorconcepts.net/turret.html
This project require some experience with tools, electronic circuits, and maybe a little programming.

Here is a sample video of the turret:
http://vimeo.com/3914462
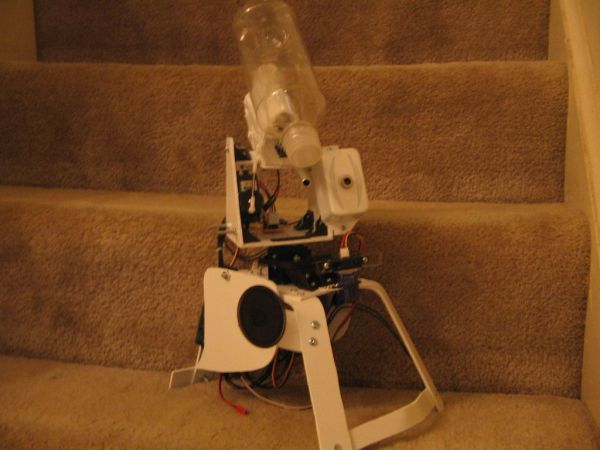
Here is the completed turret:
http://vimeo.com/4070435
Let’s get started!
Note: This turret was NOT designed to be very good at tracking and shooting – it’s more for show than functionality. If you are one of those people who have nothing better to do than criticize other people’s Instructables, just close the screen.
Step 1: Electronics Pt 1: Overview
A “smart” animatronics project needs a brain – in this case, a programmable microcontroller. I will be using a Roboduino, a modification of the popular Arduino microcontroller. The Arduino microcontroller uses easy to use Arduino software that is simple to understand for novice programmers. The Roboduino can be bought from Curious Inventor for around $40, and the various Arduinos can be bought from around $30.
There are plenty of Arduino Instructables here, I would reccomend reading through them if you are unfamiliar with them.
I used a lot of breakaway headers and hook-up wire to make all the connections to the Roboduino.
Step 2: Electronics Pt 2: Sound
Sound is a very important factor of an animatronics project – however, it is usually very difficult to implement with microcontrollers.
So far I have only found one easy to use and cheap sound player for the Arduinos – the wave shield from Adafruit industries. It only costs about $25, much cheaper than other sound playing development boards. Also the coding is fairly simple with the libraries provided by Adafruit.
The disadavanges do pile up, though. It can only play uncompressed WAV files – in mono. It needs 8 connections do the Arduino. It takes a minimum of 10kb of flash on the Arduino – leaving only about 4 or 5kb left on the Arduino for the rest of your code. However other MP3 player boards usually run for around $100, so I just stuck with the wave shield.
I changed the dac.h file in the wave shield library to use analog pins 2-5 instead of the digital pins. I wired up a speaker to the base of the turret.
Step 3: Electronics Pt. 3: LED lighting
LED lights are cheap and easy to use – and if used in the right way, can add to the asthetics of a project tremendously.
I would reccomend going to eBay and buying an LED assortment. Whenever you need a color, you’ll have it on hand. I purchased 7 colors of LEDs, 15 LEDs for each color, for about 6 dollars shipped.
If you want to drive more than one LED on the Arduino, you will need to use a transistor (basic schematic shown in pictures).
The LEDs are connected to the digital ports on the Roboduino, and used the digitalWrite command to turn the LEDs on and off.
Sintra expanded PVC plastic
For more detail: Robotic Talking Turret using Arduino