Summary of Real Time Clock and Temperature Monitor using DS3231 Module
This tutorial guides users in building a Real Time Clock and Temperature Monitor using an Arduino Mega and the DS3231 module. The low-power RTC chip maintains accurate time via a coin cell battery even when disconnected from power, while its integrated sensor measures temperature. Data is displayed on a 16×2 LCD screen connected via I2C communication.
Parts used in the Real Time Clock and Temperature Monitor:
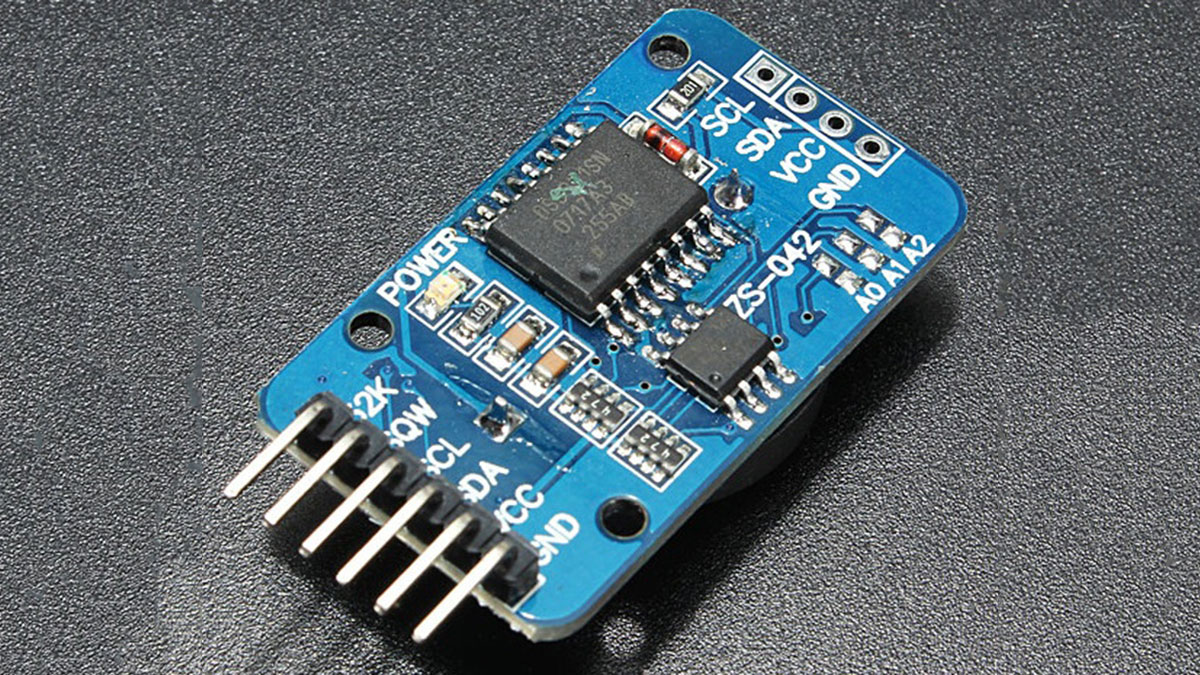
- DS3231 module
- 16×2 LCD module or shield
- Arduino Mega
- Jumper wires
- Potentiometer (if not using an LCD shield)
- Small Breadboard
Hi guys welcome to this tutorial. One of the most important thing everyone wants to keep track of daily is, time and with easy to use platforms like the arduino it is very easy to create your own timepiece and in the case of this tutorial add a temperature monitor to it.
For this tutorial, we will be creating a real time clock and temperature monitor using the simple and easy to use DS3231 module.
Introduction
The DS3231 is a very low power RTC chip, it has the ability to keep time with incredible accuracy such that even after power has been disconnected from your product, it can run for years on a connected coin cell battery. This module has the ability to communicate via I2C or SPI but for this tutorial we will be using the I2C mode for communications between our arduino and the DS3231. The module also comes with a quite accurate temperature sensor which we will be using to get temperature readings. The collected temperature and clock data is then displayed on the 16×2 LCD via the Arduino.
Required Components
The following components will be needed for this tutorial. They can be purchased via the links attached.
1. DS3231 module
2. 16×2 LCD module or shield
3. Arduino Mega, or any other variation
4. Jumper wires
5. Potentiometer (if not using an LCD shield)
6. Small Breadboard
Schematics
Connect all components as shown in the Fritzing schematics below, kindly note the LCD connection will not be needed if using the shield.
Since the DS3231 is going to communicate via I2C then its I2C pins will be connected to the arduino’s I2C (SDA and SCL) pins which on the mega are located on pin A0 and A1 or pin 20 (SDA) and 21 (SCL) of the arduino mega.
RTC - Arduino MEGA
SDA - Pin 20(SDA)
SCL - Pin 21(SCL)
VCC - 5v
GND - GND
Next connection is between the LCD and the Arduino. If you are using the screen and keypad shield whose link is attached above, all you will just need to do is plug it in to your arduino as shown below.
Read more: Real Time Clock and Temperature Monitor using DS3231 Module
- What is the primary function of the DS3231 module?
The DS3231 is a low power RTC chip that keeps time with incredible accuracy and includes an accurate temperature sensor. - How does the module maintain time without main power?
It can run for years on a connected coin cell battery even after power has been disconnected. - Which communication mode is used between the Arduino and the DS3231?
The tutorial uses the I2C mode for communications between the Arduino and the DS3231. - Where are the I2C pins located on the Arduino Mega?
On the Mega, the I2C pins are located on pin A0 and A1 or pin 20 (SDA) and 21 (SCL). - What happens if an LCD shield is used instead of a standalone screen?
If using the screen and keypad shield, you simply plug it into your Arduino and do not need separate LCD connections. - Can other Arduino variations be used besides the Mega?
Yes, the tutorial states that any variation of the Arduino can be used.