This project started as I had to create a project for the HKU with an arduino. It had to be something which would be either entertaining or solving a certain problem. For which I chose to pick the entertaining part. In the end combining multiple elements of things I love in to this product.
In this project you will find the process I went through to get to my final product, as well as how to create this mini game yourself.
If you do not care about the entire process I went through to create this mini-game just head over to step 6, download my code from there, and start working from step 7.
You will need the following things to create this product:
- Soldering equipment
- Hobby glue pistol
- Drill
- Saw
- 1x Arduino Mega
- 2x 2*16 i2c LCD screen
- 2x resistor
- Some wires for soldering
- Plywood (or other material if you prefer that)
- 9V battery (optional)
- Power switch (optional)
- Stickers (included mine in the project)
- A printer that can print stickers
Step 1: Concepting Design
The first step I took in this project was to start thinking about what I even wanted to make in the first place. I was unexperienced with arduino so I really had no clue where to start. I spend 2 afternoons just looking up projects on the internet to get a general idea of what the arduino is capable of. All I knew is I wanted to create a mini game. Once I thought I had a clear picture of what the arduino can do I started thinking about what kind of game I wanted to create. At first I was thinking about Tic, Tac, Toe. But I felt like that was too basic. At that point I literally thought I would not be able to create a full sized slot machine kind of thing. But after I heard myself say that I thought, the arcade machine would not even be such a bad idea to go after for looks.. Now all I needed was a game. Since I wanted to entertain people with my project I thought about what had entertained me. Now I can not create a Call of Duty slot machine.. So I went for my second option: Pokemon. I decided I would pick the base elements of Pokemon and combine them in to a rock paper sciccors game which would look some kind like a small 2 player arcade machine.
With my idea on a paper now it was time for me to start sketching out my ideas and come to a design.
Step 2: Sketching
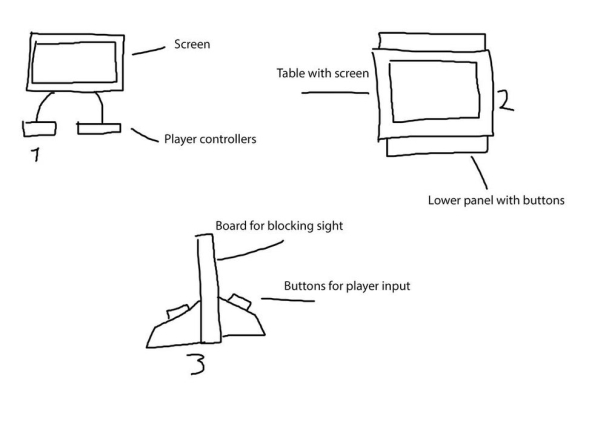
For the sketching part I started with an empty photoshop document. I knew I wanted a slot machine look for 2 players, and a rock paper sciccor game with a Pokemon twist.
While sketching I came up with 3 base designs. Design 1 being connecting 2 controllers with 3 buttons for input to a screen. But while I was thinking this up I realised players could just look at eachothers hands to see what element they were going to pick and cheat. So I came up with the second design.
The second design is a big table with a screen on the top of the table to show the players their score, input etc. and on the sides of the table there would be a panel with 3 buttons for the players to give input on. But while creating this design I realised this would be a rather large object which was not really what I was looking for in this mini game.
The third design is what eventually got transferred in to my final design. Here you would have 2 bases with 3 buttons for the players to give their input for the game. The middle part would block the players vision so they can not look what the other player is going to pick.
Step 3: Finalising Design
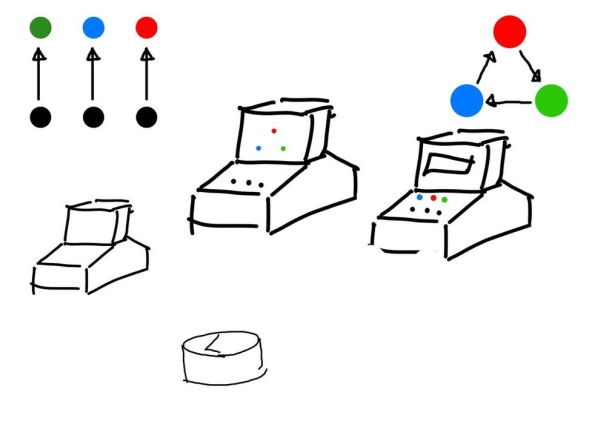
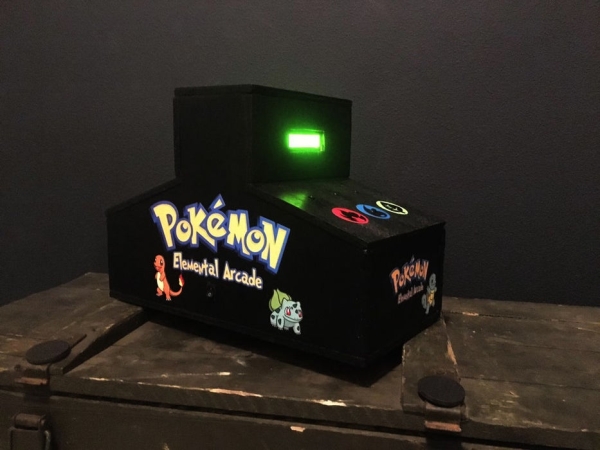
In the final design I chose to lower the part in the middle to give it more of an arcade feeling. Now that I had my visual design finished it was time to think of how to let the players interact with the machine. On the first design I though about having the 3 buttons on the lower part for the player to pick their element. And depending on their input I would let a led light burn. But this would leave a lot of empty spaces in the box. So in the second design which I ended up using I decided to go for a lcd screen which would be used to show the players their score, tell them who won a round etc. And on the lower part I would combine the led’s with the buttons so the player can see which input would give which element. Now that I had my design all finished up it was time for me to start working
Step 4: Creating a 3D Model
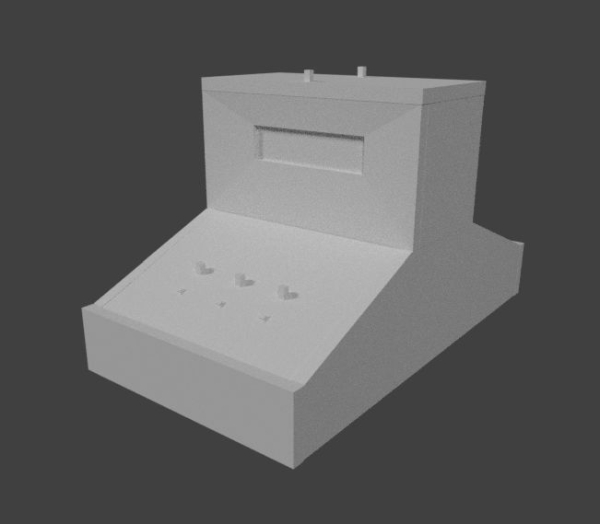
After I picked the design I decided to open up Blender and start working on a 3D model of what I image the machine to look like and I have something to work towards to instead of my very basic sketches. I made the model with multiple seperate objects so I could take it down and see how much space I would have on the inside, which is why it looks so bulky and some of the edges don’t connect properly. Now that I had a clear picture for myself it was time to start working on the physical product.
It was here that I came up with the idea to add 2 extra led’s on the top of the machine. Which depending on the player that won said round, would light up. In the end when I got to know how the LCD display’s worked I ended up scrapping this idea and instead adding a message after the round saying you won or you lost.
Source: Pokemon Elemental Arcade (Mini Game)