Summary of Play Songs(MP3) With Arduino Using PWM on Speaker or Flyback Transformer
This article details a complex project to play MP3 music on an Arduino by streaming audio data from a Linux PC via high-speed serial communication (500 kbps) and generating PWM signals using Arduino timers. The author emphasizes that this method is difficult, requires precise timing only achievable on Linux, and involves converting audio files into C headers. A simpler alternative project is mentioned in the text.
Parts used in the Play Songs(MP3) With Arduino Using PWM on Speaker or Flyback Transformer:
- Arduino Board (328, 2560, Mega, Uno, Mini, etc.)
- PC or Laptop with Linux (Fedora 29) or Live USB
- Breadboard or Perfboard
- Connecting Wires
- TC4420 Mosfet driver
- Power Mosfet (N or P channel)
- Speaker or Flyback Transformer
- Suitable Power Supply (0-12V)
- Heat Sink
- PC with Windows and pen drive
This is my first instructable, I hope you will Like It!!
Basically, In this Project I have used the Serial Communication between my Arduino and my Laptop, to transmit music data from my laptop to the Arduino. And using the Arduino TIMERS to play the data as a PWM signal.
I wanted to mention that, this project is not for Beginners!!!.
Actually, this project was one of the longest projects, because we have to do many things to make it work.
ATTENTION
I have made the second part of this instructable, which is way more easier and needs minimal troubles to work.
Link to Second Part(easiest one).
Step 1: Things We Need for This Project(Requirements)
1. Arduino Board(we can use any Board (328,2560) i.e Mega, Uno, Mini, etc but with specific different pins)
2. PC or Laptop with Linux(I have used Fedora 29) Or Live USB with Linux
3. Breadboard or Perfboard
4. Connecting Wires
5. TC4420 ( Mosfet driver or such thing)
6. Power Mosfet(N or P channel, please wire then accordingly ) ( I have used N-channel )
7. Speaker or Flyback Transformer(Yes you read it right!!)
8. Suitable Power Supply (0-12V) ( I have used my own ATX Power Supply )
9. Heat Sink (I have salvaged from my old PC)
10. PC with Windows and pen drive.
To know the detailed working of each component and this project please read the next step.
I have made the second part of this instructable, which is way more easier and needs minimal troubles to work.
Link to Second Part(easiest one).
Step 2: Understanding the Working Principle
Ahhh!! the longest part of an instructable, reading and writing this section is both boring.
First of all, we need to get an Overview, how this thing actually works.
what we are doing here is that first, we are converting our MP3 song into a WAV File and this file into a C header file by using the software, which is in the link. This C code actually contains 8-bit(why 8-bit?? read further) data samples that we need to play using our Arduino at a fixed rate or speed, which is specified according to our Sampling Rate.
Theory of an Audio Signal.
For those who don’t know what the Sampling Rate or Bit Rate is:-
Sampling Rate is defined as the number of Samples, we are playing in a second(usually measured in Hz or KHz).
To know more in Detail:-Click Here
Standard Sampling Rates are 44100 Hz(best quality), 32000 Hz, 22050 Hz, etc
which means that 44100 Samples are used in a sec to generate a wave accordingly.
i.e Each Sample is required to be played at a fixed interval of 1/44100=22.67 uS.
Then comes the Bit Depth of an Audio Signal, which is usually a measure of how precisely a sound is represented in digital audio. The higher the bit depth, the more accurate the digital sound.
But with Arduino or any other Micro-controller with 16Mhz clock allows us to use us up to 8-bit only. I will explain it why.
There is a formula at page no.102 in the datasheet of 328p:- Datasheet
I’ll not go in details, why I am using this formula.
frequency of Signal=Clock Signal / N x (1+TOP)
Clock Signal=16Mhz(Arduino board)
N=prescaler (1 is value for our project)
TOP=value 0 to 2^16(For 16-bit timer counter) (255=2^8 (8-bit) for our project)
we get the value of the frequency of Signal = 62.5 kHz
This means carrier wave frequency is dependent on Bit Depth.
Suppose,if we use TOP value = 2^16=65536 (i.e bit depth of 16-bit)
then we get the value of the frequency of Signal = 244 Hz (that we cant use)
OKK… So this much theory of How Audio Signals works is enough, So back to the Project.
The C code generated for a Song could be copied into Arduino and can be played, but we are limited up to 3-sec audio playback with a sampling rate of 8000 Hz. Because this C code is a text file and hence not compressed rather decompressed. And it takes too much space. (e.g C code file with 43-sec audio with 44,1 KHz samples takes space up to 23 MB).And our Arduino Mega gives us a space of about 256 Kb.
So how we will play songs using Arduino. It’s not possible. This Instructable is fake. Don’t worry readers,
That’s why we need to use some kind of communication between Arduino at sooo high speeds(up to 1 Mb/s) to send Audio data to Arduino.
But How much speed exactly do we need, to do this??
The answer is 44000 bytes per sec which mean speeds more than 44000*8=325,000 Bits/s.
We need another peripheral with big storage to send this data to our Arduino. And that will be our PC with Linux(why PC with Linux??? please read further to know more about it.)
Ahaa…That means we can use Serial Communication…But wait…serial is possible at just speeds up to 115200 Bits/s which means (325000/115200=3) that, it is three times slower than required.
No, my friends, it is not. We’ll use speed or Baud Rate of 500,000 Bits/s speed with a cable up to 20-30 cm max., which is 1.5 times faster than required.
Why Linux, not Windows ???
So, we need to send samples at an interval (also specified above) of 1/44100=22.67 uS with our PC.
So how can we program it to do so??
We can use C++ to send a data byte through Serial at an interval using some sort of a sleep function
like nanosleep, Chrono, etc, etc….
for(int x=0;x
sendData(x);
nanosleep(22000);// 22uS
}
BUT NO IT DOES’NT WORKED ON WINDOWS also didn’t work in this way on Linux(but I found another way that you can see in my Code attached.)
Because we can’t achieve such granularity using windows. You need Linux to achieve such granularity.
Problems I found even with Linux…
we can achieve such granularity using Linux, but I found no such function to sleep my program for 22uS.
Functions such as nanosleep, Chrono nanosleep, etc,etc.. also don’t work, as they provide a sleep only more than 100 uS. But I needed exactly, precisely 22 uS. I have researched every single page on google and experimented with all possible functions that are available in C/C++ but nothing worked for me. Then I came up with my own function, that worked for me as a real charm.
And my code now provides an exact, precisely sleep of 1uS or above !!!!!
So we have covered the difficult part and the rest is easy…
And we want to generate a PWM signal using Arduino with a specific frequency also carrier wave frequency.(62.5KHz (as calculated above) for good immunity of Signal).
So, We need to use so-called TIMERS of Arduino to create PWM. By the way, I’ll not go in much details on that, because you’ll find many tutorials on the topic of TIMERS, but if you don’t find some, then comment below I’ll make one.
I have used a TC4420 Mosfet driver, to save our Arduino Pins, because they can’t deliver so much current to drive a MOSFET sometimes.
So, that was the almost theory of this project, we can see now the circuit diagram.
ATTENTION ATTENTION ATTENTION
Actually, this project was made much difficult intentionally( I’ll tell why), there is another method that requires no
PC just Arduino and speaker in my nextinstructable.Link is here .
*The main purpose of this project is to use Serial Communication and to know it’s power and to learn how we can program our PC to do tasks precisely at such fine intervals.*
Step 3: Schematic
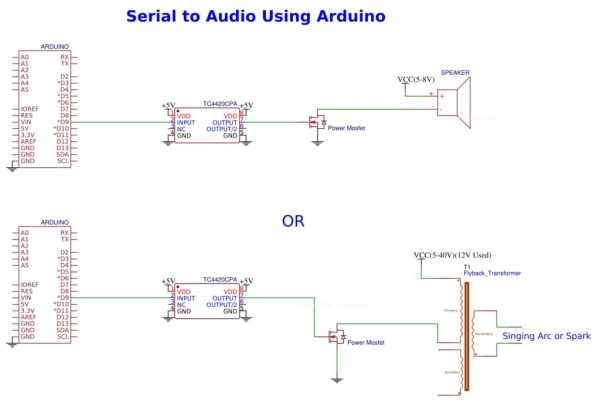
Connect all the Components as shown in the schematic. So you have here two options:-
1. Connect a Speaker( Connected with 5V)
2. Connect a Flyback Transformer (Connected with 12V)
I have tried both. And both work pretty well.
Disclaimer:-
*I recommend using Flyback Transformer with Precaution as it can be dangerous because it produces High Voltages. And I’ll be not liable to any damage.*
Step 4: Convert MP3 to WAV File Using Audacity
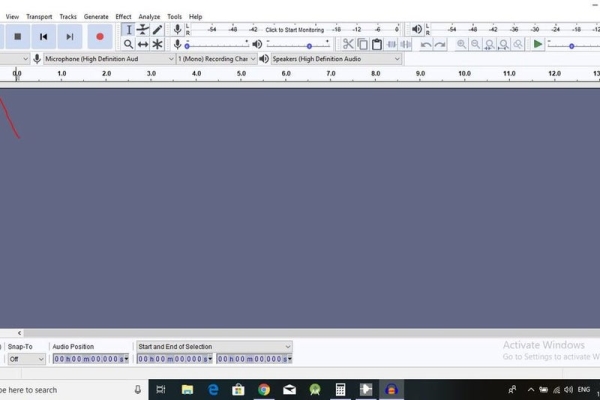
So, First of all, download the software
1. Audacity, search and download from Google
2. To convert WAV File to C-Code, download a window application, named as WAVToCode
You can learn how to use WAVToCode software from this link and download it from this link.
I’ll also give detailed steps on how to use both software.
Please See the photos linked with this instructable.
In this step, we’ll convert MP3 to Wav. (Follow the photos, Project rate must be 44100Hz)
In the next step, we’ll convert a wav file to C Code.
Step 5: WAV to C-Code
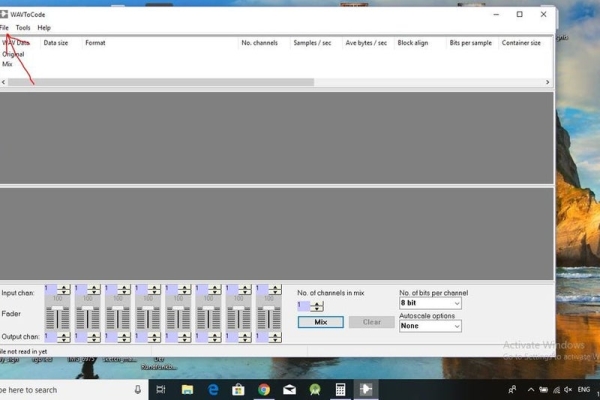
Follow the photos.
See the last two pictures, the changes must be precisely same, Capital letters should be capital and lower case should be lower, Or you’ll get syntax error during compiling.
(You can see that 1min 41s song took 23mb space.)
Change the song name and length with the name and duration of your song respectively.
And Save the C Code file.
Do this to all the Songs you want to play with Arduino.
Step 6: Make a Final File and Fire Up Your Linux
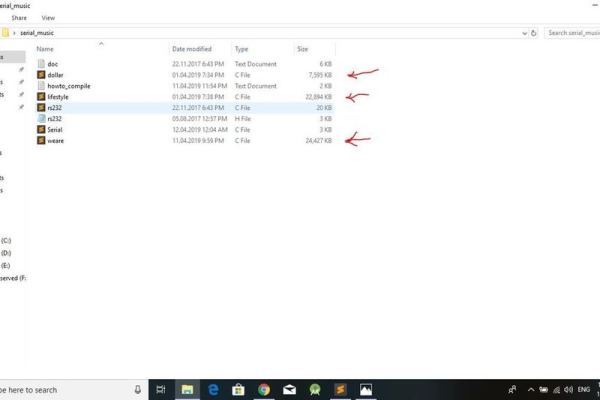
Add your all converted songs into File provided in this link.
And follow the pictures.
Upload the code into Arduino, that I have attached.
Remember the C Code file names.(for e.g lifestyle,dollar,weare), because we have to mention the exact same names into our code with case-sensitive.
At the end fire up your Fedora Live USB or other and install gcc compiler and then using the compiling instructions from the folder compile the program and run it.
In the end, you’ll be able to listen to songs from Speaker or Flyback.
Thank you for reading this instructable and please comment if you like it.
ATTENTION
I have made the second part of this instructable, which is way more easier and needs minimal troubles to work. Link to Second Part(easiest one)
Source: Play Songs(MP3) With Arduino Using PWM on Speaker or Flyback Transformer
- Why must I use Linux instead of Windows for this project?
Windows cannot achieve the required timing granularity of 22 microseconds needed to send samples at the correct interval. - What is the maximum baud rate required for this project?
The project requires a speed of 500,000 Bits/s to transmit audio data faster than the standard serial limit. - Can I use a 16-bit bit depth for the audio signal?
No, an Arduino with a 16Mhz clock allows only up to 8-bit depth because higher bit depths result in a carrier wave frequency too low to be useful. - How do I convert my MP3 file into a format the Arduino can process?
You must first convert the MP3 to a WAV file using Audacity, then use the WAVToCode software to generate a C header file. - What are the two output options available for playing the sound?
You can connect either a Speaker powered by 5V or a Flyback Transformer connected to 12V. - Why is the generated C code file so large?
The C code is an uncompressed text file containing 8-bit data samples, which consumes significant memory space like 23 MB for a 43-second song. - What is the purpose of the TC4420 component in this circuit?
The TC4420 acts as a Mosfet driver to protect Arduino pins that cannot deliver enough current to drive the Mosfet directly. - Is there a simpler way to build this project without a PC?
Yes, the author mentions a second part of the instructable that uses only an Arduino and a speaker with minimal trouble.