The Problem: You want to restrict the time when your pet is allowed to go outside. This could be because the neighborhood is not safe for your cat or small dog at night (marauding coyotes comes to mind). But you would like your pet to be able to come in at any time.
The Solution: Pet Curfew, an arduino controlled pet door, with real time clock, cat status led light and servo latch.
Video here.
Step 1: You will need…
1. Staywell Manual 4 way deluxe locking cat flap door
2. An Arduino Nano V3 micro-controller
3. 2x roller switches for detecting cat in/out status (or magnetic reed switches). Similar to this one.
4. 2x momentary push button switches (normally open) for manually opening or closing the door at any time
5. A breadboard
6. A BlinkM MinM LED module (I2C)
7. A Chronodot high precision real time clock module (I2C)
8. A Servo.
9. 4x 10K resistors (for interfacing the 4 switches)
10. Miscellaneous wiring
11. Small nuts and bolts for securing the switches and servo to the door
12. A mini-B USB power supply
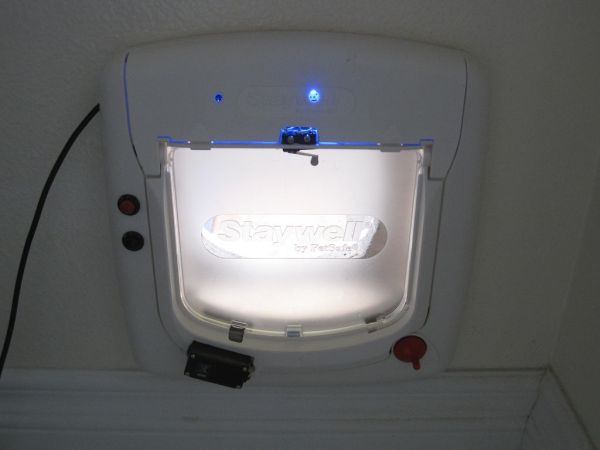
The Staywell 4 way locking pet door provides the perfect housing for this prototype, because it is already designed to accommodate additional hardware and electronic modules (other models from the manufacturer) . It also features a flap and an indoor flap guard. The flap guard prevents smart pets from opening the door from the inside.
The arduino nano’s size is perfect for fitting inside the door; however other arduino will probably fit too.
The Chronodot real time clock (RTC) is an I2C module that keeps track of the current date and time, even when power is not present.
The BlinkM MiniM is a smart I2C LED module that can fade in and out of a wide range of colors.
Step 2: Installing the switches
1. Cut out an opening and install the first micro switch on the wall side of the wall tunnel part of the door. This switch will detect the pet going out (flap up). Bring the switch wires to the other side for connection to the breadboard.
2. Cut an opening and install the second micro switch on the indoor part of the door. This switch will detect the pet coming in.
3. Install both manual override switches on the inside part of the door.
Step 3: Install the servo
Install the servo so that the actuator arm is on the inside of the door:
1. You will need to cut out a rectangular opening for the servo using a dremel type tool.
2. You will also need to notch the indoor flap to allow it to close around the servo.
3. Secure the servo using nuts and bolts.
We will use the servo arm as a latch to prevent the door from opening to the outside.
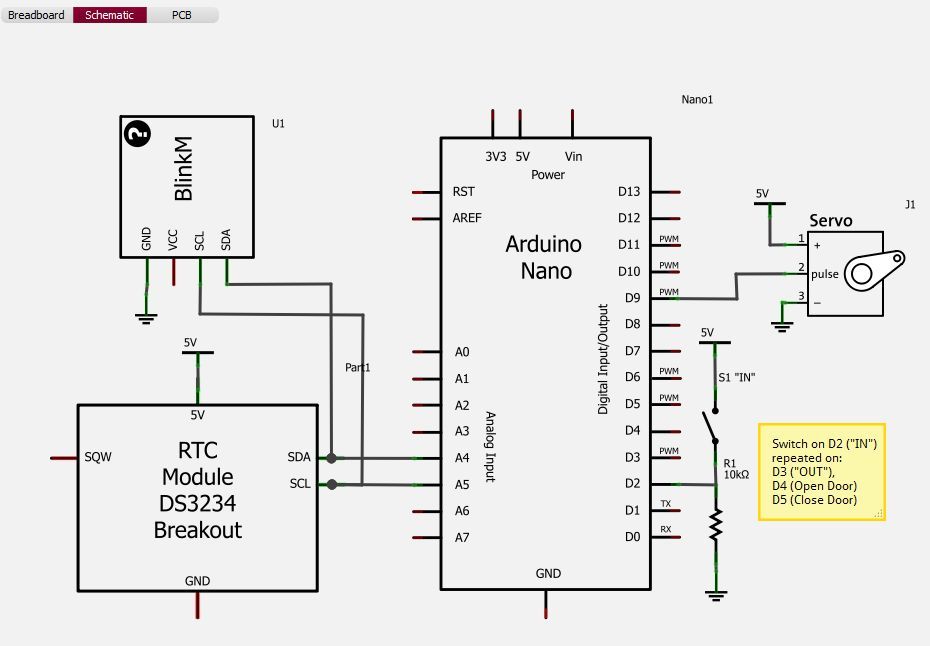
Step 4: Assemble the electronics
1. On your breadboard, assemble the electronics.
2. Download the software by clicking the links below. You will need both files.
3. Using the Arduino IDE, upload the sketch to the board.
4. Using the “demo” mode, make sure everything is functional before installing inside the door. In demo mode, the servo arm will toggle between the open and close position every 30 seconds.
Note that the servo is powered before moving and then powered down to prolong the life of the servo. For this lightweight application, the servo gearbox is sufficient to maintain the servo in whatever position it is moved to.
The program also automatically adjusts for U.S. daylight savings time.
2. An Arduino Nano V3 micro-controller
3. 2x roller switches for detecting cat in/out status (or magnetic reed switches). Similar to this one.
4. 2x momentary push button switches (normally open) for manually opening or closing the door at any time
5. A breadboard
6. A BlinkM MinM LED module (I2C)
7. A Chronodot high precision real time clock module (I2C)
8. A Servo.
9. 4x 10K resistors (for interfacing the 4 switches)
10. Miscellaneous wiring
11. Small nuts and bolts for securing the switches and servo to the door
12. A mini-B USB power supply
For more detail: Pet Curfew: An Arduino Controlled Pet Door