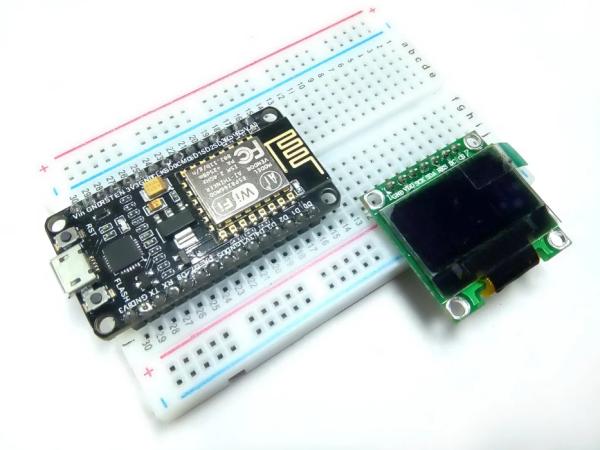
Summary of OLED Interfaced to NodeMCU
OLED technology uses organic thin films between conductors to emit light without a backlight, making displays thinner and more efficient than LCDs. This project demonstrates interfacing an SSD1306 OLED display with a NodeMCU using the U8glib library in SPI mode to render text on the screen.
Parts used in the OLED Interfaced to NodeMCU:
- NodeMCU
- 0.96 SSD1306 OLED Display
- Bread Board
- Jumper Wires
- Micro USB Cable
OLED!! What is an OLED?
OLED ( Organic Light Emitting Diodes ) is a flat light emitting technology, made by placing a series of organic thin films between two conductors. When electrical current is applied, a bright light is emitted. OLEDs can be used to make displays and lighting. Because OLEDs emit light they do not require a backlight and so are thinner and more efficient than LCD displays(which do require a white backlight).
Step 1: Need to Be Collected
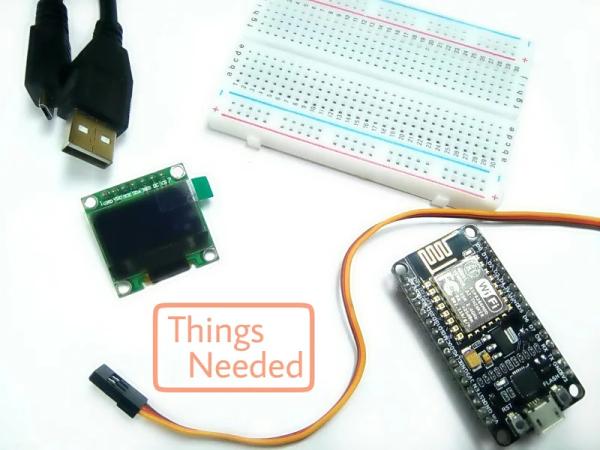
Here is the list of components required to get started with the Instructable,
Hardware Components
- NodeMCU
- 0.96” SSD1306 OLED
- Bread Board
- Jumper Wires
- Micro USB Cable
Software Components
- Arduino IDE
Step 2: Connections
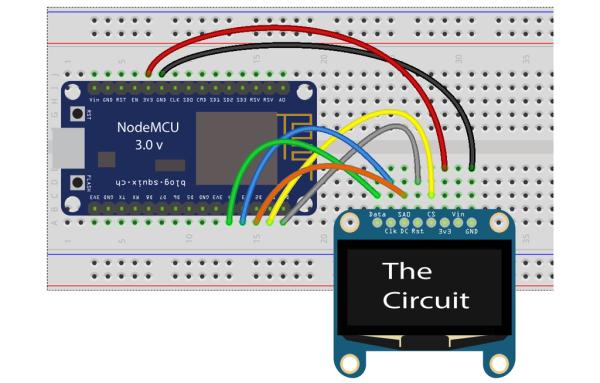
Create an instance for the SSD1306 OLED display in SPI mode.
Connection scheme:
1. CS – D1
2. DC – D2
3. Reset – D0
4. SDA – D4
5. SCL – D3
6. VDD – 3.3v
7. GND – GND
Check the schematic and pin configuration to make connections.
Step 3: Library Download
Before you download library you need Arduino IDE to get started.
To download Arduino IDE and for NodeMCU setup, you can check my previous instructacle.
Interface Servo Motor with NodeMCU
Here’s the library you need for this project:
OLED can be easily coded with a library file called Ug8lib.
Ug8lib is a graphics library with support for many different monochrome displays.
The library file can be downloaded by following steps
- Go to Sketch
- Include Library
- Manage Library
- Download U8glib library file.
Step 4: Time to Play With OLED

CODE
#include <U8glib.h>
U8GLIB_SSD1306_128X64 u8g(5, 4, 16, 2, 0);
void setup() {
  /* nothing to do here */
}
void loop() {
    u8g.firstPage();
  /* Keep looping until finished drawing screen */
  do
  {

   u8g.setFont(u8g_font_osb18);
   u8g.drawStr(30, 20, "Hello"); //(horizontal spacing,vertical spacing,"string")
   u8g.drawStr(20, 50, "Makers!");

  } while(u8g.nextPage());

}
Download the “OLED_NodeMCU.ino” file and open it up in the Arduino IDE.
Then Create a new sketch and paste the code below in the Arduino IDE and hit Upload. You can tinker with it if you like based on the application, or just use it as it is.
Step 5: Output
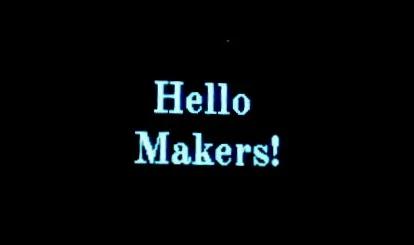
Yipeeee!!
That’s all makers!
I hope you found this instructable most useful. You have successfully completed one more NodeMCU Instructable.
Stay Tuned for more Projects!
You can contact me by leaving a comment. If you like this instructable probably you might like my next ones.
Source: OLED Interfaced to NodeMCU
- What is an OLED?
OLED stands for Organic Light Emitting Diodes and is a flat light emitting technology made by placing organic thin films between two conductors. - Why are OLED displays thinner than LCD displays?
OLEDs do not require a white backlight like LCDs do, which allows them to be thinner and more efficient. - Which library is needed to code the OLED display?
The project requires the U8glib library, which supports many different monochrome displays. - How do you connect the CS pin of the OLED to the NodeMCU?
The CS pin connects to D1 on the NodeMCU board. - What voltage should be applied to the VDD pin?
The VDD pin requires 3.3v power. - Can the provided code be modified for other applications?
Yes, users can tinker with the code based on their specific application needs. - How do you install the required library in Arduino IDE?
You must go to Sketch Include Library Manage Library and download the U8glib file. - What function is used to draw text on the screen?
The u8g.drawStr function is used to draw strings at specific horizontal and vertical spacing coordinates.