Summary of Motorized Pulldown Curtain (Phone & Radio Controlled)
Summary (under 100 words): The article describes converting an IKEA pulldown curtain into a motorized, remotely controlled curtain using a motor, Arduino, NodeMCU, relays, and sensors. It supports manual remote control plus optional phone-based scheduling via Blynk. The maker explains operation logic, needed tools, parts, mounting, and code configuration for Arduino and ESP8266, noting two NodeMCU settings to edit (Blynk token and Wi-Fi credentials).
Parts used in the Motorized Pulldown Curtain:
- Pulldown curtain (IKEA or similar)
- Motor (servo-style with servofunctionality removed)
- Plastic motor mounts (supplied with motor)
- 2 Relays (or power transistors as alternative)
- 5V power supply
- Arduino
- NodeMCU (ESP8266)
- Reflective IR sensor
- 433 MHz receiver
- Radio remote (Livolo Mini Remote Controller recommended)
- Project box
- Switch (for manual control)
- Zip ties (2, for mounting motor)

I pull my curtain up and down a couple of times a day. If I watch a movie I pull it down and then, I pull it up to get better lighting. I also pull it down when I go to sleep and I pull it up again when I wake up. I want this process to be automatic, if my curtain rises before I wake up, it will be easier for me to wake up when the clock goes off. Just like those night lights that lights up before you wake up this can do the same but with the sun as a source.
If you are like me and would like to have your home automated, you might also have considered buying motorized Curtains. But if you have, then you have also realized that they cost a considerable amount.
Therefore, I have decided to make my own motorized curtain. This project will be about modding an existing IKEA curtain, adding a motor to it and writing some code. Without further ado, let’s begin!
Step 1: How It Should Work
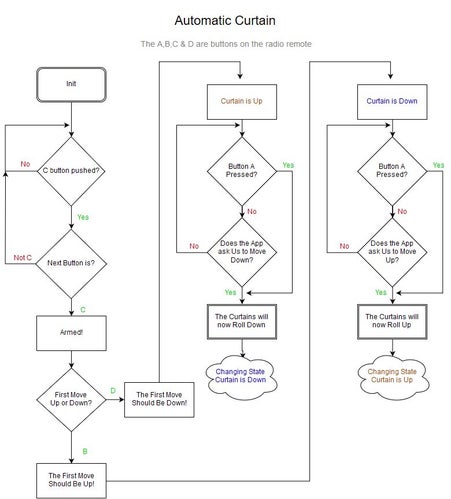
These two pictures should give you an idea about how I wanted it to work. What they do not tell you is that the manual-control for up and down can be used at any time (even in the initial phase). And the external control sends “requests”, you might not always be able to see the curtain, or you might have made it so the phone sends requests automatically.
For example you push on the phone that you want it to go up, it will move up if it is in the down position and it will do nothing if it is already up. This makes it so you won’t need to think about witch button you push and you can also make it so it sends a request to move up at 8:30 in the morning for example.
In this case the external control is a NodeMCU controlled by a phone. But you could choose to use another Arduino with an SMS-shield instead if that would be a better solution for you.
The curtain will work with only a remote controller so if you do not need the “phone control” feature you could skip it, the code that I provide will still work.
Step 2: Tools & Supplies
For this project we will need some tools.
Tools
- Drill-bit
- Screwdriver
- Computer
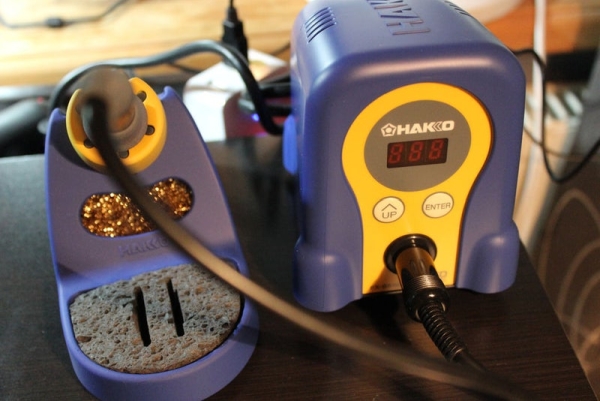
- Soldering Iron
- Crimp tool
- Wire Strippers
- Glue gun
- Electrical tape
Step 3: Parts
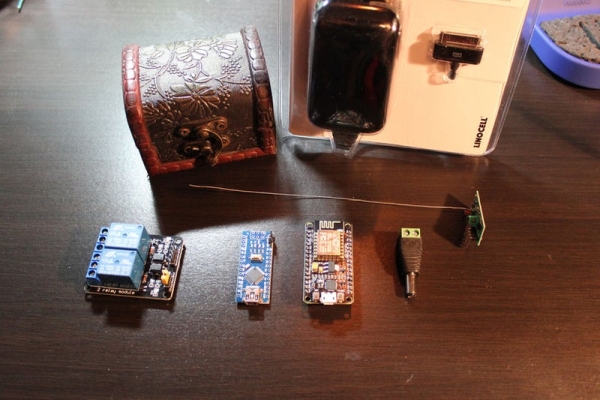
Parts
- 1: Pulldown Curtain (that fits the window, IKEA is one supplier of these).
- 1: Motor(The one I use is a servo-motor, with the servo
functionality removed. It is supplied with good plastic mounts, this makes it easy to mount it to the curtain). - 2: Relays (You could also use power transistors for this if you want).
- 1: 5V power supply. (Do not buy a “fake” power supply of ebay
[or any other seller], instead wait for a sale in one of your local stores). - 1: Arduino
- 1: NodeMCU
- 1: Reflective IR Sensor
- 1: 433MHz Reciever(will be used to take commands from remote).
- 1: Radio remote. (I recommend “Livolo Mini Remote Controller”
only because it is the one I will be using in this project and I will provide code that support this remote). - 1: Project Box
- 1: Switch (For manual control).
- 2: Zip Ties (Used to hold the motor onto the L-shaped mounts)
Step 4: Code for the Curtain
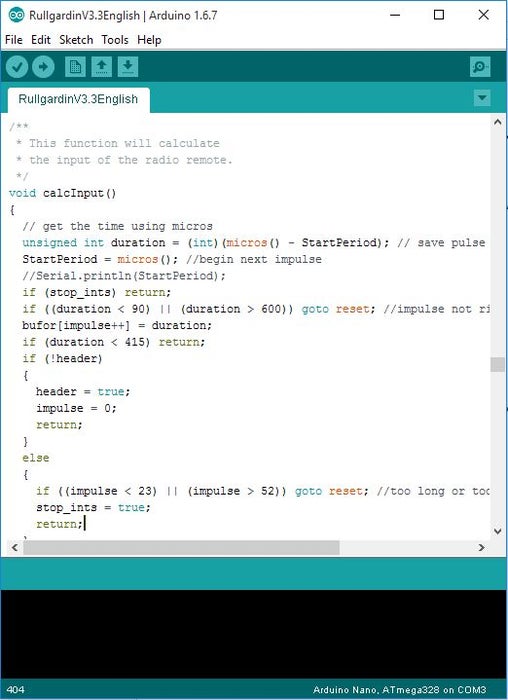
You do not have to change anything in the code for the Arduino (RullgardinV3.3English) but if you want to be able to use your phone to control the curtain and set timers for when it should rise in the morning and roll down in the evening. Then you will need to change at least two things in the code for the NodeMCU board (ESP8266_CurtainCompanion) I have marked these two rows and one of them is the authentication token for your project in the Blynk app on your phone. The other one is the name and password of your Wi-Fi connection.
The code for this project is quite long, please download them if you want to take a look.
Read more: Motorized Pulldown Curtain (Phone & Radio Controlled)
- How does the curtain know whether to move up or down when receiving a command?
The external control sends requests and the curtain will move only if the request corresponds to a change in position (it moves up if down, and does nothing if already up). - Can I still use manual control after adding the motor?
Yes, the manual control for up and down can be used at any time, even during the initial phase. - Do I need the NodeMCU and phone control for the curtain to work?
No, the curtain will work with only the radio remote; the phone control is optional. - What must I change in the NodeMCU code to enable phone control?
You need to change two rows: the Blynk authentication token and the Wi-Fi name and password. - What remote control does the provided code support?
The code provided supports the Livolo Mini Remote Controller. - What alternatives can I use instead of relays?
You could use power transistors instead of relays. - What tools are required for building this project?
The project requires drill bits, screwdriver, computer, soldering iron, crimp tool, wire strippers, glue gun, and electrical tape. - Where should I get the 5V power supply?
Do not buy a fake power supply from some eBay sellers; wait for a sale at local stores and buy a reputable supply.