
This nightlight doubles as a trap to catch monsters under the bed! Before you go to sleep at night, place it under your bed and it will catch any monster under there. It even keeps a light on all night to make sure new monsters stay away.
This Instructable makes a great project for parents of a kid who’s afraid of monsters under the bed. The trap can help them sleep easy knowing that any monsters are locked away in the trap and can’t get them.
The enclosure body of the Monster Catcher is made with laser cut acrylic (though this could be 3D printed if needed) and a few 3D printed parts. The electronics are built using an Arduino.
Supplies:
- 3D printer – dual extruder
- Filament – PLA and PVA
- Sheet acrylic – 12” x 24 “ x ⅛”
- Adhesive vinyl etching – can be replaced with sanding, sandblaster, or spray paint, or some other diffuser
- Sharpie
- Laser cutter – with a bed large enough for 12×24 piece of acrylic
- Glue gun
- 2 L brackets & screws
- Arduino Uno, Leonardo, or equivalent
- Jumper wires
- 2 hobby servos
- Assorted resistors
- RGB LED
- Trimmer potentiometer, aka trimpot
- 9V battery pack with on/off switch
- 9V battery
- 2 small breadboards
(Note the breadboard and jumper wires can be replaced by perfboards and stranded wire, if soldering the circuit together)
Step 1: Write the Code
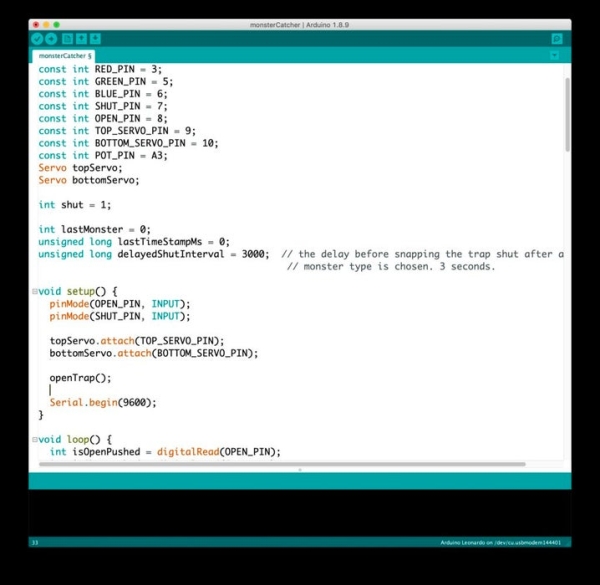
Clone or download the Monster Catcher code from the colleeninboots Github repo. Upload it to your Arduino Uno or Leonardo.
The firmware is designed to open the trap, i.e. the teeth, by moving the servos when the board is turned on, showing that it is ready to catch a monster. As the user turns the trimmer potentiometer (or trimpot), it changes the color of the light. Once a color is chosen, the trap snaps shut after 4 seconds, capturing any nearby monster. If the knob is turned all the way to 0, then the LED shuts off and the trap opens back up.
The program is coded for a Common Anode RGB LED. If you have a Common Cathode RGB LED, just remove the “255 -” from each of the digitalWrite lines in the setColorRGB method. If you aren’t sure, then check the data sheet for the LED that you have.
Step 2: Connect the Circuit
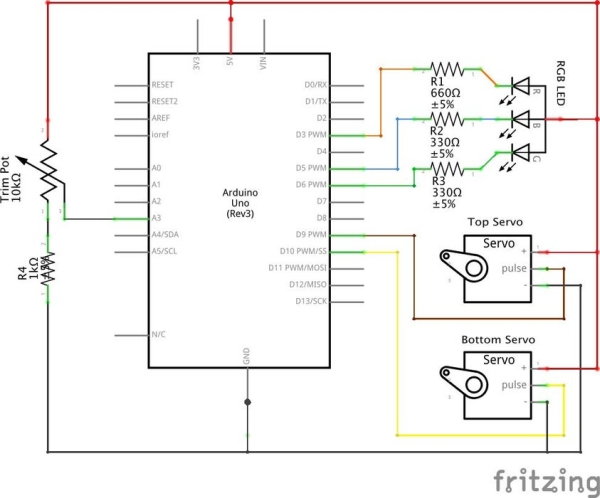
The next step is to get the circuit working. Connect the components as shown in the schematic above. The servos will open and shut the mouth of the trap – one servo controls the top teeth and one the bottom. The RGB LED will be the light source of the night light, and the trimpot controls the color. The 9V battery powers the whole thing, while the Arduino controls all the components.
I find it helpful to build one functional element at a time and then test. For example, connect only the RGB LED and then turn the Arduino on to make sure it is connected correctly.
I even added some buttons and modified the code slightly to test the function of the servos (one to move the servos to the “open” position and one to move it to “shut”).
The video above shows how you can use a piece of notebook paper to keep track of the components and their function while testing.
Step 3: Laser Cut the Enclosure
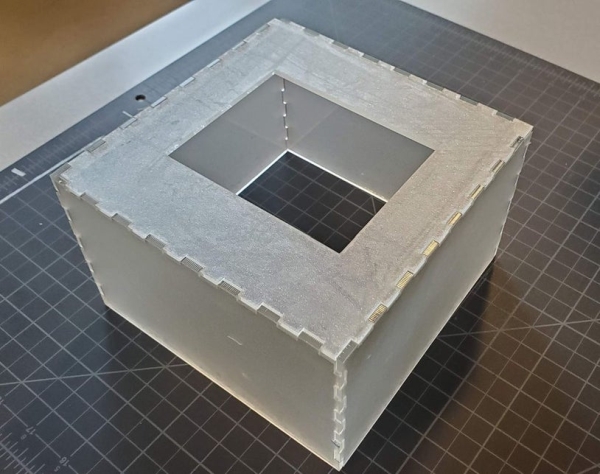
The monster catcher electronics are enclosed in a box with a cutout in the top for the “teeth” of the trap. All the sides of the box can be cut on a single sheet of 12 x 24” acrylic using the attached adobe illustrator file, including an insert for the inside of the box to hold the servos in place.
The file includes a few test pieces for gauging the power setting of the machine and the tolerances of the finger joints. Settings vary a bit by machine, but I was able to get good cuts using the manufacturer settings for 1/8” thick acrylic on the Epilog Universal Laser.
I recommend cutting just the rectangles in the top first, one by one, to test power settings on your machine. Then cut just the finger joint gauges to make sure you’re happy with the fit. Finally, cut the rest of the pieces.
Lastly for this step, we’ll add a light diffuser. I used adhesive etching vinyl. This is a roll of stick-on plastic that has the look of etched or frosted glass. I found it to be an easy way to get an evenly frosted look and diffuse the light inside the box. Just cut the vinyl in the same shapes as your pieces and stick it on. Two layers gave me a level of diffusion I was happy with.
Read more: Monster Catcher Night Light