Summary of Manual Controlled Toll Gate Using Push Button
This project simulates a manual toll booth gate using a NodeMCU microcontroller, a servo motor, and a push button. When the button is pressed, the microcontroller commands the servo to rotate 90 degrees, opening the gate. The system uses Arduino IDE for programming and includes simple craft materials like a box and chart paper to create the physical gate model.
Parts used in the Manual Controlled Toll Gate:
- NodeMCU
- Servo Motor
- Push Button
- Bread Board
- Micro USB cable
- Connecting Wires
- Arduino IDE (with ESP8266 Library)
- Chart (any colour)
- Sketch Pen (any color)
- Empty Box
n this Instructable we will simulate an Toll Booth Gate by using a manual Push Button to open and close the gate.
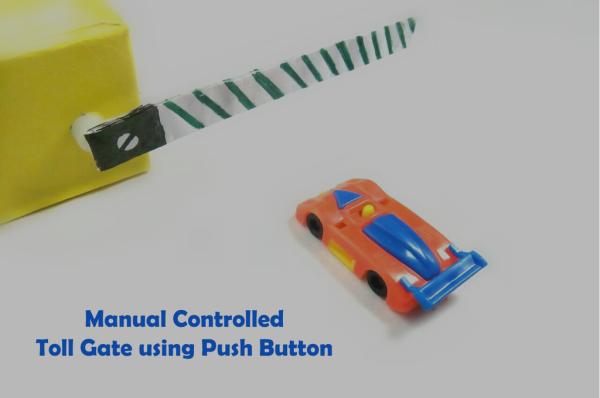
How Does It Work?
When the vehicle comes in front of the gate, the push button is pressed & the gate is opened, this is done by sending a command via microcontroller to the servo to open the gate 90 Degree.
So, we will let’s begin.
Step 1: Components Needed
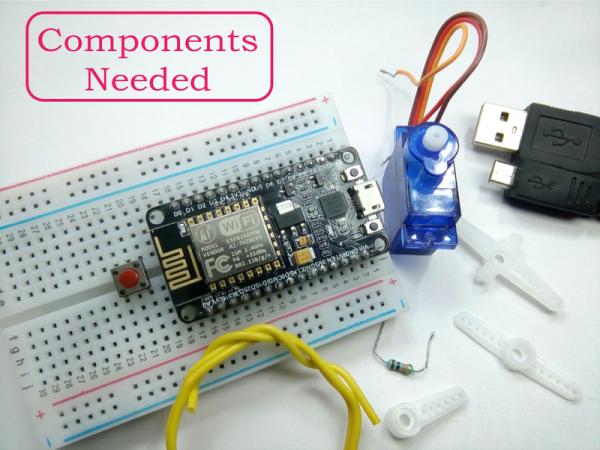
All That You Need.
Hardware Required
- NodeMCU
- Servo Motor
- Push Button
- Bread Board
- Micro USB cable
- Connecting Wires
Software Required
- Arduino IDE (with ESP8266 Library installed)
Craft Items
- Chart ( any colour )
- Sketch Pen ( any color )
- Empty Box
Step 2: Building Process

The construction part of the craft is been displayed clearly in the images. You can choose any colour (optional). You add your creative ideas to make the Instructable look even more awesome.
Step 3: Circuit Connection
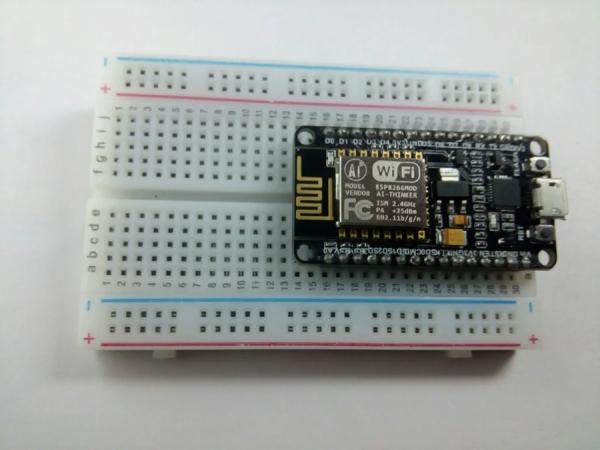
Follow each image for the circuit connections, connections are very simple.
This Instructable is part of a series of Instructables with the NodeMCU, my previous Instructables shows you how to Interfacing servo motor and push button with NodeMCU.
So make sure, you check those circuit connections first before trying out this.
Interfacing Servo Motor with NodeMCU
Control LED Using PushButton with NodeMCU
Step 4: Programming Stage
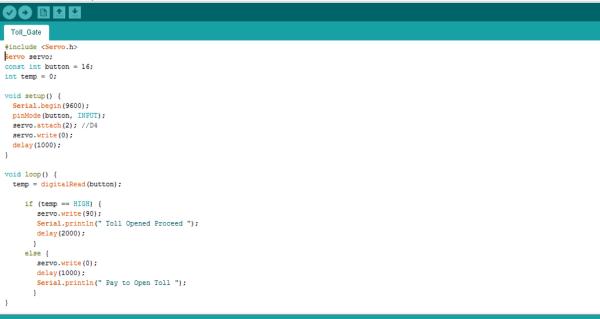
#include <Servo.h>
Servo servo;const int button = 16;int temp = 0;
void setup() { Serial.begin(9600);
 pinMode(button, INPUT);
 servo.attach(2); //D4
 servo.write(0);
 delay(1000);
}
void loop() {temp = digitalRead(button);
if (temp == HIGH) {
servo.write(90);
Serial.println(" Toll Opened Proceed ");
delay(2000);
}
else {
servo.write(0);
delay(1000);
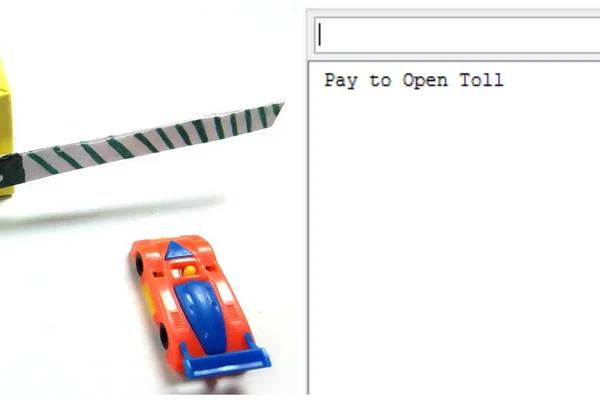
Serial.println(" Pay to Open Toll ");
}}
Download the “Toll_Gate.ino” file and open it up in the Arduino IDE.
Then Create a new sketch and paste the code below in the Arduino IDE and hit Upload. You can tinker with it if you like based on the application, or just use it as it is.
Step 5: OUTPUT
That’s all makers!
I hope you liked this, Stay Tuned for more Projects!
Source: Manual Controlled Toll Gate Using Push Button
- How does the gate open?
The gate opens when a vehicle approaches and the push button is pressed, sending a command via the microcontroller to rotate the servo motor 90 degrees. - What software is required for this project?
You need the Arduino IDE with the ESP8266 Library installed to program the NodeMCU. - Which pin connects to the servo motor?
The code specifies that the servo attaches to pin D4. - Can I change the colors of the gate?
Yes, you can choose any color for the chart and sketch pen to customize the appearance of the craft. - Does the gate stay open indefinitely?
No, the servo rotates back to 0 degrees after a delay of 1000 milliseconds if the button is not held high. - What happens when the button is pressed?
The serial monitor prints "Toll Opened Proceed" and the servo moves to 90 degrees for 2000 milliseconds. - Where can I find similar circuit connections?
The article suggests checking previous instructables on interfacing a servo motor and controlling an LED with a push button using NodeMCU. - How do I upload the code?
Create a new sketch in the Arduino IDE, paste the provided code, and hit Upload.