Summary of Lettuce for Life – Arduino 101 Based Automated Controller for Hydroponics, Aeroponics, Aquaponics, Etc. Intel Curie
This project, "Lettuce for Life," details building an Arduino 101-based automated controller capable of managing up to four hydroponic or aeroponic systems simultaneously. It features Bluetooth customization and real-time LCD notifications, designed for ease of use to help beginners grow lettuce efficiently indoors. The guide covers system setup, including hydroponic and aeroponic bucket construction, necessary environmental controls, and optimal conditions for growing romaine lettuce. The device leverages the Intel Curie module for real-time control, monitoring sensors, and relay-based power management, providing a high-tech approach to soil-less agriculture automation.
Parts used in the Lettuce for Life project:
- Intel Arduino 101 board
- OLED LCD Screen
- Solid State Relay
- Humidity and Temperature Sensor
- Light Sensor
- Water Level Sensor
- 5 Gallon Buckets (for Hydroponic and Aeroponic setups)
- Air Pump (7.8L/min, 2 channels)
- Flexible Air Line Tubing
- Small Cylinder Air Stones
- Hydroton (clay pebbles growth medium)
- Hydroponic Basket (8 inch wide)
- Active Aqua 400-GPH Submersible Water Pump
- 360° Non-Adjustable Sprinkler Head
- Threaded Male to Female PVC Couplings
- 2 or 3 inch Net Cups
- Full Spectrum Light Bulb with heat-sink
- Light Clamp
- Romaine Lettuce
- Digital LCD TDS Meter Water Tester
- General Hydroponics GH1514 pH Control Kit
- Hydroponic Lettuce Fertilizer (24-15-36)
- USB A to B Cable (for Arduino connection)
SUMMARY
A device that can be used to control up to 4 different Hydroponic/Aeroponic Systems at once. The device will control the components of the system and will display notification to a LCD screen and allow the user to customize settings via Bluetooth. This system will be user friendly and optimized for fast growing so that even the least experienced user can grow lettuce with minimal maintenance required.
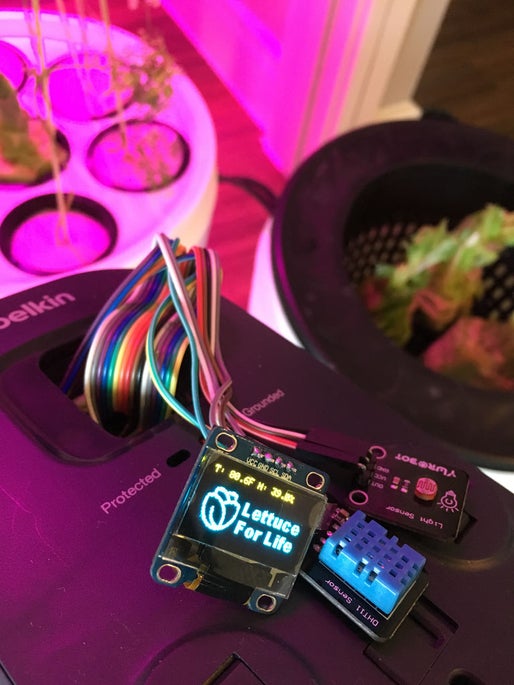
AUDIANCE
This instructable was put together to help:
- A tech/computer person who is interested in growing plants in water(Myself)
- A traditional gardening(soil) person interested in converting their crops to DWC(Deep Water Culture)
- A DWC person interested in automating the process
- An agricultural/farming person that wants to implement new technology into their crops
- Last but not least, the Curious George
INSPIRATIONAL VIDEOS
Backyard aeroponics: self-sustaining farm for Wisconsin
Hydroponics vs Aeroponics vs Soil
BACKGROUND
I do not have a garden or experience with growing plants. I’m just a computer geek that decided to quickly grow plants without soil inside my apartment. What inspired the lettuce for life project was the idea of regrowing lettuce. After learning about DWC(Deep Water Culture), I decided to start this Instructable because I found lots of information about DWC, but not a lot about the automation of the systems.
GROWING PLANTS
I decided to use 5 Gallons buckets to build a Hydroponic and an Aeroponic system that will be monitored by the Arduino device. I will show you how to build the device and both bucket system. If you have an existing DWC system, you can focus on the automation steps to add some automation to your system.
DEVICE DESIGN
The design has been inspired by power strip packet sniffer article from lifehack.com. Here is the Amazon Link to the exact powerstrip used. This one should work as well. You can come up with your own device design that does not require you to tamper a powerstrip. For example, using a plastic electrical junction box is a better option for those who do not know much about electricity. Quick warning: AC current can kill you. I would not recommend anybody to follow a tutorial on the internet that deals with something that kills, like electricity, if they do not have basic understanding of it.
TECHNOLOGY
For this project, I chose the $30 Arduino 101 board because it comes with a tiny, low-power Intel Curie module with built-in Real Time Clock(necessary for timer), and built-in Bluetooth. There is also a in built-in Gyroscope, but we will not be using it. I will break this Instructables down to the enabling of each component per step page. Finally, a step for the master code that used to pull information from all the sensors every 5 seconds.
Here is a preview list the components used for automation:
- Intel Arduino 101 – Amazon Link
- OLED LCD Screen – Amazon Link
- Solid State Relay – Amazon Link
- Humidity and Temperature Sensor – Amazon Link
- Light Sensor – Amazon Link
- Water level sensor – Amazon Link
With no further dues, lets get stated!
UPDATE: DON’T FORGET TO VOTE FOR LETTUCE FOR LIFE!
Step 1: Setting Up the Location
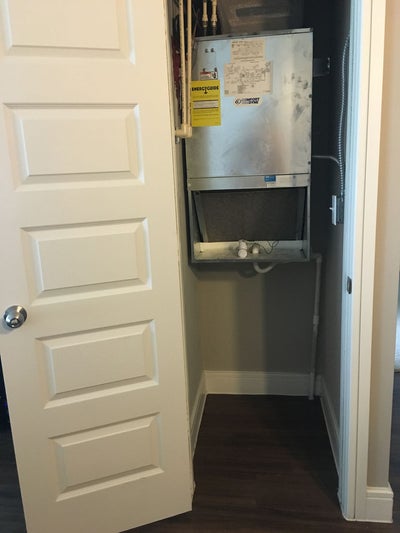
INSTRUCTIONS
- To utilize dead space, I chose to setup inside my A/C closet.
- When choosing a location for your project, keep in mind the following :
- Temperature should not change dramatically.
- Power Outlet closeby, but not too close where it could get wet from splashes.
- A place to clamp the light
- A way to close the area so that the light will not go everywhere
WHY IS THE LIGHT PINK?
- The light looks pink because it is a mixture of Violet-Blues and Orange-Reds LEDs.
- These lamps are commonly known as Full Spectrum Light.
- Reds are needed for Chlorophyll A (used in photosynthesis)
- Blues are needed for Chlorophyll B
- Greens are reflected by the plant
THE SHOPPING LIST
- Full spectrum Light Bulb with heat-sink – Amazon link
- Light Clamp – Amazon Link
Step 2: Setting Up the Hydroponic Bucket
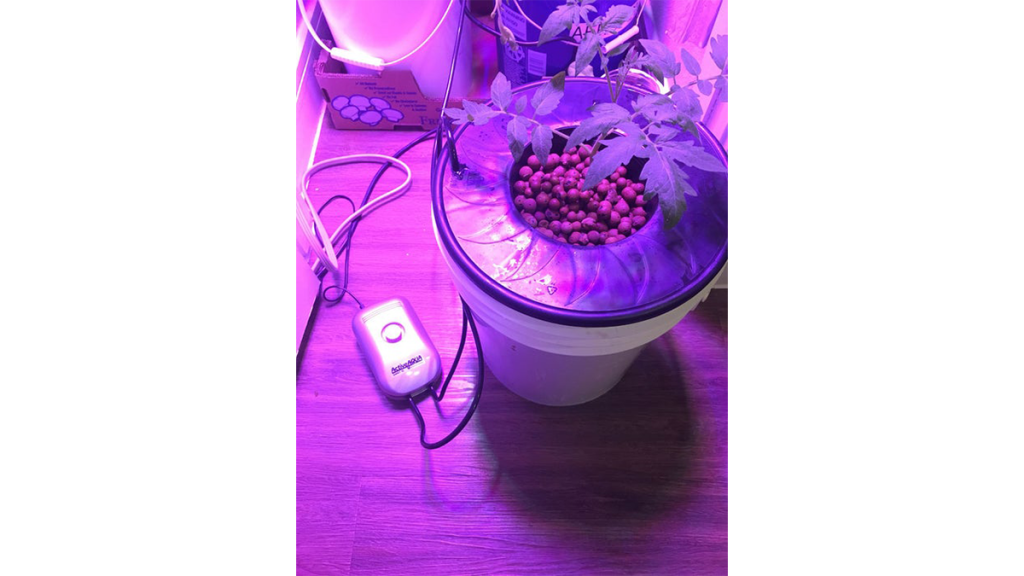
WHAT IS IT?
- Hydroponics is a method of growing plants using mineral nutrient solutions, in water, without soil. Terrestrial plants may be grown with their roots in the mineral solution. oxygen is delivered to the roots via a air stone inside the water.
INSTRUCTIONS
- In this Instructable, I will be using 2 Hydroponics buckets to grow a single plant per bucket. If you wish to use one only, I still recommend buying the two channel air pump and 2 air stones, just put both air stones in the same bucket.
- The medium used is hydroton (a clay pebbles and should not be substituted). Wash it before use
- Do NOT use RIVER ROCKS because they are not pourus.
- Do NOT use LAVA ROCKS because they have sharp edges and will damage your roots
- I chose to use a 5 Gallon buckets because:
- It’s structure is stronger than those Walmart tote, and uses less water than it
- Easy to move it around
- Easy to change water
- Easy to clean
- You will need to make a hole on the lid or create an opening on the edge of the bucket to pass the air hose
- Fill up your bucket with the water going 1 to 2 inches over the bottom of the net cup, so the lower pebbles are submerged
- As your roots grow past the net cup, the water level should be lowered
THE SHOPPING LIST
- 2x 5 Gallon bucket
- Air Pump 7.8L/min – 2 channels – Amazon link
- 8 ft of flexible air line tubing(cut in half and use 4 ft per channel) – Amazon link
- 2x Small Cylinder Air Stone – Amazon link
- 8 in Wide Bucket Basket – Amazon link
- Hydroponics Clay Pebbles Grow Media – Amazon Link
- OR
- You may buy a similar pre-made system like the Hydroponic Deep Water Culture Vegetative System from homedepot.com. This setup ends up being cheaper, but it has a lower quality.
Step 3: Setting Up the Aeroponic Bucket
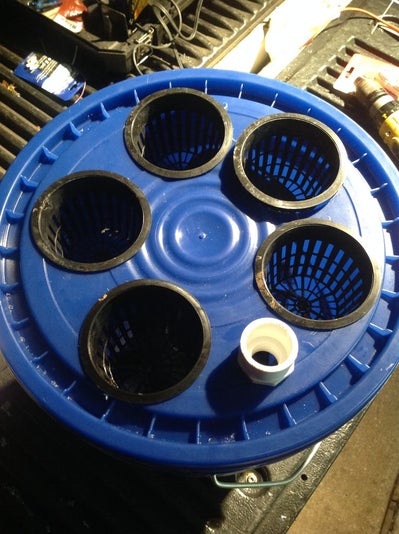
WHAT IS IT?
- Aeroponics is the process of growing plants in an air by spraying the roots with mineral nutrient solutions without the use of soil. Aeroponics grow faster than hydroponics because more nutrients and oxygen gets absorbed since plants are 100% in the air
INSTRUCTIONS
- Get a 5 gallons bucket and lid
- Drill openings in the lid with the same size of your netcups. The smaller PVC hole is for the water sensor
- Starting from the water-pump, stack a few PVC male to female couplings. This makes it easier for you to adjust the height as your roots grow inside the bucket. Attach the 360° sprinkler head to the end of it.
- Create a gap on the side of the bucket to pass the pump’s electrical wire
- DO NOT make the hole too small because you will damage the electrical cord
- DO NOT make the hole too big because water will leak. This happened to me and I had to tape some orange foam to stop the leak
- Depending on your lid, you may need to also create an opening in the inside of the lid if it touches the cord
THE SHOPPING LIST
- 5 Gallon Buckets
- Active Aqua 400-GPH Submersible Water Pump 6 Foot Cord – Amazon link
- 360° Non-Adjustable Sprinkler Head
- Threaded Male to Female PVC couplings. Make sure it fits your pump and the sprinkler
- 2 or 3 inches net cups – Amazon Link
- 3″ works better for regrowing
- 2″ works better for growing for seed
Step 4: Growing Letuce
WHY ROMAINE LETTUCE?
- Lettuce can be easily regrown; it doesn’t require you to have a green thumb
- Fast Growth. In DWC, lettuce can go from seed to harvest as fast as 30 days
- Doesn’t require lots of nutrients. Will almost grow on tap water!
- Doesn’t require special light bulb. Will grow under white daylight light bulb
- Also, care2.com compared the benefits of romaine vs iceberg lettuce. Romaine lettuce has:
- Less sugar
- Twice the protein
- Twice the calcium
- Three times the Vitamin K
- Four times the Iron
- Eight times the Vitamin C
- Seven times the Vitamin A
INSTRUCTIONS
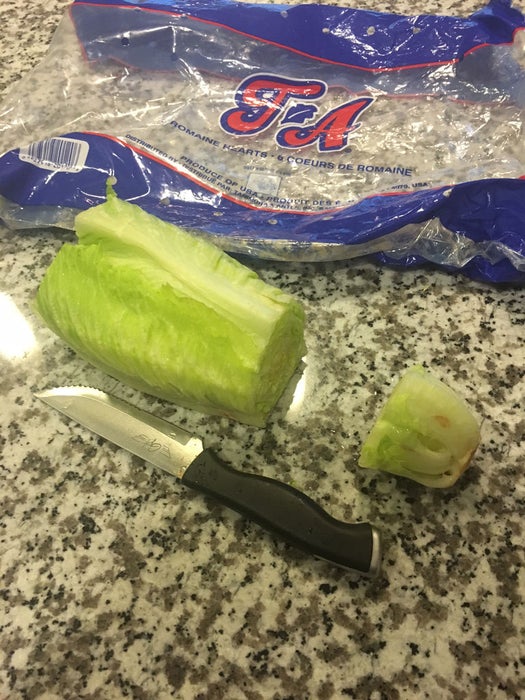
- Cut Romaine lettuce about 1 – 2 inches from the bottom. Make a nice salad with the top
- With a spoon, scrape off the gunk on bottom of lettuce stem
- DO NOT remove outer leafs. Doing so will make your lettuce grow loosely all over the place(see image 3)
- Lettuce will start regrowing if you simply put it in a plate with 1in water and change the water daily
- Get a sample of tap water and check the ppm and pH. As you can see in picture
- Texas tap water was at 114PPM and had a pH of 8.5
- Fill up bucket with water until it covers water pump completely, adjust pH, and add fertilizer
- pH should be between 6.5
- PPM should be about 560 – 840 of nutrients
- DO NOT over fertilize lettuce. This is the most common mistake people make.
- Keep nutrient water away from leaves. It can damage leaves by making nutrient burns
- Fertilizer should have a balance of the following required nutrients for your plant:
- Primary: Nitrogen(N), phosphorus(P), potassium(K)
- Secondary: Calcium Nitrate(Ca), Magnesium Sulfate(Mg)
- There are multiple table for each plant’s fertilizer mix values available on the internet
- Once in a while, check your sprinkler head filter(if you have one)
BEST CONDITIONS TO GROW LETTUCE
- Ideal humidity is from 40% to 80%, with 50% being the best for growth
- Ideal temperature is 60°F to 70°F during day time, and 50°F to 60°F at night time
- if you are using LED lights, raise temperatures by 5°C. LEDs do not radiate heat
- I had better results with 20 hours of Light, 4 Hours of Dark
- Ideal PPM 560 – 840
- ideal pH is from 6.0 to 7.0
- ideal cF is 8-12
THE SHOPPING LIST
- Romaine Lettuce – No amazon link, go to the store and buy it =)
- Digital LCD TDS Meter Water Tester- Amazon link
- General Hydroponics GH1514 Ph Control Kit – Amazon Link
- Hydroponic Lettuce Fertilizer 24-15-36 – Amazon Link
Step 5: Setting Up Arduino 101
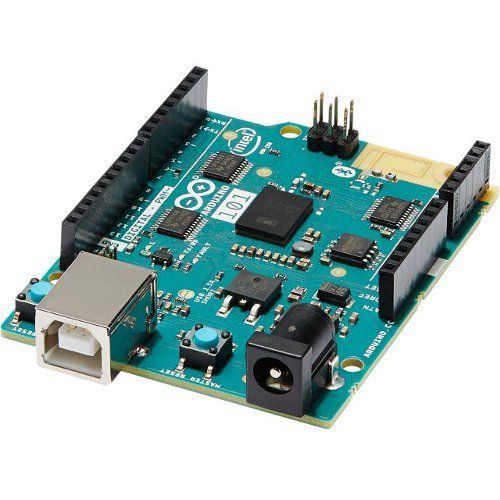
WHAT IS AN INTEL ARDUINO 101?
- Arduino 101 is the first widely available development board based on the tiny, low-power Intel Curie module.
- Easy to use and affordable, Arduino 101 is ideal for education environments, makers and embedded developers.
LETS GET STARTED!
- Connect the Intel Arduino 101 to your PC with a USB A to B cable
- Download the latest Arduino Software(IDE)
- Go to http://www.arduino.cc,
- Navigate to the Download page
- Chose the Operating system on the right side of the page.
- Then a donation page will show up before you start the download
- You can skip it by clicking on “JUST DOWNLOAD” to start download
- Install the Arduino Software with all default selected options. If prompted, Install any required drivers as well.
- Open Arduino Software.
- A new scketch will pop up with 2 fundamental functions,
- setup()
- loop()
- Remember that this IDE is made in Java so if you have troubles opening the IDE, It may be because your PC does not have Java installed
- A new scketch will pop up with 2 fundamental functions,
- By default, Intel Arduino 101 board is not part of the software and needs to be downloaded manually
- On the Top Menu Bar, navigate to Tools -> Board -> Board Manager.
- In the Boards Manager window, search for the word “curie”
- You should see the “Intel Curie Boards. Arduino/Genuino 101”.
- Click in the install button and wait for the board package to be downloaded.
- When prompted, click install on any popup in Windows.
- Select the Arduino 101 Board
- Now navigate back to Tools -> Boards and scroll down to the “Intel Curie(32-bit) Boards” section
- Select “Arduino/Genuino 101” board
- Select the COM Port for your Arduino platform
- Navigate to Tools -> Port
- select the port that has the label “Arduino/Genuino 101”
- In my case was COM3
- Last but not least,we need to make sure we have the 3 main Curie libraries.
- Navigate to Sketch -> Libraries – > Library Manager
- Type the word “curie” in the search box.
- Install “CurieBLT”, “CurieIMU”, and “CurieTime” if not installed already.
SANITY CHECK
- Now lets upload a quick example to verify that everything is setup properly.
- Make sure you have the Arduino connected via USB
- Navigate and open to File -> Examples ->01.Basics -> Blink.
- A new window called Blink will popup with some code.
- In this window, simply click on the “Upload” button
- Button located on the top left of the window(looks like an arrow to the right).
- This will cause the code to compile and upload.
- If everything is setup correct, you should see a green build-in LED blink on your Arduino board(LED located close to Digital pin 13)
