Summary of Learn how to use 7-Segment LED Display using Arduino
Summary: This tutorial explains wiring and basic programming of a 7-segment LED display with Arduino. It covers the common cathode type, connecting each segment to Arduino digital pins and the shared ground, and provides a starter Arduino class (header) with basic functions to control displayed digits. The guide encourages expanding the class and experimenting further.
Parts used in the 7-Segment LED Display Project:
- Arduino
- 7-Segment LED display (common cathode)
- Connecting wires
- Resistors (for segment current limiting)
- Breadboard (optional for prototyping)
7-Segment LED Display is a very useful component, but also a very confusing and difficult piece to use for beginners. It won’t be difficult once you get it working for the first time.
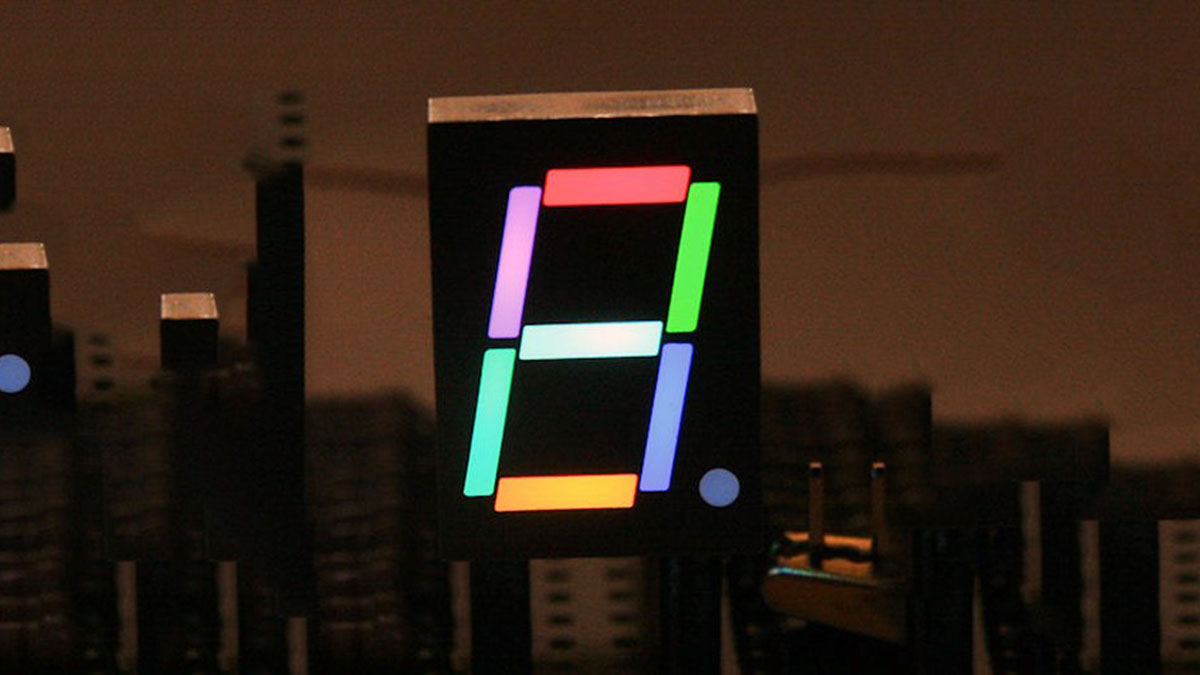
This is what you will get at the end of the tutorial (part one):
It basically consists of 7 LEDs, (8 if include decimal point). Just like controlling a single LED, we need to connect each ‘segment LED’ to a Arduino digital pin. Here is the circuit diagram of the LED display:
You might notice, there are 2 different type of them, don’t be scared by them, because in the market, the “Common Cathode” type is the most popular so you won’t need to care about the other type.
Basically, all you need to do is to connect each LED with a pin, and connect the shared Gnd connector to the ground pin. Next you will need to program it, so required LEDs are switched on to display different number.
Here is my circuit diagram:

Coding:
I have created a class for using the 7 seg LED display, it’s not a complete working class, but gives a few very useful basic functions. Feel free to expand it and add new useful functions, or create your own class.
Seven_Seg_LED_Display.h:
Major Components in Project
Arduino
LED
For more detail: Learn how to use 7-Segment LED Display using Arduino
- What does a 7-segment LED display consist of?
It consists of 7 LEDs (8 if including the decimal point) arranged to form digits. - How do you connect a common cathode 7-segment display to Arduino?
Connect each segment LED to an Arduino digital pin and connect the shared cathode to the Arduino ground. - Do I need to worry about different types of 7-segment displays?
The tutorial notes there are two types, but the common cathode type is the most popular so you likely won't need to worry about the other type. - Can I control each segment like a single LED?
Yes, each segment is controlled like a single LED by connecting it to a digital pin and switching it on or off. - Is there example code provided in the tutorial?
Yes, a header class Seven_Seg_LED_Display.h with basic functions is provided as a starting point. - Is the provided class complete and final?
No, the class is not complete; it provides useful basic functions and can be expanded. - What is required to display different numbers?
You need to program the Arduino so the required segment LEDs are switched on to form each number. - Are resistors required in the circuit?
The parts list and typical practice include resistors for segment current limiting.