Summary of Connecting an IR Sensor Using Arduino
The article describes wiring IR proximity sensors on a breadboard: adding an IR LED per detector, powering the IR detector with 5V and ground, and matching the detector’s middle pin to the LED cathode/ground. It outlines assembling LEDs into housings, correct LED polarity (anode longer, cathode flat), and using current-limiting resistors for LEDs. A parts list and step-by-step placement instructions are provided, noting IR LEDs are invisible so resistors are essential.
Parts used in the IR Sensor project:
- 2x IR Detectors
- 2x IR LEDs in housings
- 2x 2kΩ resistors (red-black-red)
- 2x 220Ω resistors (red-red-brown)
- 2x red jumper wires
- 2x black jumper wires
- 2x signal jumper wires
- Breadboard
Schematic
Since the IR Sensor uses a light sensor, the schematic is very similar to that of the light sensor. The only difference is the addition of an IR LED and that the IR detector requires connection to 5V and ground.

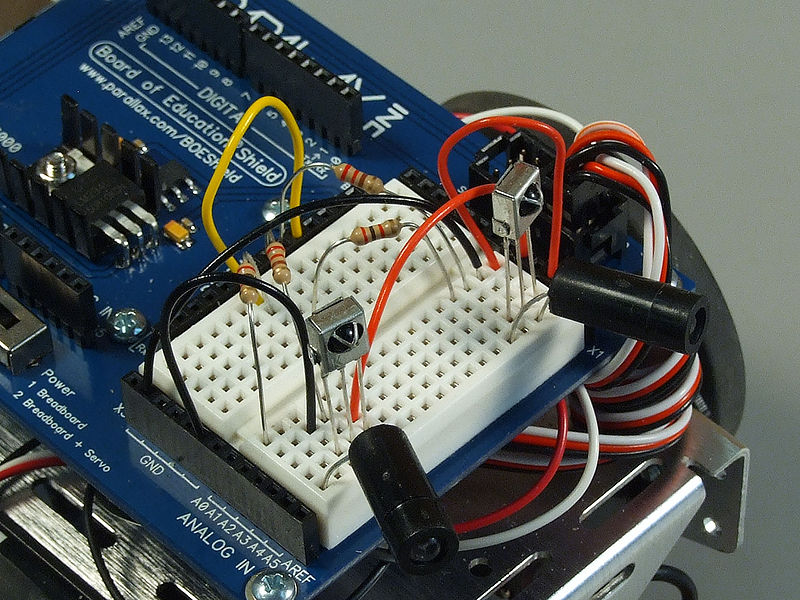
Breadboard Setup
To setup the sensors you will need:
- 2x IR Detectors
- 2x IR LEDs in housings
- 2x 2kΩ resistors (red-black-red)
- 2x 220Ω resistors (red-red-brown)
- 2x red jumper wires
- 2x black jumper wires
- 2x signal jumper wires (can be of any color)
First we need to make sure that the IR LEDs are in their housings :
1) Insert IR LED into larger housing part with leads sticking out.
2) Press the LED firmly into the housing.
3) Place the smaller housing part over the LED.
Placing the IR LEDs
Now we can place the IR LEDs into the breadboard. Note that the anode (longer lead, rounded edge) is the positive side and the cathode (shorter lead, flat edge) is the negative side. Reversing the polarity may damage the LED.
Placing the IR Detectors
Now we can place the IR Detectors into the breadboard. The middle prong of the collector should be on the same bus as the LED’s cathode (in order to tie it to Ground).
Resistors
Remember, the IR LED’s are still a form of LED and will need a resistor in place to limit the amount of current flowing through them. This is especially important to remember with infrared LEDs because the wavelengths of light they emit are not visible to the human eye; it may be difficult to determine if they are working or not.
For more detail: Connecting an IR Sensor Using Arduino
- How is the IR Sensor schematic different from a light sensor schematic?
The IR Sensor schematic adds an IR LED and requires the IR detector to be connected to 5V and ground. - How many IR detectors and IR LEDs are needed?
The setup uses 2 IR Detectors and 2 IR LEDs in housings. - What resistors are required for the IR LEDs?
Each IR LED requires a 220Ω resistor; the parts list also includes 2kΩ resistors for the detectors. - Which pin of the IR detector should be tied to ground?
The middle prong of the IR detector should be on the same bus as the LED cathode to tie it to ground. - How can you identify the anode and cathode of the IR LED?
The anode is the longer lead with a rounded edge (positive) and the cathode is the shorter lead with a flat edge (negative). - Why is it important to use resistors with IR LEDs?
IR LEDs need resistors to limit current because their emitted light is invisible and damage may not be obvious. - Can reversing the LED polarity cause damage?
Yes, reversing polarity may damage the LED. - What jumper wires are included in the setup?
The setup includes red and black jumper wires for power and two signal jumper wires of any color.