So far, we have only built 3 LED cubes. Our first cube is a 4x4x4 LED cube and though we managed to successfully complete it without too much difficulty, we did not find much excitement and satisfaction experimenting with it.
Next, we designed, created and built our second cube, an 8x8x8 LED cube driven using the awesome MAX7219 ICs almost a year ago. You may check out our instructable on jolliCubeif you are interested.
The main objective of creating jolliCube is to encourage electronics hobbyist looking into building their first LED cube to take a leap of faith to build a larger cube instead of building a small 4x4x4 or 5x5x5 LED cube.
Though building an 8x8x8 cube requires a lot more effort and patience, it is very much more exciting to experiment with it. We are sure that all electronics hobbyists who are able to successfully complete an 8x8x8 LED cube will feel an indescribable sense of satisfaction like we do if that is their first LED cube.
We built our third LED cube which is another 8x8x8 jolliCube but in a different LED color (orange) recently just to refresh ourselves on our building process. We will be using this cube for this instructable.
We are very encouraged to know that quite a handful of electronics hobbyists have successfully built their jolliCubes. However, once a while we received requests for more animation effects for jolliCube. We understand that it is not an easy task to create new and interesting animation effects for LED cubes. Some may be able to search online for animation effect codes designed for other LED cubes and adapt them for use on jolliCube, however, not all are able to do so.
We are proud of creating the jolliCube hardware but without the software to drive jolliCube would have rendered it useless. For this instructable, we will be introducing the MD_Cubo software library created by Marco Colli to drive jolliCube.
Marco Colli is very well regarded and have contributed very much to the Arduino community. One of his popular contributions is the awesome Parola library to drive LED matrix displays. We have used his Parola library for two of our instructables. You may check them out at https://www.instructables.com/id/Arduino-Parola-Zone-Time-Msg-Display/and https://www.instructables.com/id/Large-8×8-LED-Matrix-Display/.
The MD_Cubo library comes with some new and interesting animation effects which we did not have in our earlier jolliCube instructable. Here, we will showcase some of the animation effects from the MD_Cubo library example with some additional interesting animation effects we adapted from codes found online which were written for some other LED cubes.
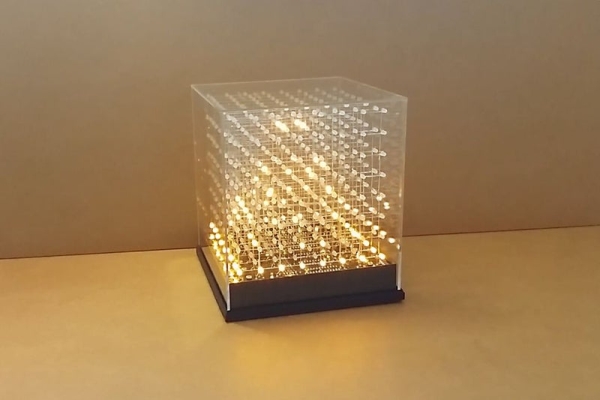
You may view the following jolliCube with MD_Cubo library Demo YouTube video to see what we will be building here.
Step 1: Building JolliCube
First, you will need to have jolliCube before we proceed later to load our demo program to run the animations. If you have already build jolliCube, you may like to proceed to the next step.
If you are interested in building jolliCube, you may check out our instructable at https://www.instructables.com/id/JolliCube-an-8x8x8-LED-Cube-SPI/
Go through the following steps in that instructable to build the hardware for jolliCube:
Step 1: Design of jolliCube – Arrangement of LEDs
Step 2: Design of jolliCube – Electronic control circuit
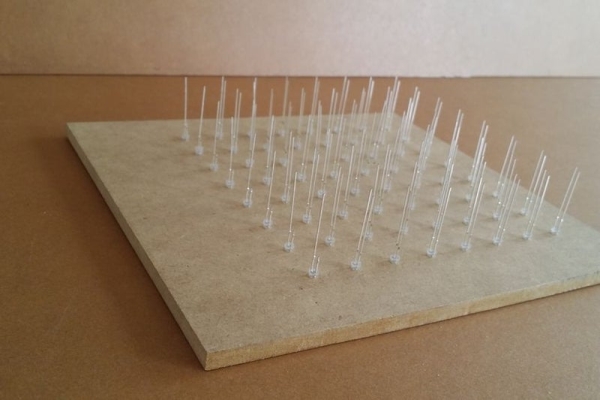
Step 3: Build the jigs
Step 4: Assembly Part 1 – Build 8 layers of 8×8 LED Matrix
Step 5: Assembly Part 2 – Complete the LED Cube with control circuit
Step 6: Test jolliCube
The following are the two jolliCube assembly YouTube videos:
Step 2: JolliCube With MD_Cubo Library Demo Program Code
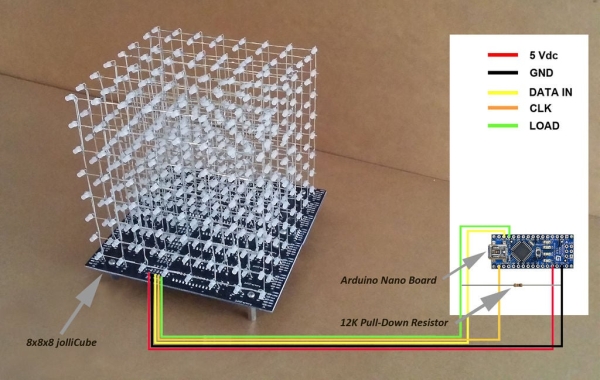
Though our jolliCube is not designed to work with any particular microcontroller, we will be using the popular Arduino board in this instructable to drive it via SPI using only 3 signal lines.
The demo program code for the LED Cube used here is based largely on the demo example that comes with the MD_Cubo library created by Marco Colli with a few additional interesting animation effect codes we found online.
For this project, you will need to install the MD_Cubo library from https://github.com/MajicDesigns/MD_Cubo
The jolliCube MD_Cubo Demo V1.0 example can be downloaded here.
Upload the demo program to your Arduino Nano/Uno. Then connect it to jolliCube. See the picture above for the connection of the Arduino Nano/Uno to jolliCube.
Power up jolliCube via your Arduino Nano/Uno. Any USB port/adapter which is able to supply at least 500mA should be suitable.
If your jolliCube build is good, you may sit back and Enjoy the Show!
Step 3: Building the Enclosure
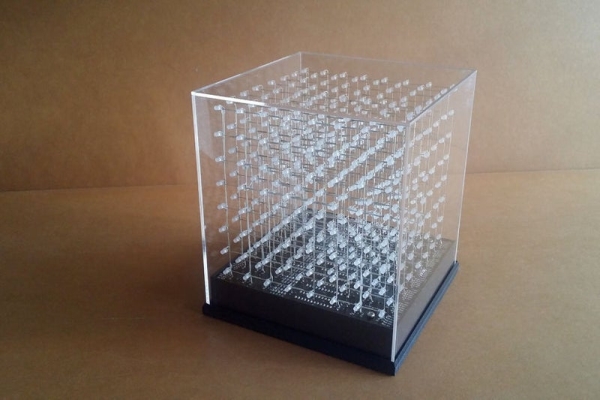
You will want to protect your investment after putting in all these hours building the 8x8x8 LED Cube by building an enclosure for it.
We will not delve into the detail on how we build our enclosure here. We are fortunate to find 6 x 8-inch clear acrylic sheets (2mm thick) at one of our local Art Shop which is just the right size to make a protective case for our LED Cube. We just need to shorten the length of each acrylic sheet using the simple scrape and break method which is fast and produces acceptably nice edges. We also found acrylic glue which is a solvent for ‘welding’ acrylic at the Art Shop. Using a syringe, we glued the acrylic sheets together to form the protective case. We also designed a simple base for our enclosure and have it 3D printed out. You may want to check out our STL file for 3D printing of our base below.
Click here to download our jolliCube base STL file for 3D printing.
We found a 6 x 6 x 6 inches clear acrylic box display case at http://www.collectingwarehouse.com which looks suitable for our LED cube. You may like to check it out if you are looking for a more professional and ready-made protective case instead of building it yourself.
Read more: JolliCube (8x8x8 LED Cube) With MD_Cubo Library