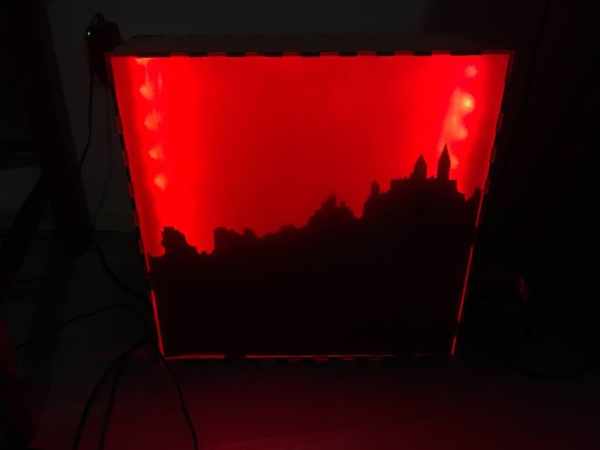
I made a Sunlight simulating lightbox with a mountain village skyline, that I might upgrade to a wake-up light some time, for a school project.
Step 1: Get the Supplies
Supplies I used:
-Arduino UNO
-Neopixel ledstrip 1m, 30 leds(DC5V-W2812)
-3 jumper wires
-USB cable type B
-5V power adapter
-Aluminum tape(or aluminum foil)
-4mm thick wooden & a plexiglass(sanded down) plate
-laser cutter
-Drill with drill bit to make a hole in one of the box’ faces
-Superglue
-Adhesive tape
-cutter knife
-thick black paper / cardboard
Step 2: Make a Box Template
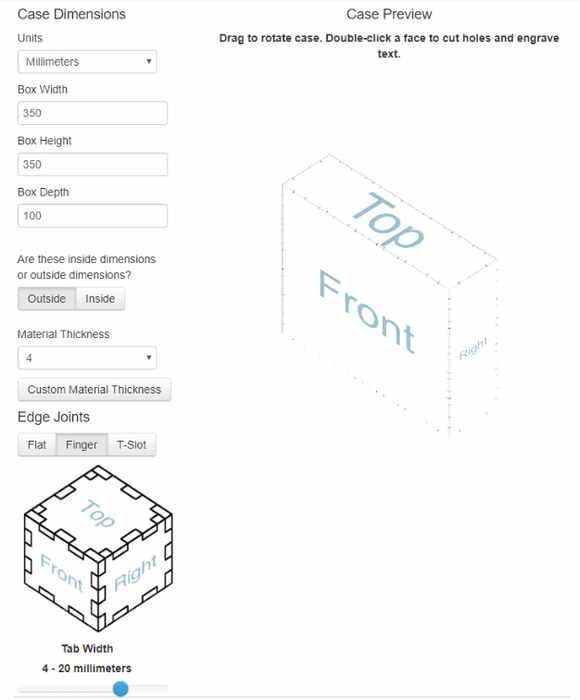
Go to makercase.com, fill in the dimensions. You can see the dimensions I used in the image above(don’t forget the thickness of your material).
download the PDF, open it in illustrator and export as .dxf
Step 3: Prepare the Template for Lasercutting
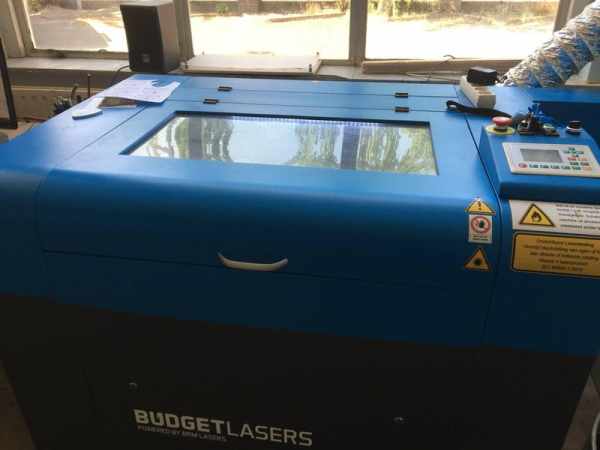
Load the .dfx in Laserwork, remove 1 face, which will be cut from plexiglass.
Rearrange the other faces for that will be cut from wood. Measure the wood and make sure you place it in the lasercutter accordingly, and get it going.
Next up arrange the leftover face to cut the plexiglas part.
Assemble the box to test.
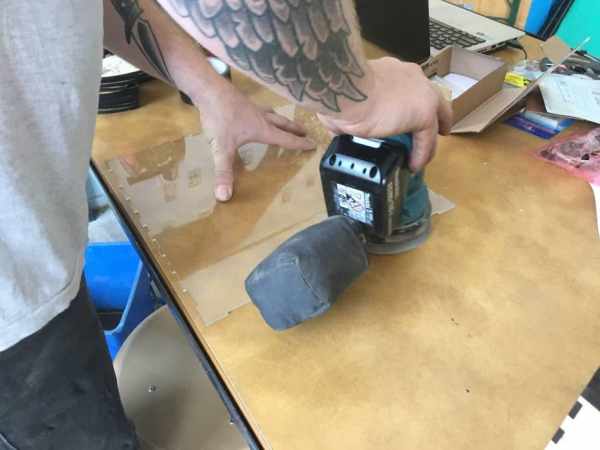
Step 4: Sand the Plexiglass Face
Step 5: Drill a Hole for the Cables
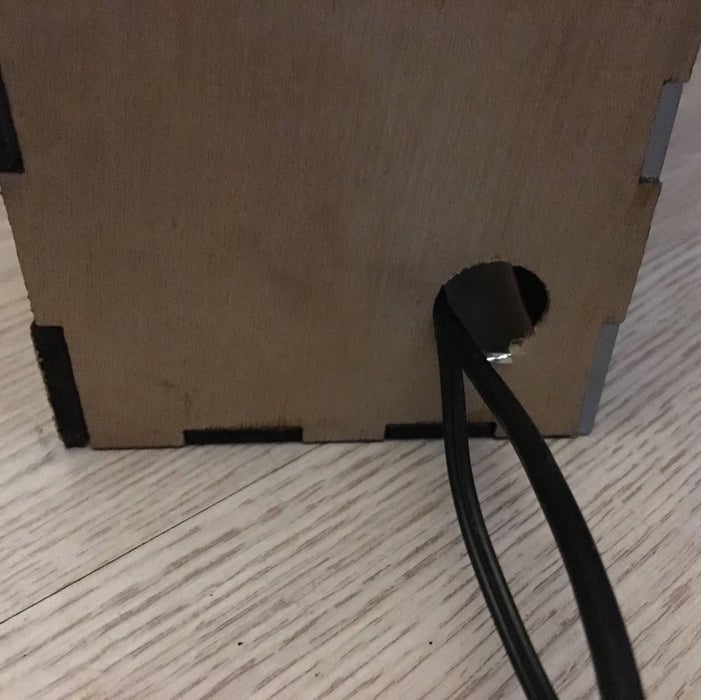
Use a drill with a ~20mm drill bit to make hole in one of the side-faces, so you can pull the cables through there.
Step 6: Apply Aluminum Tape
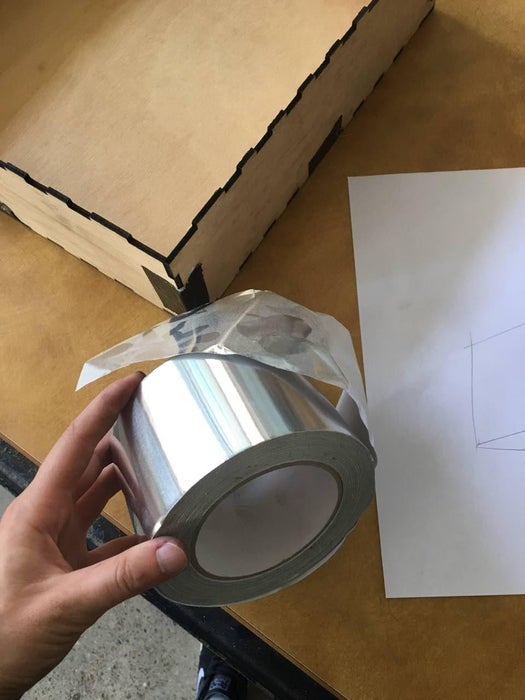
Cover inside of wooden faces with aluminum tape(or foil)
Step 7: Assemble the Box
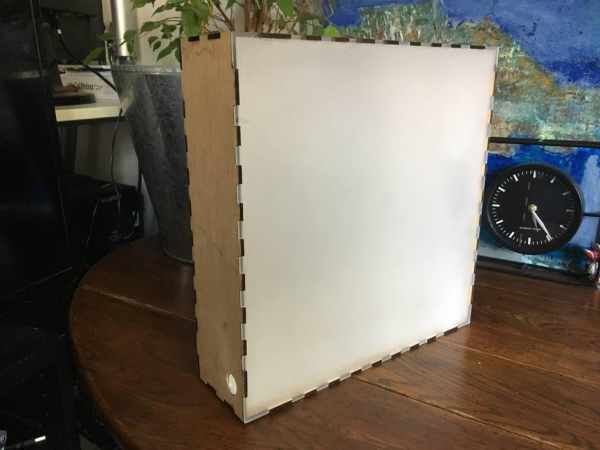
Superglue side-faces & plexiglass face together, leave the backface unglued for easy access.
Step 8: Making the Skyline
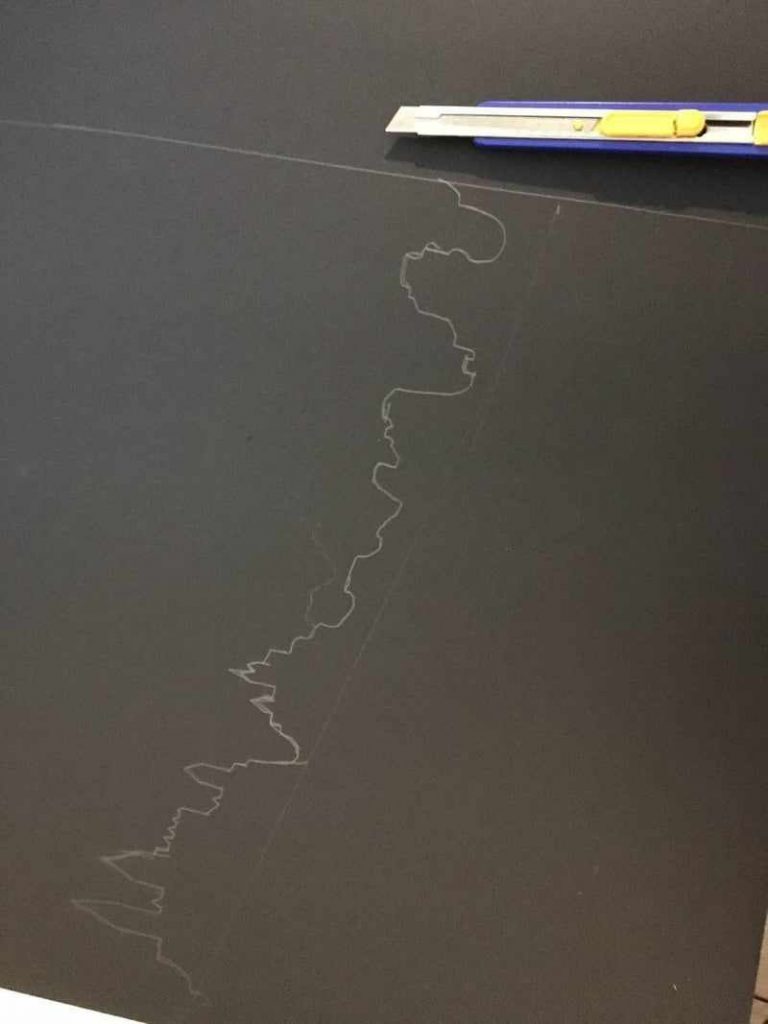
Grab the black cardboard, measure out how big it should be to fit inside the box. Draw out a skyline with pencil & use the cutterknife to cut it out.
Finally place it on the inside of the box and make sure its pressing tight against the plexiglass plate. Sadly I only had tape and double sided tape, so I used small parts of that to make sure it was pressing against the plexiglass plate.
Step 9: Assembling Arduino UNO & Ledstrip

Now get out your arduino & neopixel ledstrip. Plug 3 jumper cables into the neopixel strip, I chose to use the same colors as the one on the neopixel strip in the same order to keep things easy.
Plug the white cable onto GND(ground), red cable onto 5v and the green cable onto digital 6(~6).
I fastened the Arduino UNO and LEDstrip with adhesive tape. Make sure it’s fastened properly.
Step 10: Getting the Script on Your Arduino
Download/launch arduino software and go to sketch > include library > manage libraries > search for FastLed > click install, make sure FastLed is included properly.
Also make sure that under Tools > Board is set to Arduino Uno.
Now plug USB cable in the arduino and your pc & upload the code from the file “wakeuplight.ino”
You can change sunriseLength in the script to something like 5 or 3 minutes for testing.
Code credits go to Jasoncoon on github. Link: https://gist.github.com/jasoncoon/d54216fc8ce2eb0…
After you uploaded the code onto your Arduino you can plug in the 5V power adapter and plug it into a wall outlet.
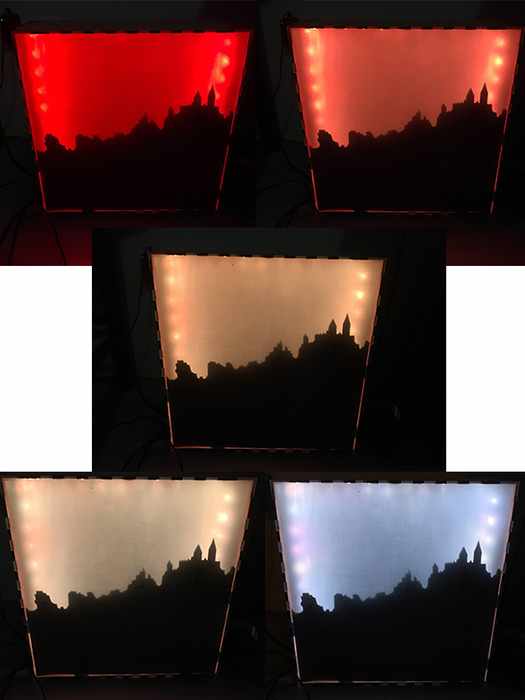
Step 11: The End Result
Source: ITTT – Sunlight Simulating Lightbox