Hi everyone!
In this instructable, I tell you how to make split-flap display and show the current weather conditions on it. Also how to fetch the weather information from the Web using Wi-Fi and API.
I am a fan of the XOD visual programming environment. With the 0.22.0 version, XOD entered the Internet of things. So I have an excellent opportunity to create a device in the style of IOT and program it using XOD.
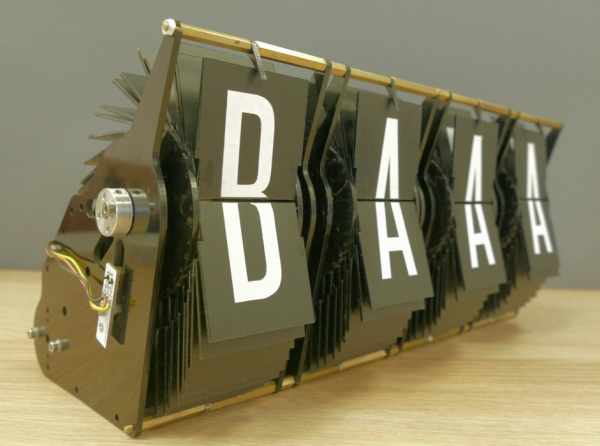
The idea is to display data about the current weather and temperature in my city. To display the information I decided to make a retro split-flap display in the spirit of the old railway station display boards.
The display can show up to four characters.
This instruction can be divided into several stages:
- Preparation.
- Creation the mechanics for the display.
- Electronics configuration.
- Interaction with the weather API app.
- Programming the device.
Step 1: Preparation. Tools.
You need several things to make this project:
- A home computer with a printer and XOD IDE installed.
- Scissors.
- Clippers.
- Set of a crewdrivers.
- Drill and drill bits.
- Dremel to cut the metal shafts.
- M3 Thread tap.
- Soldering tools.
Step 2: Preparation. Lasser Cutting.
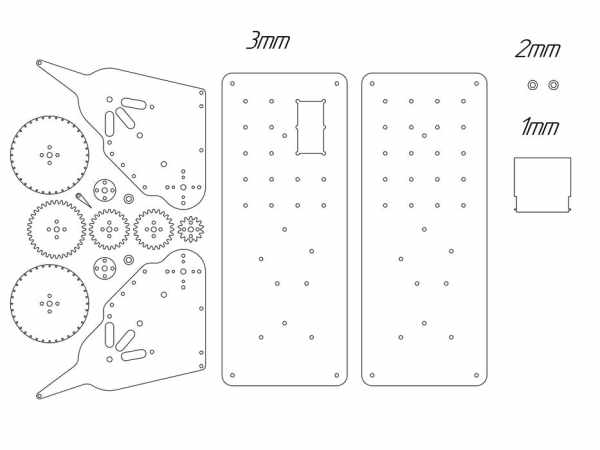
I chose plexiglass as a material for the body parts and laser cutting to manufacture. Here is the minimal list of parts for the 4-digit display that you need to order or make them by yourself:
- Disk 3mm thickness – 8 pieces.
- Panel 3mm thickness- 8 pieces.
- Large gear 3mm thickness – 4 pieces.
- Medium gear 3mm thickness – 8 pieces.
- Small gear 3mm thickness – 4 pieces.
- Gear sleeve 3mm thickness – 8 pieces.
- Sleeve 3mm thickness – 8 pieces.
- Sleeve 2mm thickness – 8 pieces.
- Limiter 3mm thickness – 4 pieces.
- Flip 1mm thickness – 144 pieces.
- Front electronics panel 3mm thickness – 1 piece.
- Back electronics panel 3mm thickness – 1 piece.
Step 3: Preparation. Shopping List.
The minimum list of things that you need to obtain. Remember, this is not a mandatory list and components can be replaced.
Electronics:
- Unipolar stepper motor Nema 17 1.8deg 12V 42x42x48mm – 4 pieces. Link
- Digital line track follower sensor – 4 pieces. Link
- Arduino mega 2560 – 1 piece. Link
- Arduino Stepper driver module – 4 pieces. Link
- Arduino ESP 8266 AT-modem module – 1 piece. Link
- Button – 2 pieces. Link
- Arduino prototype shield – 3 pieces. Link
- Prototyping wires – 1 pack. Link
- USB (A — B) wire – 1 piece. Link
- 12V, 3A AC-DC power supply – 1 piece. Link
Metalware:
- Steel corner braces about 30x30mm – 3 pieces. Link
- Steel or brass rod/shaft 5mm diameter, about a meter length.
PCB supports and spacers:
- PCB Brass or Steel hex standoff M3 Male – Female 25mm length – 16 pieces. Link
- PCB Brass or Steel hex standoff M3 Female – Female 25mm length – 16 pieces. Link
- PCB Brass or Steel hex standoff M3 Male – Female 40mm length – 16 pieces. Link
- PCB Brass or Steel hex standoff M3 Male – Female 32mm length – 12 pieces. Link
- PCB Brass or Steel hex standoff M3 Male – Female 10mm length – 12 pieces. Link
- PCB Nylon hex standoff M3 Male-Female 8mm length – 16-20 pieces. Link
Hardware:
- Hex nut M3 (DIN 934).
- Spring washer M3 (DIN 127).
- Washer M3 (DIN 125).
- Screw M3 (DIN7985 / DIN 84 / DIN 912) 16mm length.
- Screw M3 (DIN7985 / DIN 84 / DIN 912) 10mm length.
- Screw M3 (DIN7985 / DIN 84 / DIN 912) 6-8mm length.
Other:
Step 4: Mechanics. Making Flaps.
Characters
In this project, the digit capacity of the display is 4. The display has a modular structure and can be easily expanded. You can increase or decrease the number of digits at your will.
Every digit has 36 flaps:
- 26 flaps are used for the Latin alphabet letters (A B C D E F G H I J K L M N O P Q R S T U V W X Y Z).
- 9 flaps are used for numbers (1 2 3 4 5 6 7 8 9).
- 1 empty flap for spacing (for displaying zero I used the ‘O’ letter).
A flap has a top part of the current character on its front side and a bottom part of next character on its backside.
The font that I used for letters is “Steelfish rg”. You can find it here
The material list
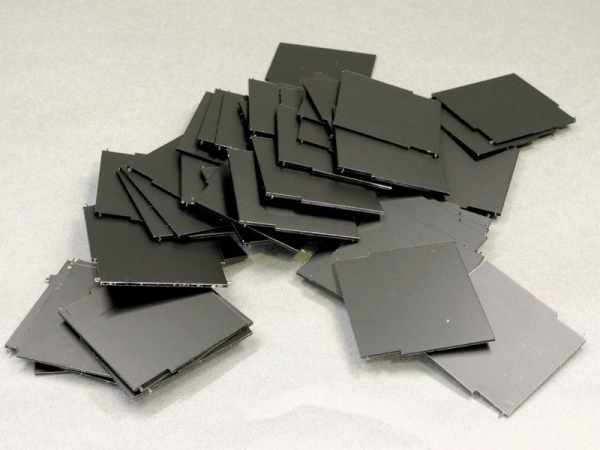
- 144 flaps.
I made flips from the 1 mm transparent plexiglass list covered with a black film on both sides. You can make them from any material that you have.
Do not forget to increase the diameter of the mounting holes in the discs of the flip carrier If you are going to use a list thicker than 1mm. For the manufacturer of flips, I used laser cutting.
144 (36 x 4) is a minimum quantity, but I strongly recommend you to make more. In my case, the ears which flap mounts to the discs of the flap-holder turned out quite weak, and I broke more than a dozen of flips.
- Self-adhesive paper.
I used multi-functional white self-adhesive paper from Lomond. A package of 50 sheets is enough. I’m sure it is quite easy to find a replacement.
Process
- Print the letters using the self-adhesive paper. The pdf file with letters at the scale of 1:1 is attached below.
- Cut out the outline of the top part of the letter with scissors. For example the top part of the “A”.
- Glue the top part of the “A” letter to the front side of the flip in the necessary place.
- Cut out the outline of the bottom part of the next letter. For example the bottom part of the “B”.
- Turn the flip over and glue the bottom part of the letter “B”.
- The “A – B” flip is ready. Repeat these steps for each character.
I can say without a doubt that it’s a very laborious process.
If you have the opportunity to print characters on the flips on both sides, be sure to use it.
Source: IoT Split-flap Weather Forecast Powered by XOD