
Summary of IOT Lighted Xmas Tree
This article describes an IoT project using the Arduino MKR1000 to remotely control Christmas tree lights via a REST API. The system acts as a server, responding to HTTP POST and PUT requests to toggle a relay connected to the lights. Users can control the lights through a custom mobile app built with Xamarin or directly via Postman by sending specific commands to the device's IP address, enabling energy conservation by automating light schedules.
Parts used in the IOT Lighted Xmas Tree:
- Arduino MKR1000
- PowerSwitch Tail II
- Breadboard
Do you want to conserve energy and turn the Christmas tree lights on/off when not required? In IOT era, that can be done using MKR1000.
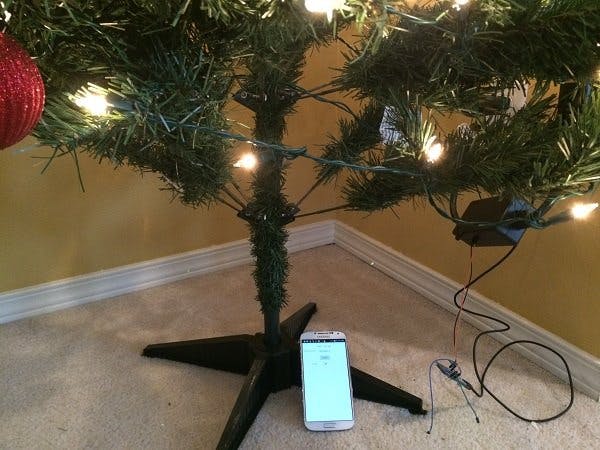
Things used in this project
Hardware components |
||||||
 |
|
× | 1 | |||
|
× | 1 | ||||
Software apps and online services |
||||||
 |
|
|||||
 |
|
|||||
 |
|
|||||
Story
This project uses MKR1000 as a REST API server with the help of MKR1000RESTServer library. When POST method on the API is called, it initiates the relay pin in OUTPUT mode. When PUT method is called, the pin is set HIGH/LOW based on the value of the parameter. Effectively it turns the lights on/off.
API
The API on the server can be called using tools such as Postman or using the app source code that is supplied.
Steps:
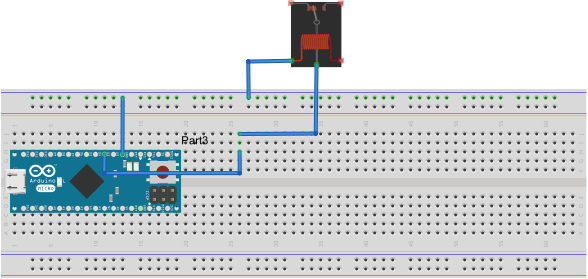
- Connect the relay and the lights
- Download the MKR1000RESTServer.zip file from the github
- Start Arduino IDE
- Click Sketch Menu -> Include Library -> Add .zip library
- Choose the downloaded library
- Open the solution
- Update your SSID name and password
- Start the serial port monitor
- Build and upload the sketch to the MKR1000. It will print the IP address on the monitor. (e.g 192.168.0.13)
Using the App
To control the lights using the app (iOS, Android, Windows (UWP) platform).
- Download Visual Studio 2015 Community Edition.
- Install the necessary Xamarin Forms extensions.
- Run the app on the connected device.
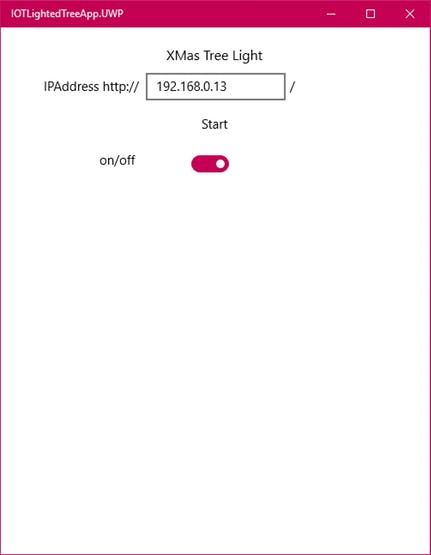
- Enter the IP address
- Click “Start”. This will return message box with results.
- Switch the light on/off.
Using Postman
If you want to control the lights using Postman, here are the steps:
- Download Postman
- Select the POST verb and enter address as
http://192.168.0.13/Pin3/
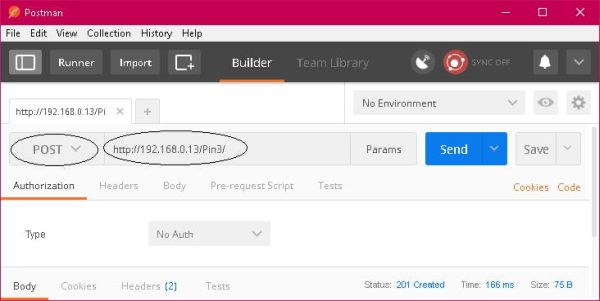
- Click send. This will initiate the pin.
- Select PUT verb and enter address as
http://192.168.0.13/Pin3/on/
- Click send. This will turn the lights on.
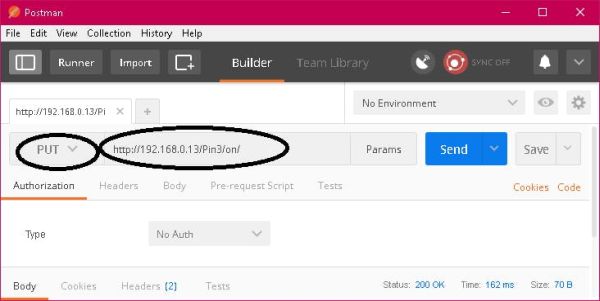
- Select PUT verb and enter address as
http://192.168.0.13/Pin3/off/
- Click send. This will turn the lights off.
Schematics
breadboard
breadboard
Code
- How does the MKR1000 control the lights?
The MKR1000 acts as a REST API server where calling the POST method initiates the relay pin and the PUT method sets the pin HIGH or LOW to turn lights on or off. - Can I use Postman to control the lights?
Yes, you can use Postman by selecting the POST verb to initiate the pin and the PUT verb with /on/ or /off/ parameters to switch the lights. - What software is required to build the control app?
You need Visual Studio 2015 Community Edition and the necessary Xamarin Forms extensions to run the iOS, Android, or Windows UWP app. - How do I configure the MKR1000 network settings?
You must update your SSID name and password in the code before building and uploading the sketch to the MKR1000. - Where can I find the library needed for this project?
The MKR1000RESTServer.zip file is available for download from GitHub to be added to the Arduino IDE libraries. - What happens after uploading the sketch to the MKR1000?
The serial port monitor will print the IP address of the device, such as 192.168.0.13, which is used to access the API. - Which hardware components are essential for connecting the lights?
The project requires an Arduino MKR1000, a PowerSwitch Tail II relay, and a breadboard to connect the relay and lights. - How do I start the app to control the lights?
After downloading the solution and running it on a connected device, enter the IP address into the app and click Start to return results.
