Summary of How to Install LEDs Under a Scooter (with Bluetooth)
Summary: This project installs Bluetooth-controlled ground-effect LED lighting under a scooter using recycled APA102 (DotStar) pixel strips, an Adafruit Bluefruit 32u4 Feather microcontroller, and a lithium battery in a waterproof enclosure. The guide covers soldering power, ground, and data/clock connections, customizing and uploading an Arduino sketch with animations, magnet-mounting the strips and enclosure to the scooter, and controlling colors/patterns via the Bluefruit LE app.
Parts used in the Scooter Underlight:
- Two strips of APA102 (DotStar) LEDs (or WS2812b NeoPixels with code change)
- Bluefruit 32u4 Feather Arduino-compatible microcontroller board
- Lithium battery
- Waterproof project enclosure (waterproof alkaline battery holder repurposed)
- Stranded wire
- Soldering iron and solder
- Wire strippers and flush cutters
- Heat shrink tubing
- Helping third hand tool (optional)
- Hot glue
- Tape
- Neodymium (rare earth) magnets
- CB radio antenna magnet with hardware to attach (washer, nut, bolt)
- Small screwdriver
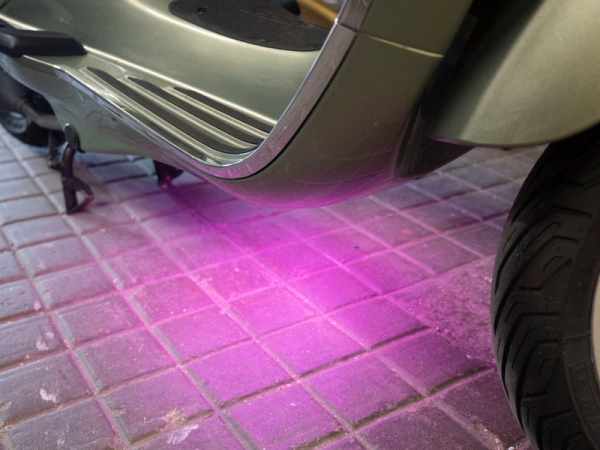
Join me in creating ground effect lighting for my scooter using a bluetooth microcontroller and addressable LED strip.
For this project I’m recycling two bits of pixel strip leftover from my old POV bike project tutorial. These are APA102s or DotStars, but you could totally use Neopixels for this project, I just happened to have this set of two strips wired in parallel, which is perfect for sticking under my scooter.
For this project you will need:
- Two strips of APA102 (aka DotStar) LEDs (or WS2812b aka NeoPixels with a slight code change)
- Bluefruit 32u4 Feather Arduino-compatible microcontroller board
- Lithium battery
- Waterproof project enclosure
- Stranded wire
- Soldering iron and solder
- Wire strippers and flush cutters
- Heat shrink tubing
- Helping third hand tool (optional but handy)
- Hot glue (nearby ice water is great for unexpected burns)
- Tape
- Neodynium (rare earth) magnets
- CB radio antenna magnet with hardware to attach (washer, nut, bolt)
- Small screwdriver
To keep up with what I’m working on, follow me on YouTube, Instagram, Twitter, Pinterest, and subscribe to my newsletter. As an Amazon Associate I earn from qualifying purchases you make using my affiliate links.
Legal disclaimer! The automotive underglow lighting laws where you live may prohibit some or all colors/animations– where I live, only solid white is technically allowed, and I don’t drive with any other colors/patterns in traffic. Never use flashing lights in the colors emergency vehicles use!
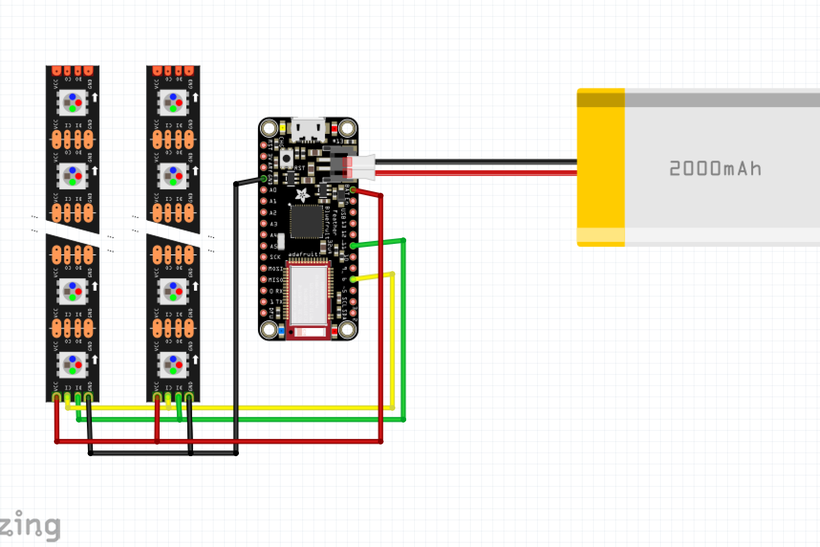
Step 1: Build the Circuit
I double checked and touched up the solder connections, which I made on alternating sides of the strip. It’s just cleaner that way.
I’m using the waterproof alkaline battery holder from the bike project as a project enclosure in this project. It already has a waterproof switch and is the right size for a Bluefruit Feather microcontroller and flat lithium battery, so I removed the metal bits and cut away small sections to maximize the interior volume.
I also removed the original wires and hot glue using a bit of rubbing alcohol. I did something in this project I don’t normally recommend folks do, which is to solder directly to the leads of a lithium battery, and that’s because you could short it out and cause a fire. Anyway I badly wanted to use the switch built in to the waterproof battery pack so I spliced it in.
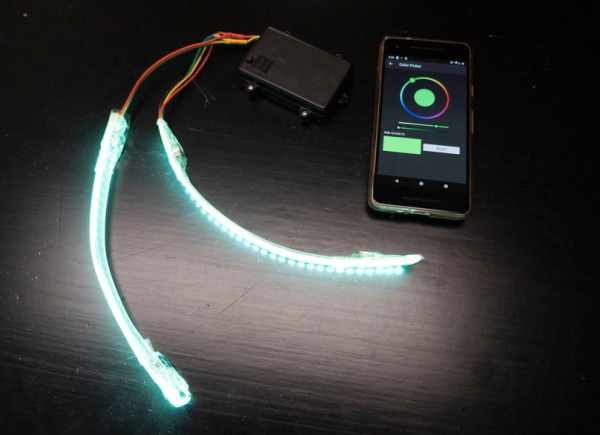
Then I tinned the LED strip wires and fed them through the opening. I soldered up power, ground, and data and clock to two different microntroller pins.
Step 2: Customize Code & Upload
Once I had the circuit assembled, I went to program it using my Arduino software. I modified a bluetooth sketch I made for my 2017 LED sign which used Neopixels but the same bluetooth Arduino compatible feather board. The sketch includes configurable color and a few animation patterns.
Download the scooter_underlight.zip file and open scooter_underlight.ino with your Arduino software.
Step 3: Install Magnetized Circuit Under Scooter
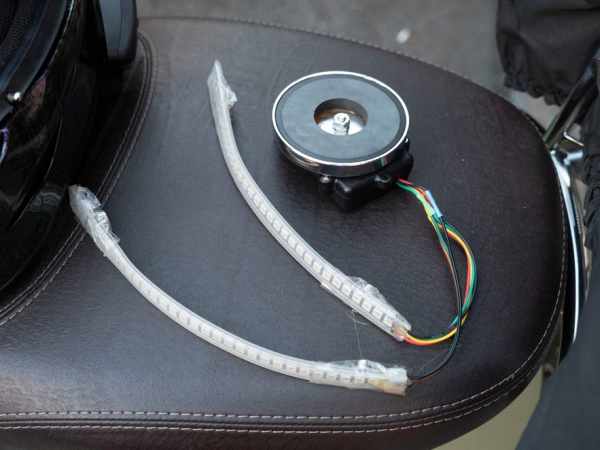
To prepare the pixel strip for the underside of my scooter, I taped neodymium magnets to each end and used hot glue and more tape to seal up the ends. I’ve used silicone adhesive to seal up pixel strip before, but it takes 24 hours to dry and I just wasn’t willing to wait this time– I wanted this to be a one day build.
I tried the same treatment with rare earth magnets inside the enclosure, but it just didn’t feel sticky enough for the bumpy road. So I found this old CB radio antenna magnet and bolted it to the lid.
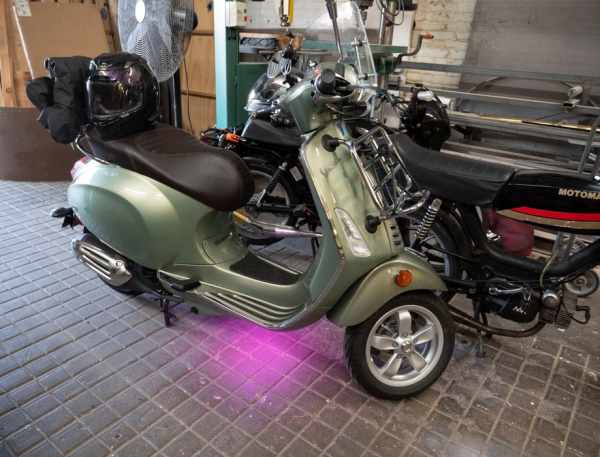
Step 4: Enjoy!
Now all the parts feel super secure stuck to the steel structure of my scooter. Maybe someday I’ll wire these lights into the electrical system of my bike, but for now I’ll just remove the circuit for charging.
The Arduino sketch pairs with the Adafruit Bluefruit LE connect app to adjust the LED color and change between a few patterns. It looks just like my vehicles in GTA 5 online!
Thanks for following along! I’d love to hear how you’d make this project your own in the comments below.
Step 5: More Photos & Thank You!
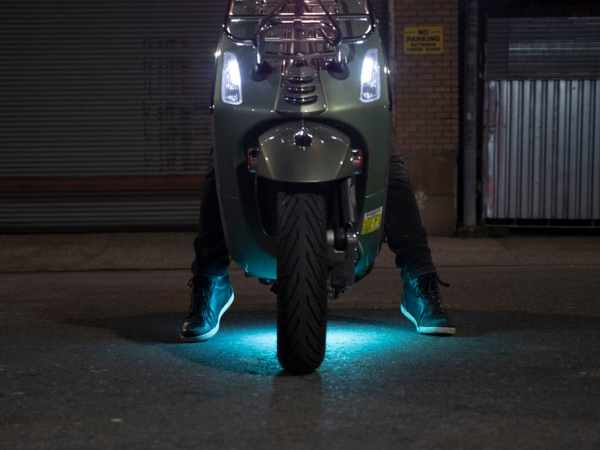
Here are some more photos of the finished project in action.
If you like this project, you may be interested in some of my others:
- 13 Ideas for Diffusing LEDs
- Diffused LED Strip Sign With Arduino/Bluetooth
- YouTube Subscriber Counter with ESP8266
- Easy Infinity Mirror
- 3 Beginner Arduino Mistakes
To keep up with what I’m working on, follow me on YouTube, Instagram, Twitter, Pinterest, and Snapchat.
Source: How to Install LEDs Under a Scooter (with Bluetooth)
- What type of LED strips were used?
Two APA102 (DotStar) pixel strips were used, with NeoPixels as an alternative with slight code changes. - Which microcontroller is used for Bluetooth control?
An Adafruit Bluefruit 32u4 Feather Arduino-compatible microcontroller board is used. - How is the circuit powered and enclosed?
A lithium battery is used inside a waterproof project enclosure repurposed from an alkaline battery holder. - How are the LED strips mounted under the scooter?
Neodymium magnets are attached to the strip ends and a CB radio antenna magnet is bolted to the enclosure so components stick to the scooter steel. - How are the LED strips connected to the microcontroller?
Power, ground, and data and clock lines are soldered from the strips to pins on the microcontroller. - How is the code uploaded and customized?
The scooter_underlight.ino sketch from scooter_underlight.zip is opened in the Arduino software and modified before uploading. - How are colors and patterns controlled?
The Arduino sketch pairs with the Adafruit Bluefruit LE connect app to adjust color and switch between animation patterns. - Was any risky soldering done in the build?
The builder soldered directly to the lithium battery leads, which they note is not normally recommended. - What sealing method was used for the strip ends?
Hot glue and tape were used to seal the strip ends and secure magnets because silicone adhesive would take too long to cure. - Are there legal cautions about using the lights on vehicles?
Yes, the builder warns that underglow laws vary and only solid white may be allowed locally; avoid flashing emergency vehicle colors.